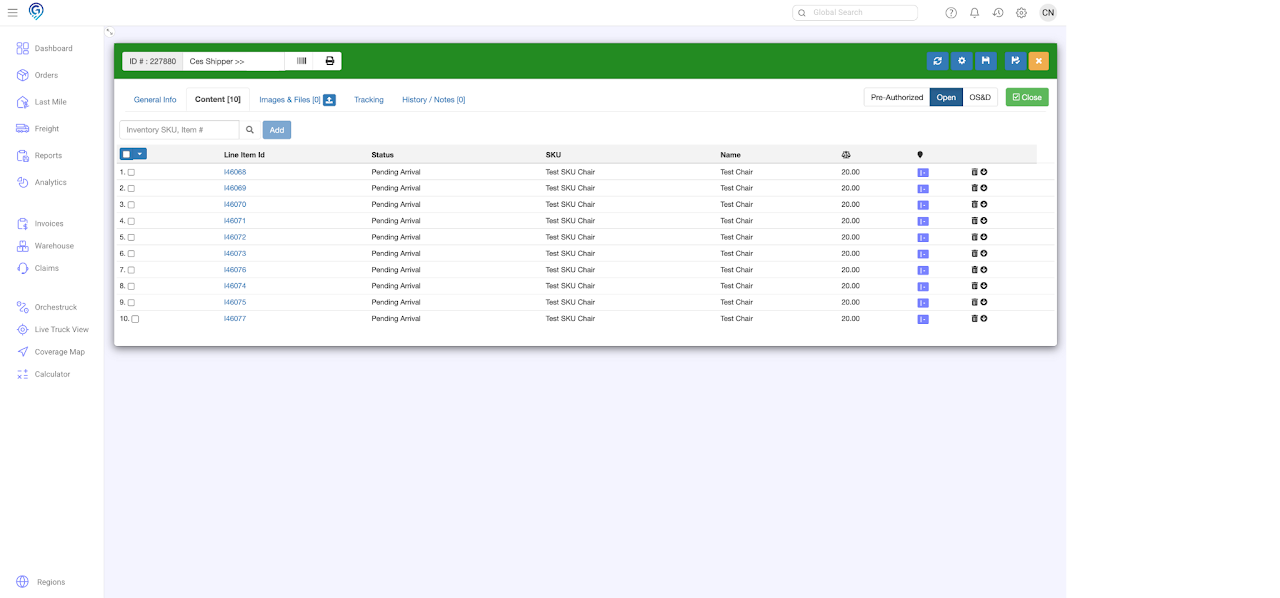
Option 1: + Inventory
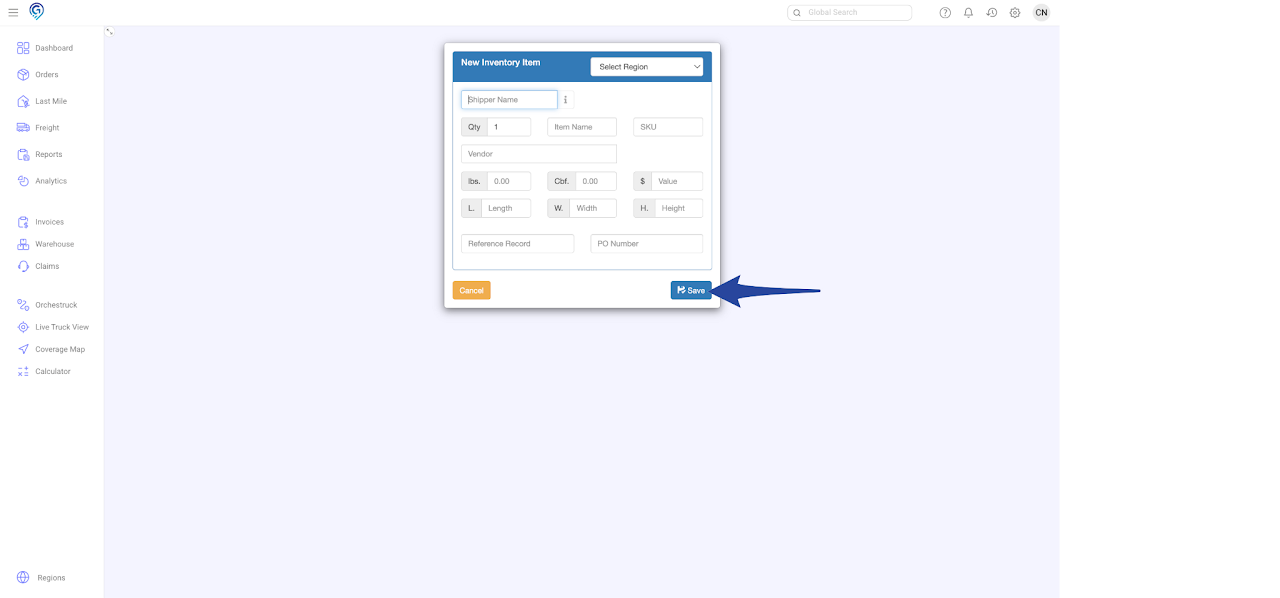
This option lets you create individual inventory items. All fields must be entered – Region, Shipper Name, Qty, Item Name, SKU, Vendor, Weight, Value, PO Number
Step 1
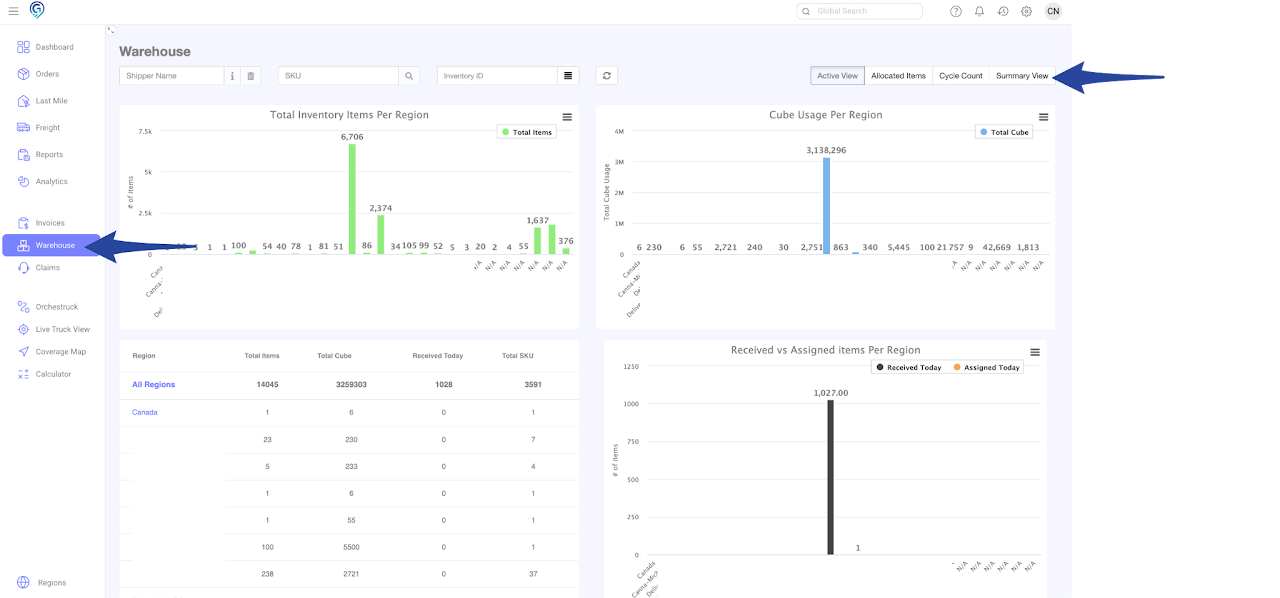
Go to the Warehouse Section and click the Summary View
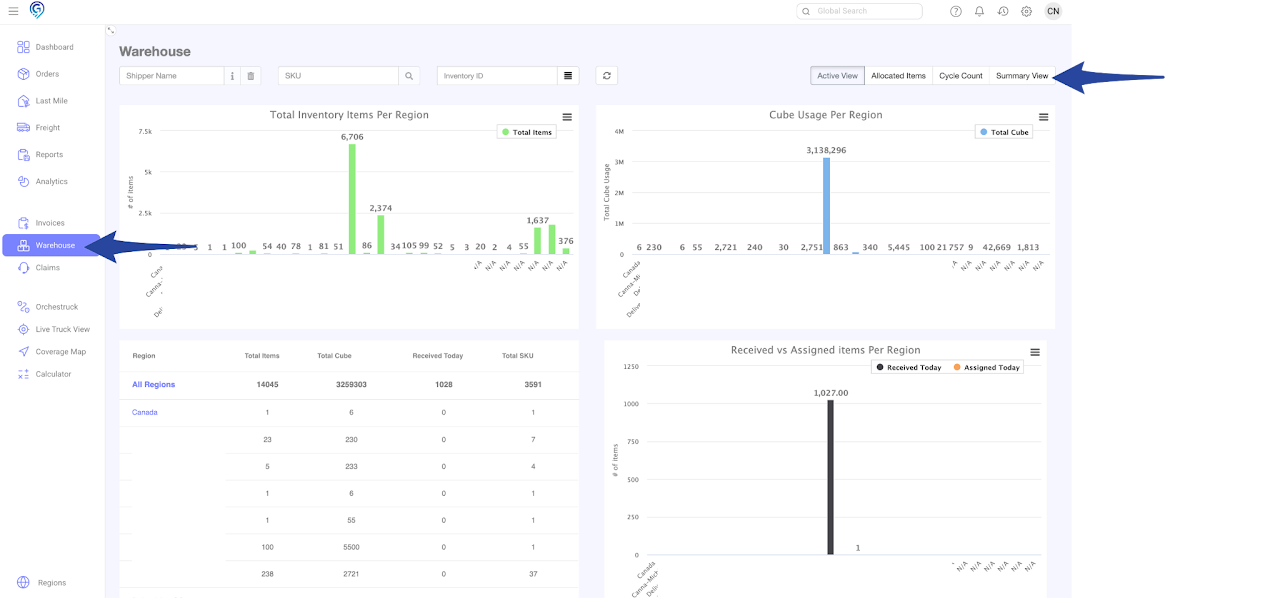
Step 2
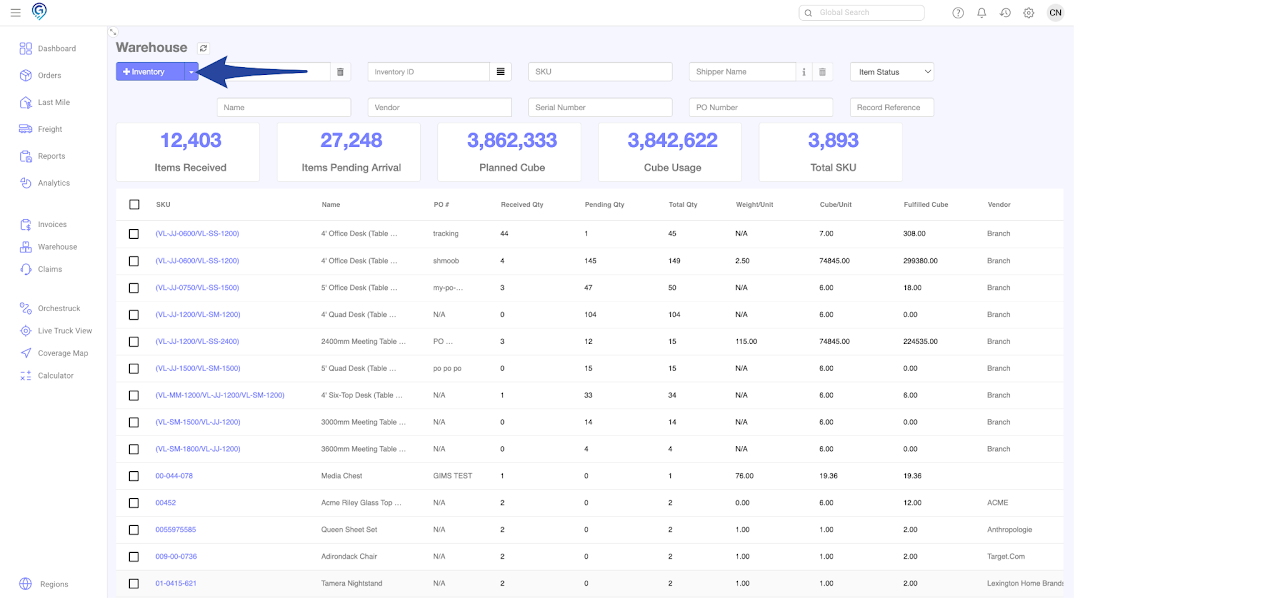
Click + Inventory, enter details in all fields and click Save.
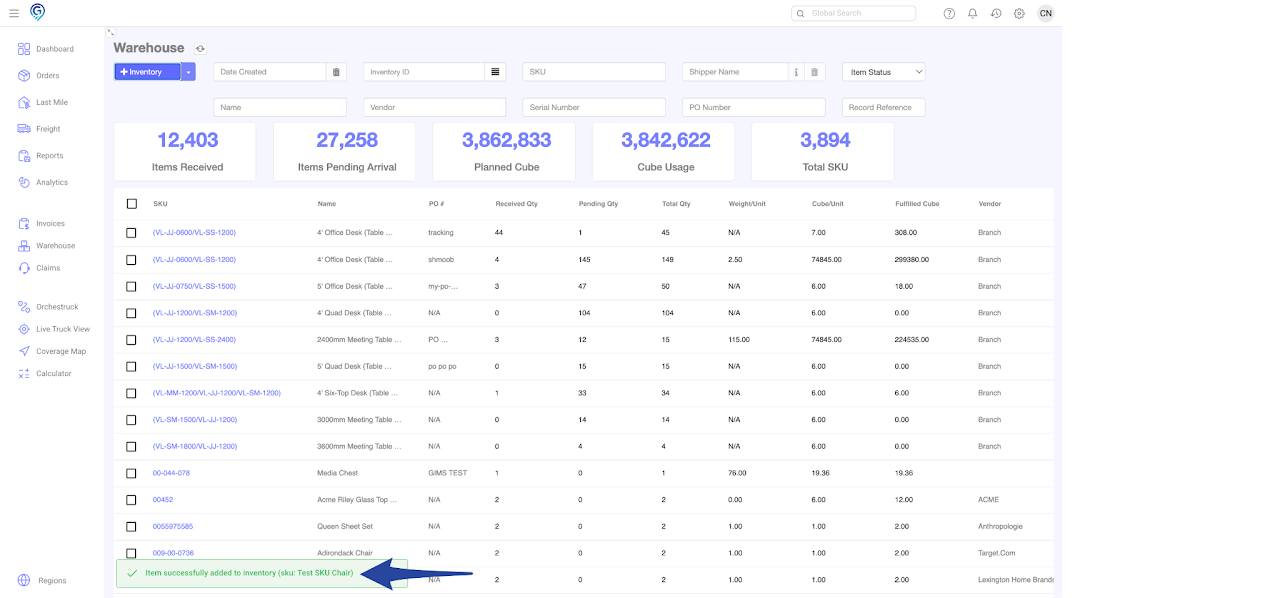
Single Inventory Record Successfully Added
Option 2: Import Inventory (Bulk Items)
This option lets you create bulk inventory items. All fields must be entered – Name, SKU, Vendor, Quantity, Weight, Cube, and Value.
Product Category, PO Number, Reference Record and Serial Number are optional.
Step 1
Go to the Warehouse Section and click the Summary View
Step 2
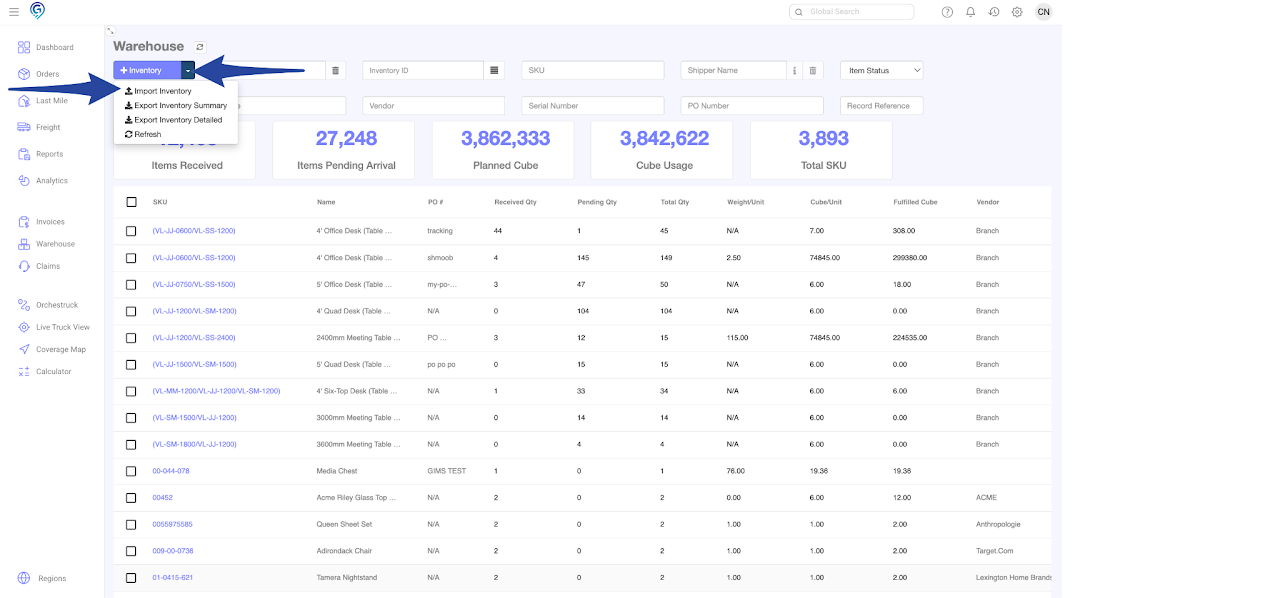
Click the drop down arrow and select Import Inventory
Step 3
Enter the Shipper Name

Step 4
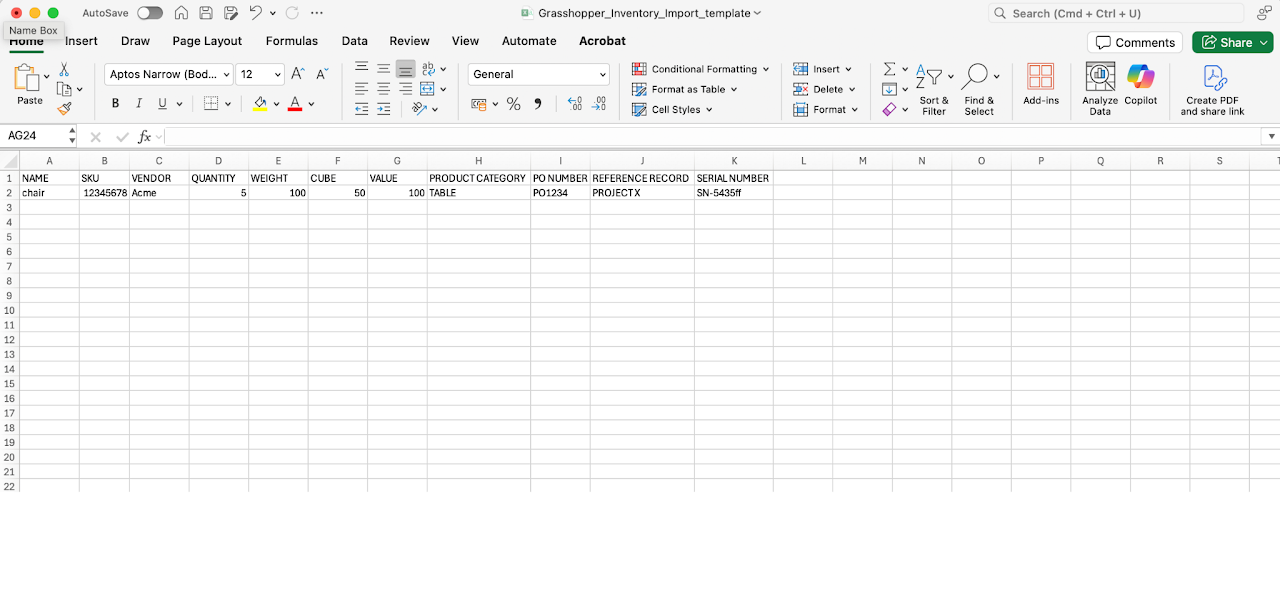
Click the Download Template and open the CSV File
Adding Inventory (Single & Multiple) 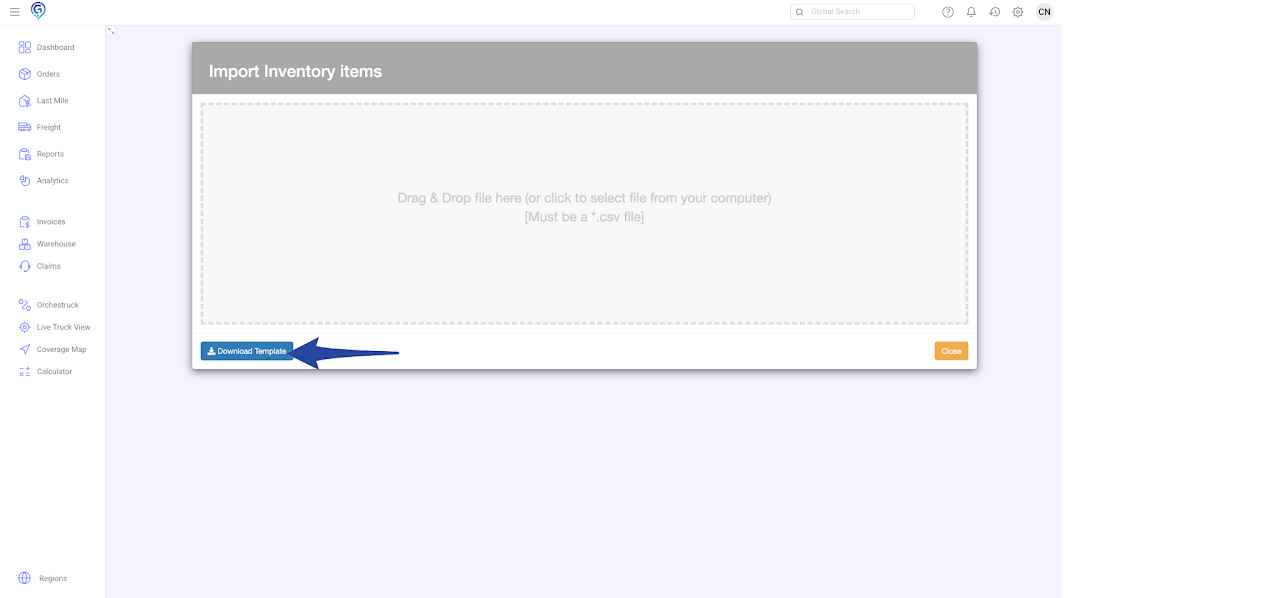
Step 5
Enter the Name, SKU, Vendor, Quantity, Weight, Cube, and Value.
Product Category, PO Number, Reference Record and Serial Number are optional.
Save the file in CSV,
Step 6
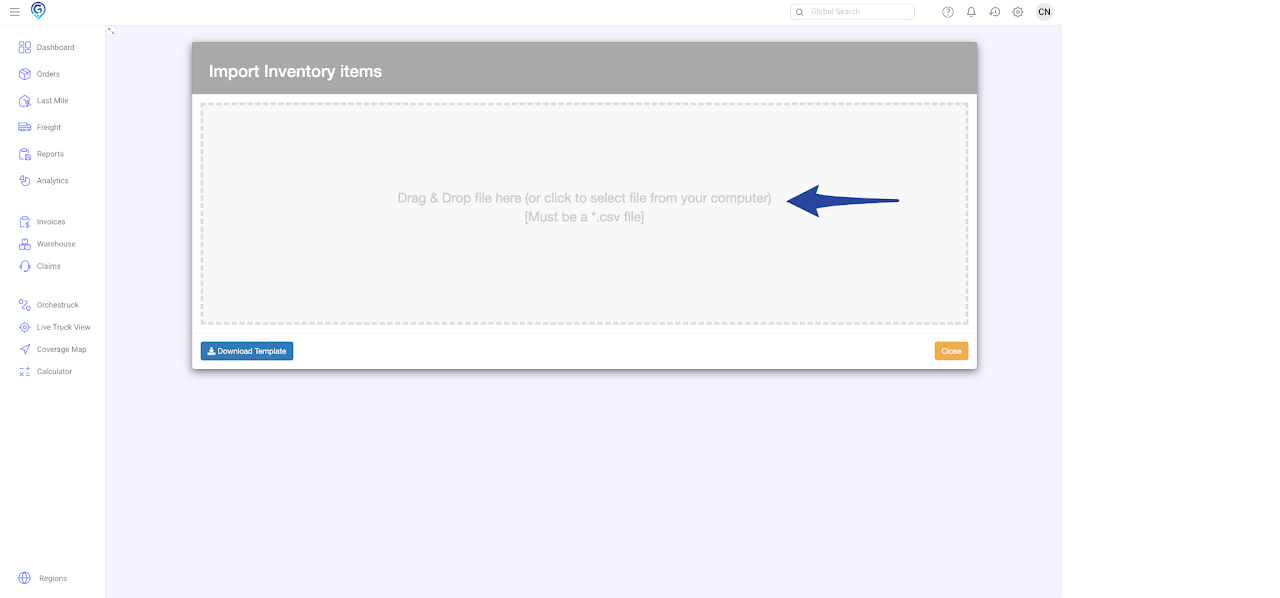
You can drag and drop the CSV file in the Import Inventory Items box or click to select the file from your computer
Step 7
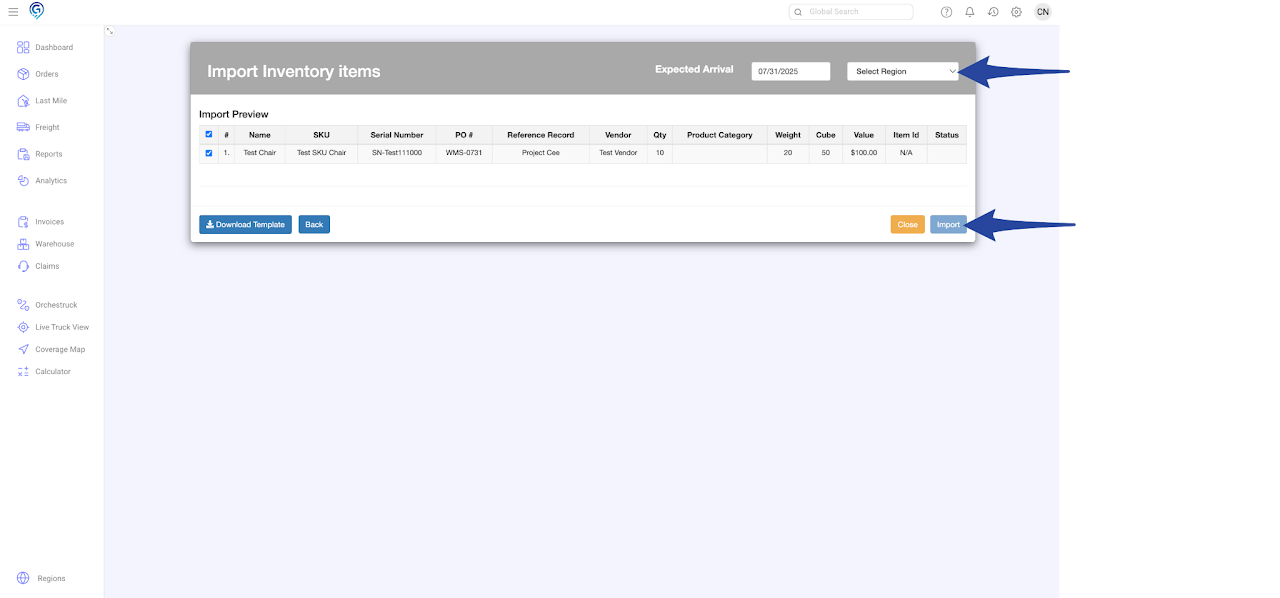
Select Region to where the inventory is to be stored/imported, select the items that you want to import then click on Import.
Successful Completion of Inventory Import.
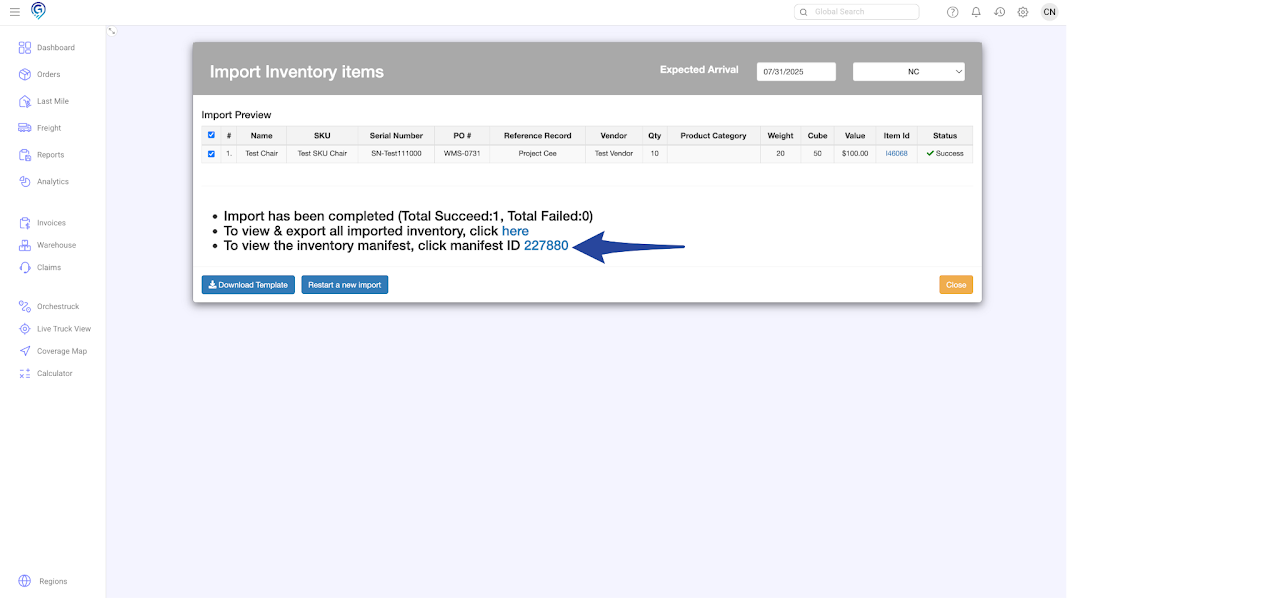
Manifest for the imported inventory items
