
Creating Individual Location
Step 1
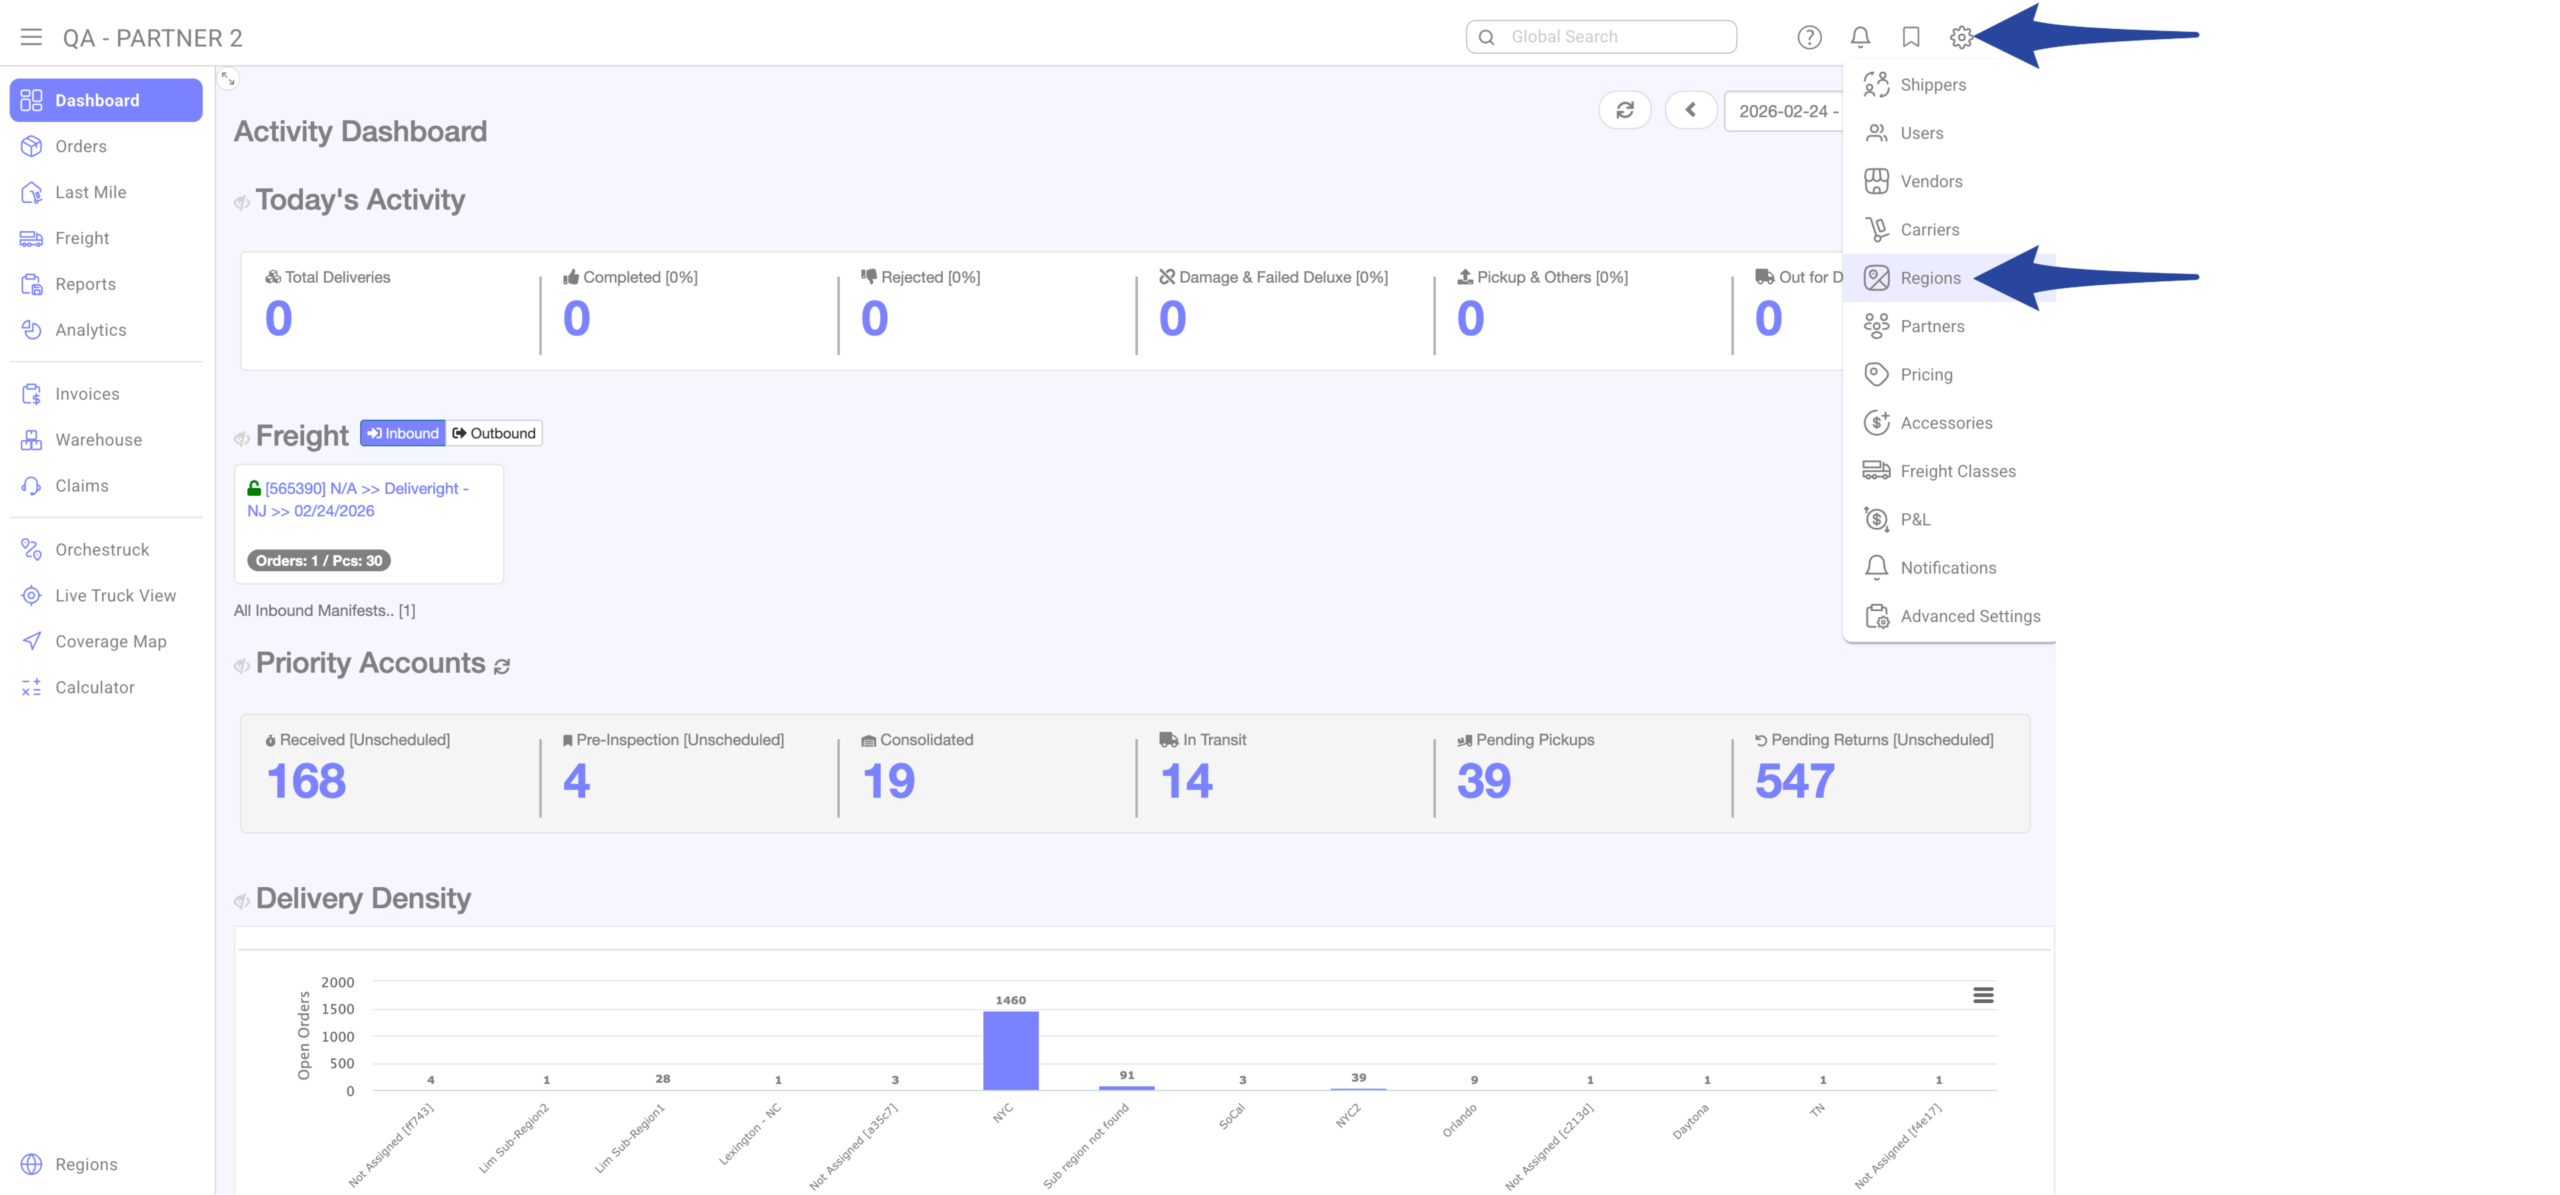
Click the gear icon from the main Dashboard and select Regions.
Â
Step 2
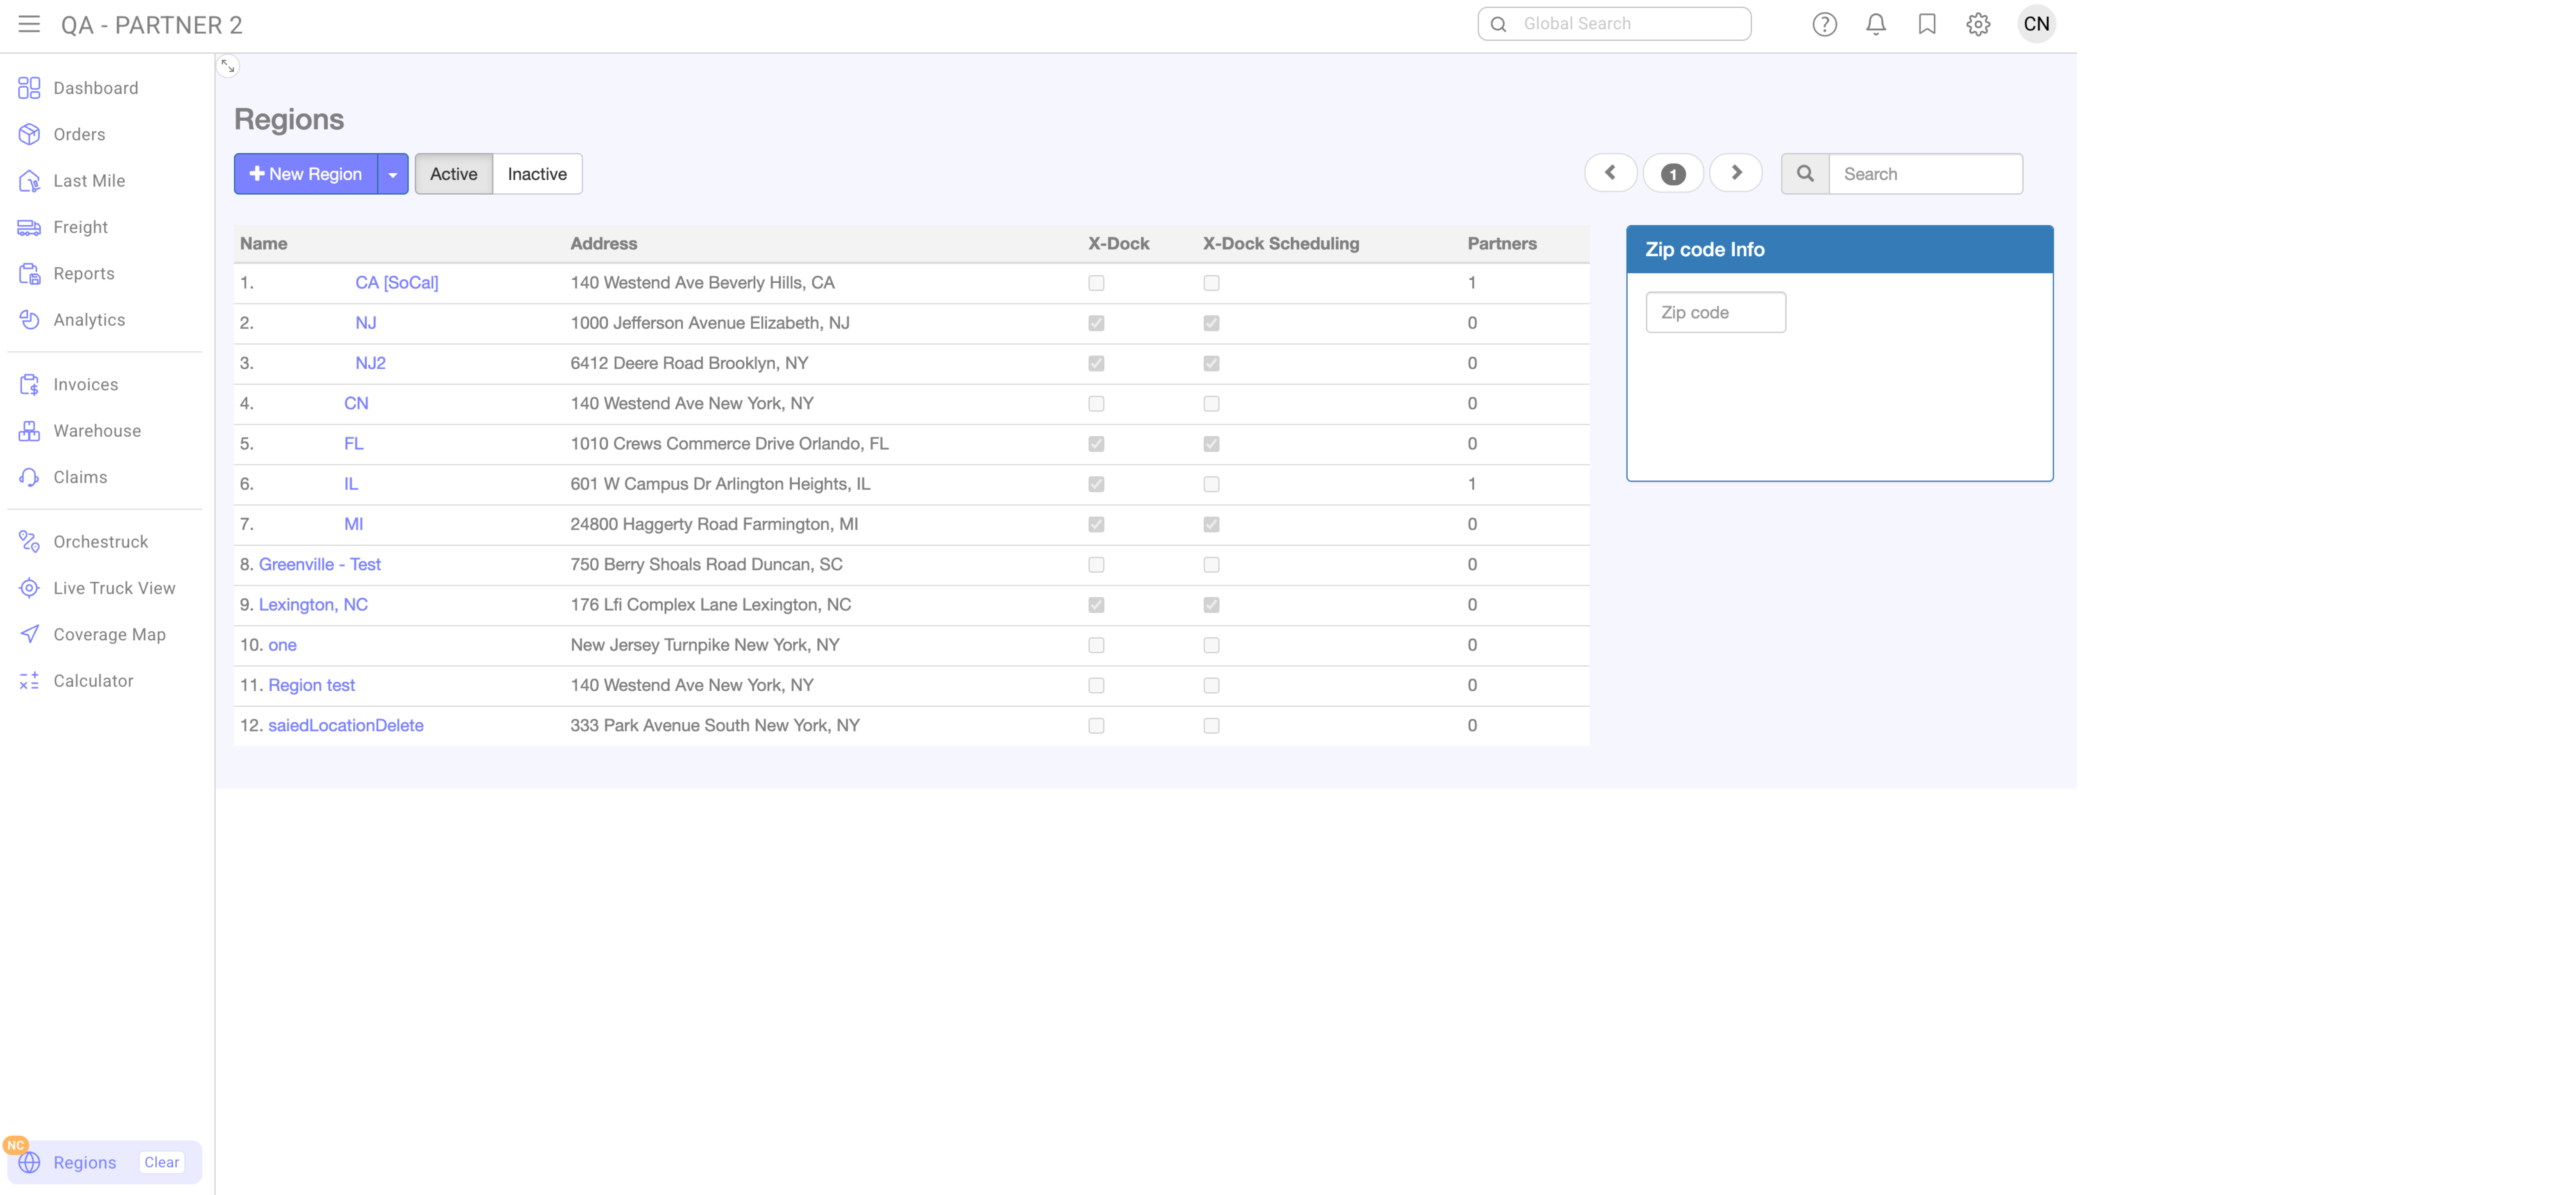
Navigate to the correct Region.Â
Â
Step 3
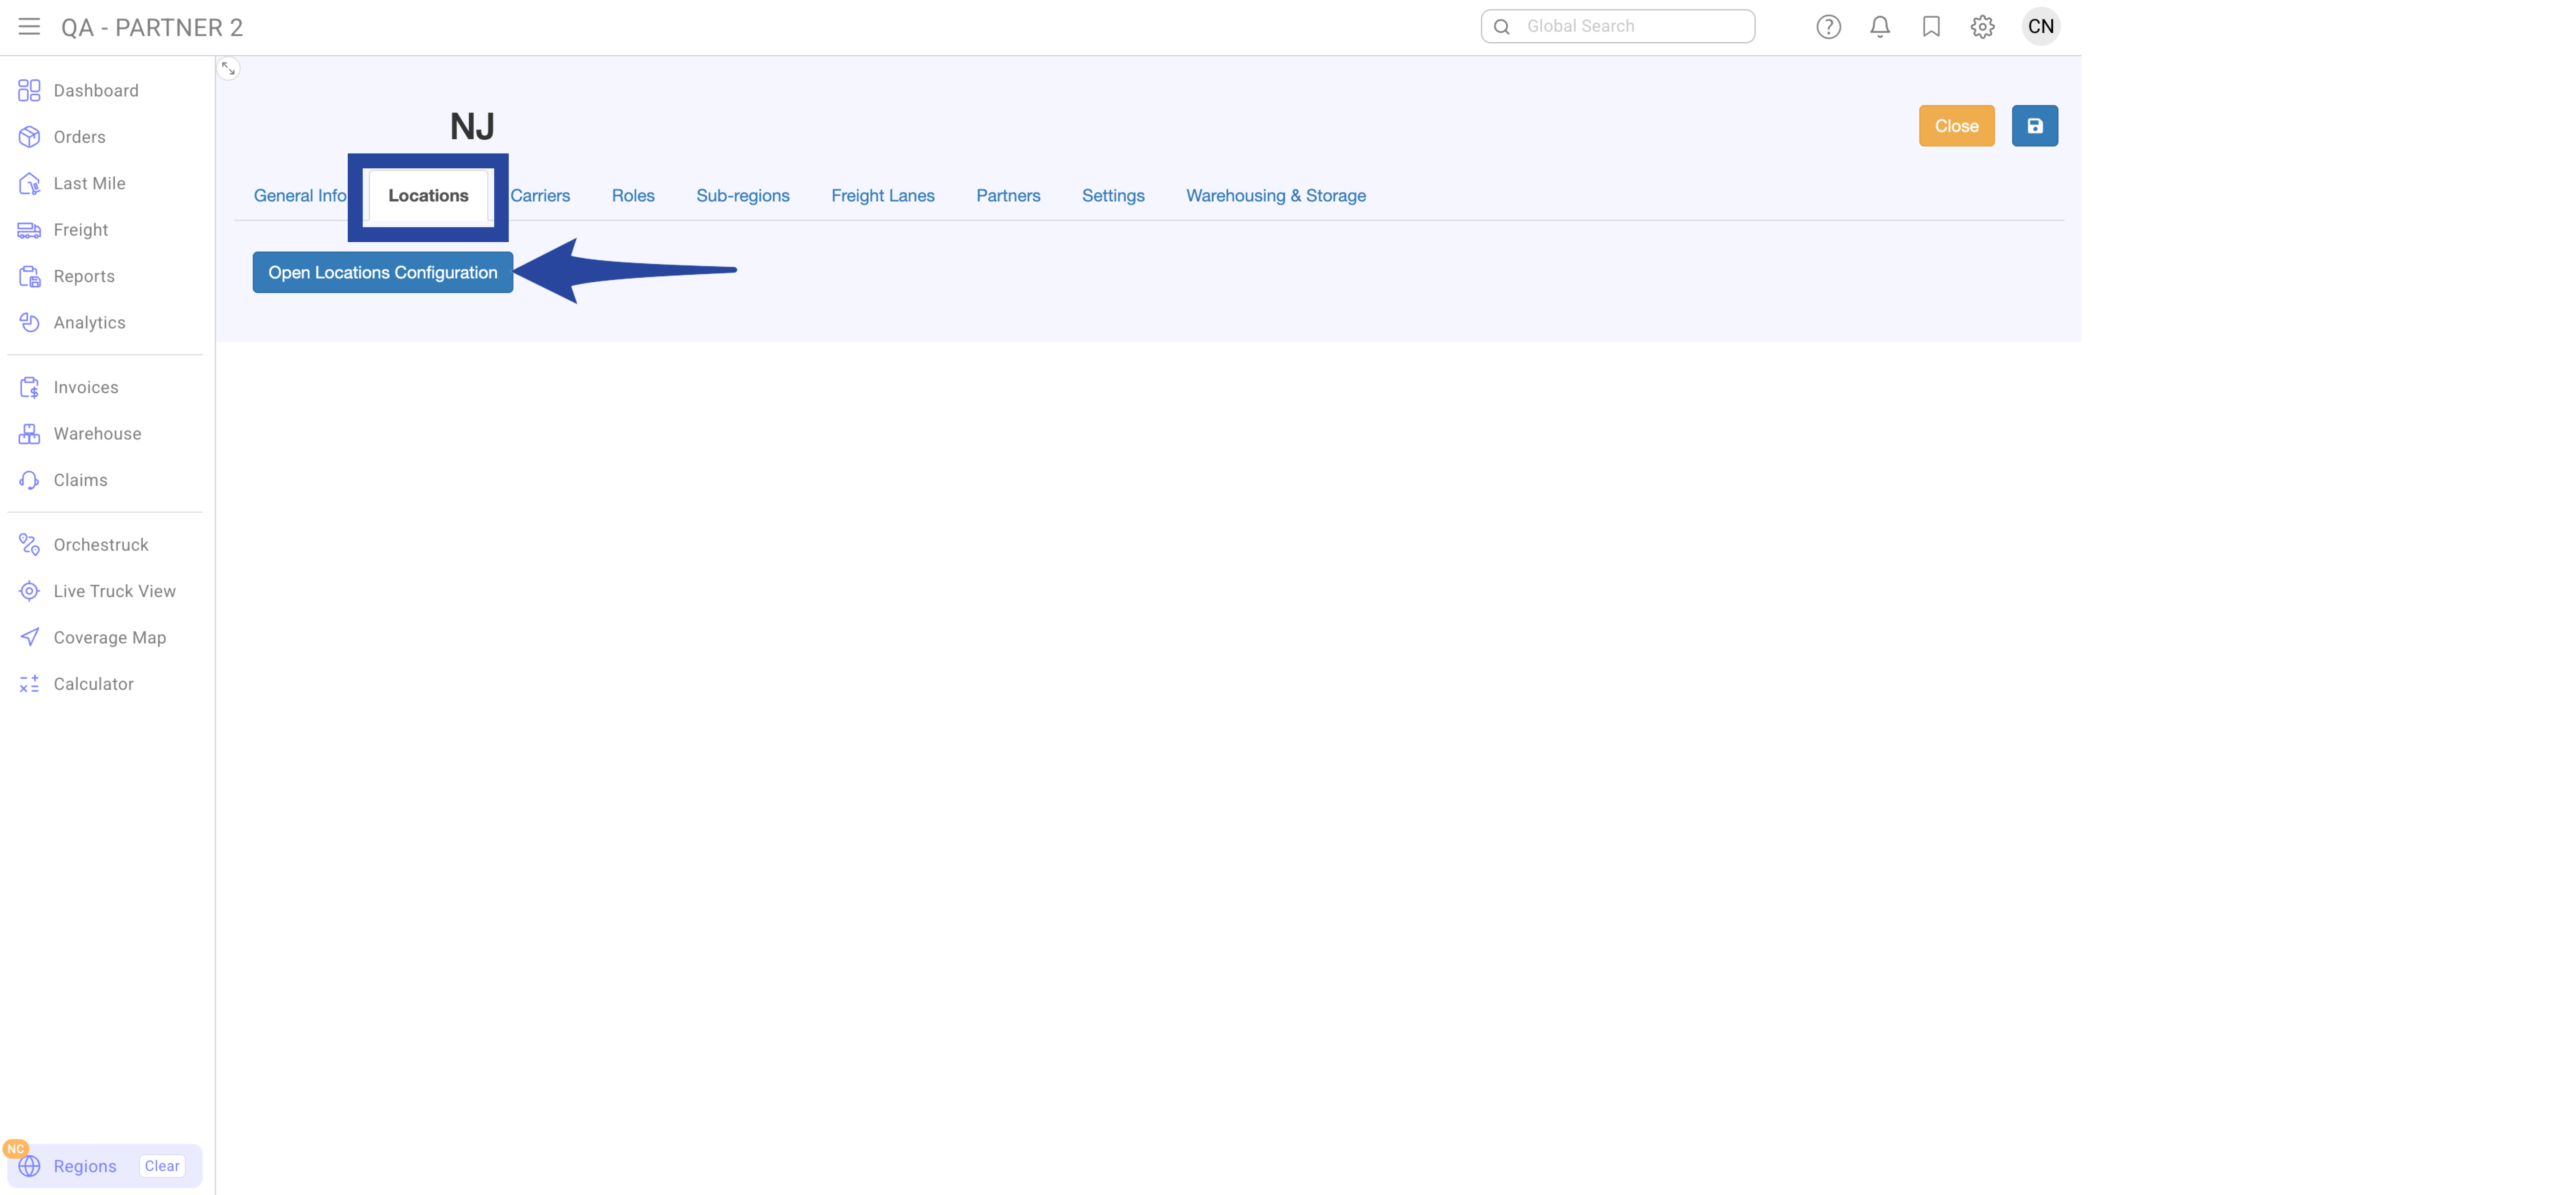
Go to Locations tab and click Open Locations Configuration.
Â
Step 4
Click +Create Location

Â
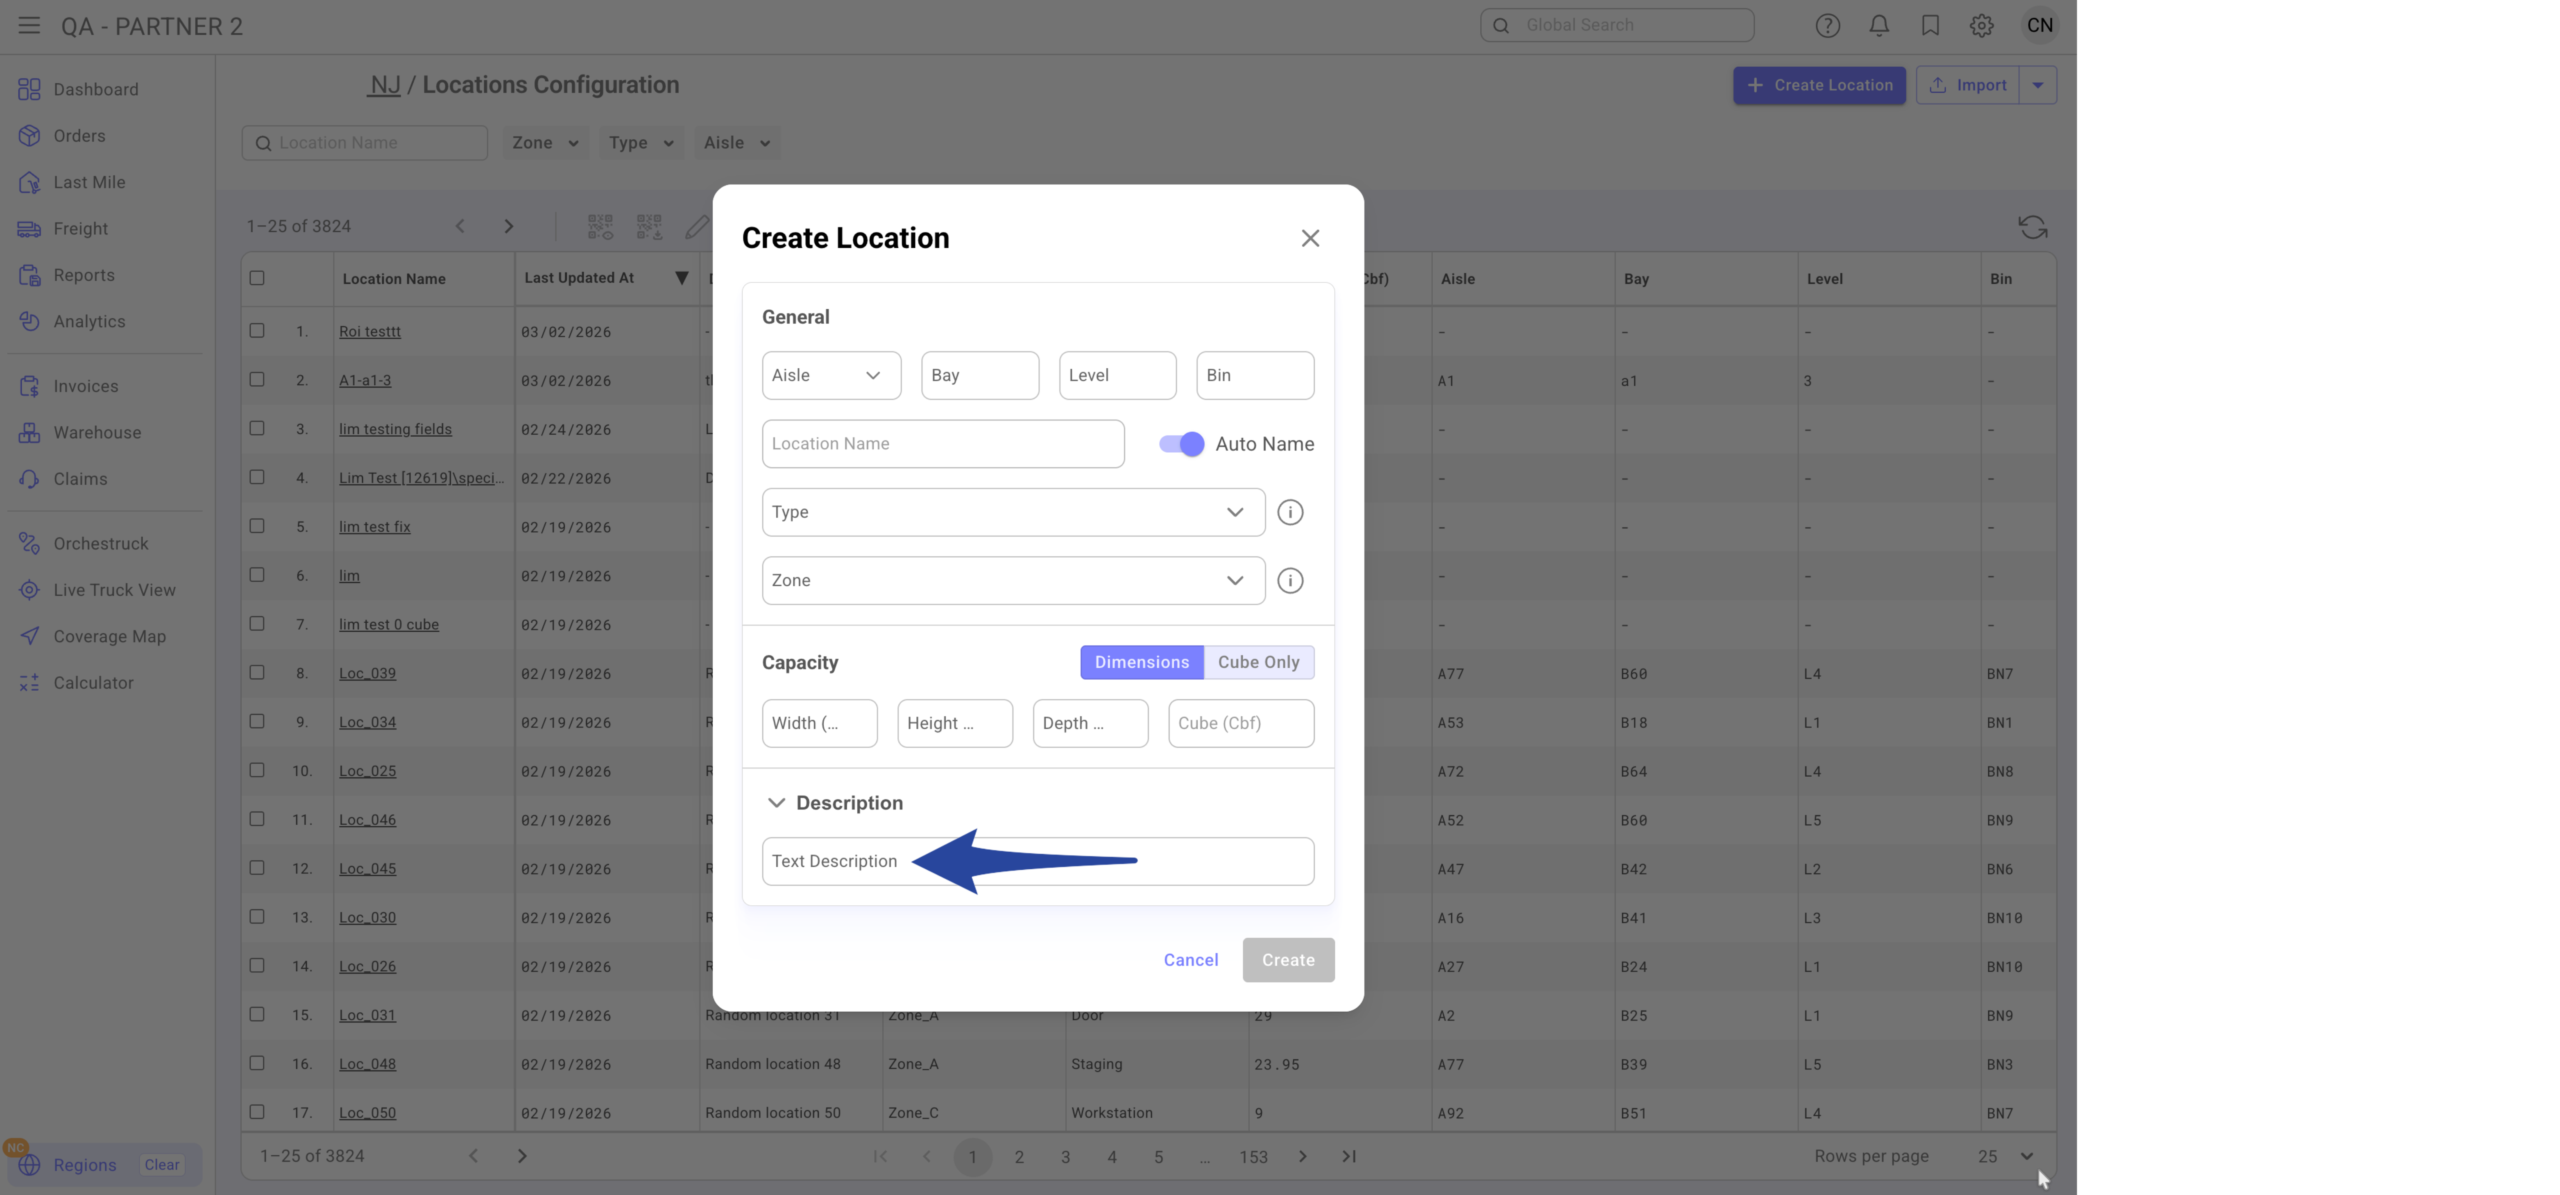
Step 5
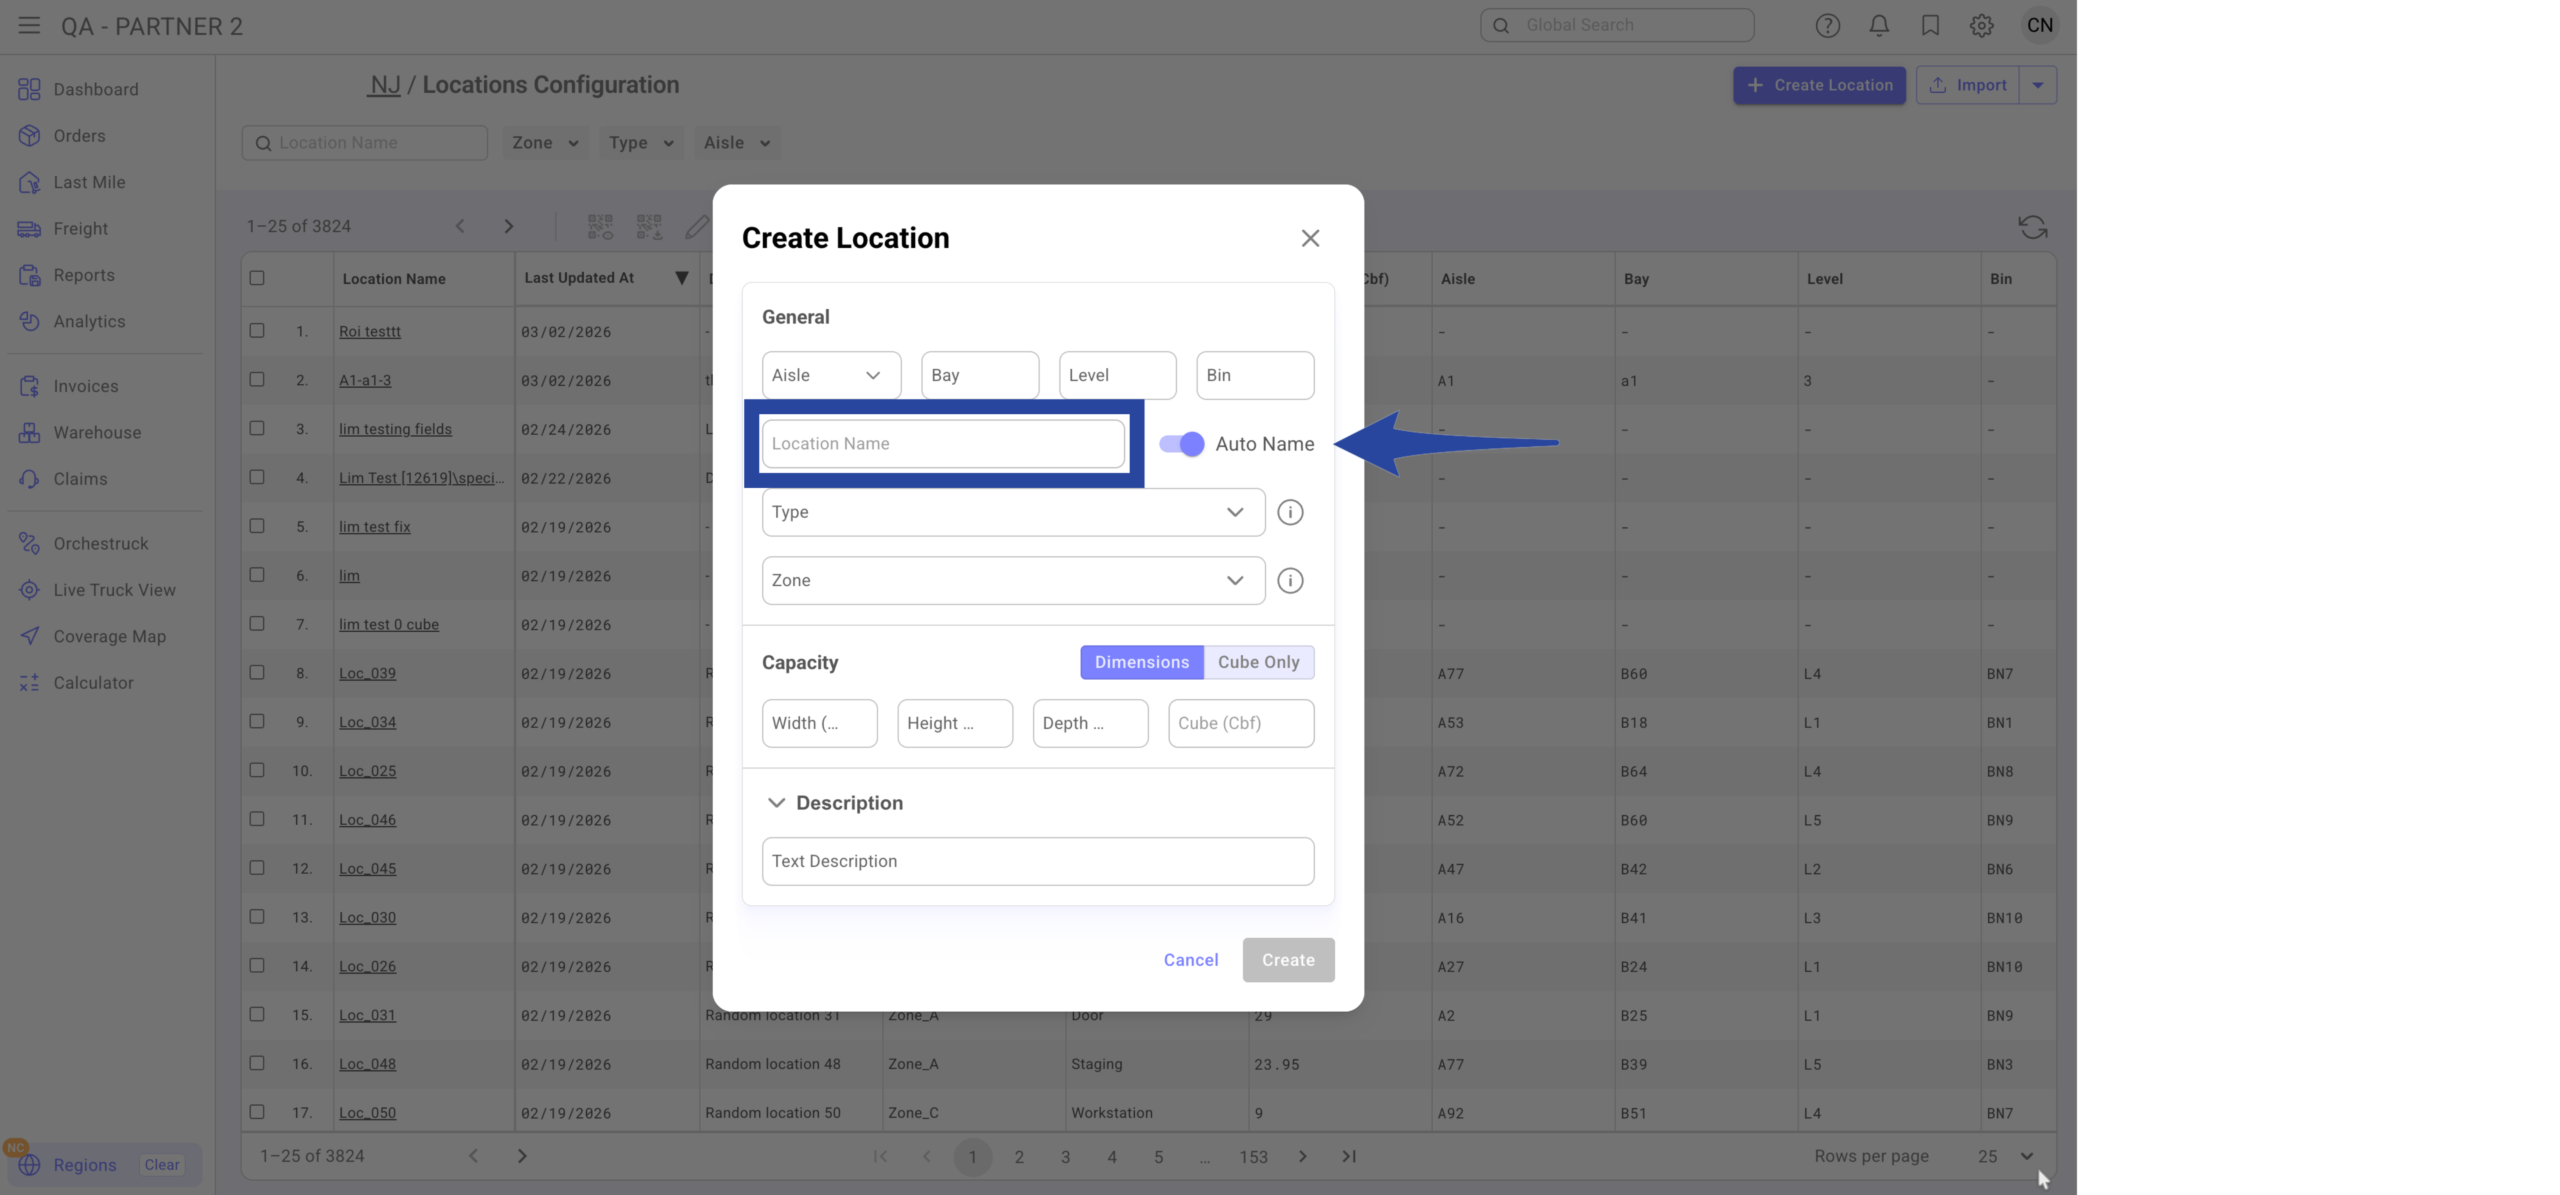
A. Enter the details:
-
Aisle (optional)
-
Bay (optional)
-
Level (optional)
-
Bin (optional)
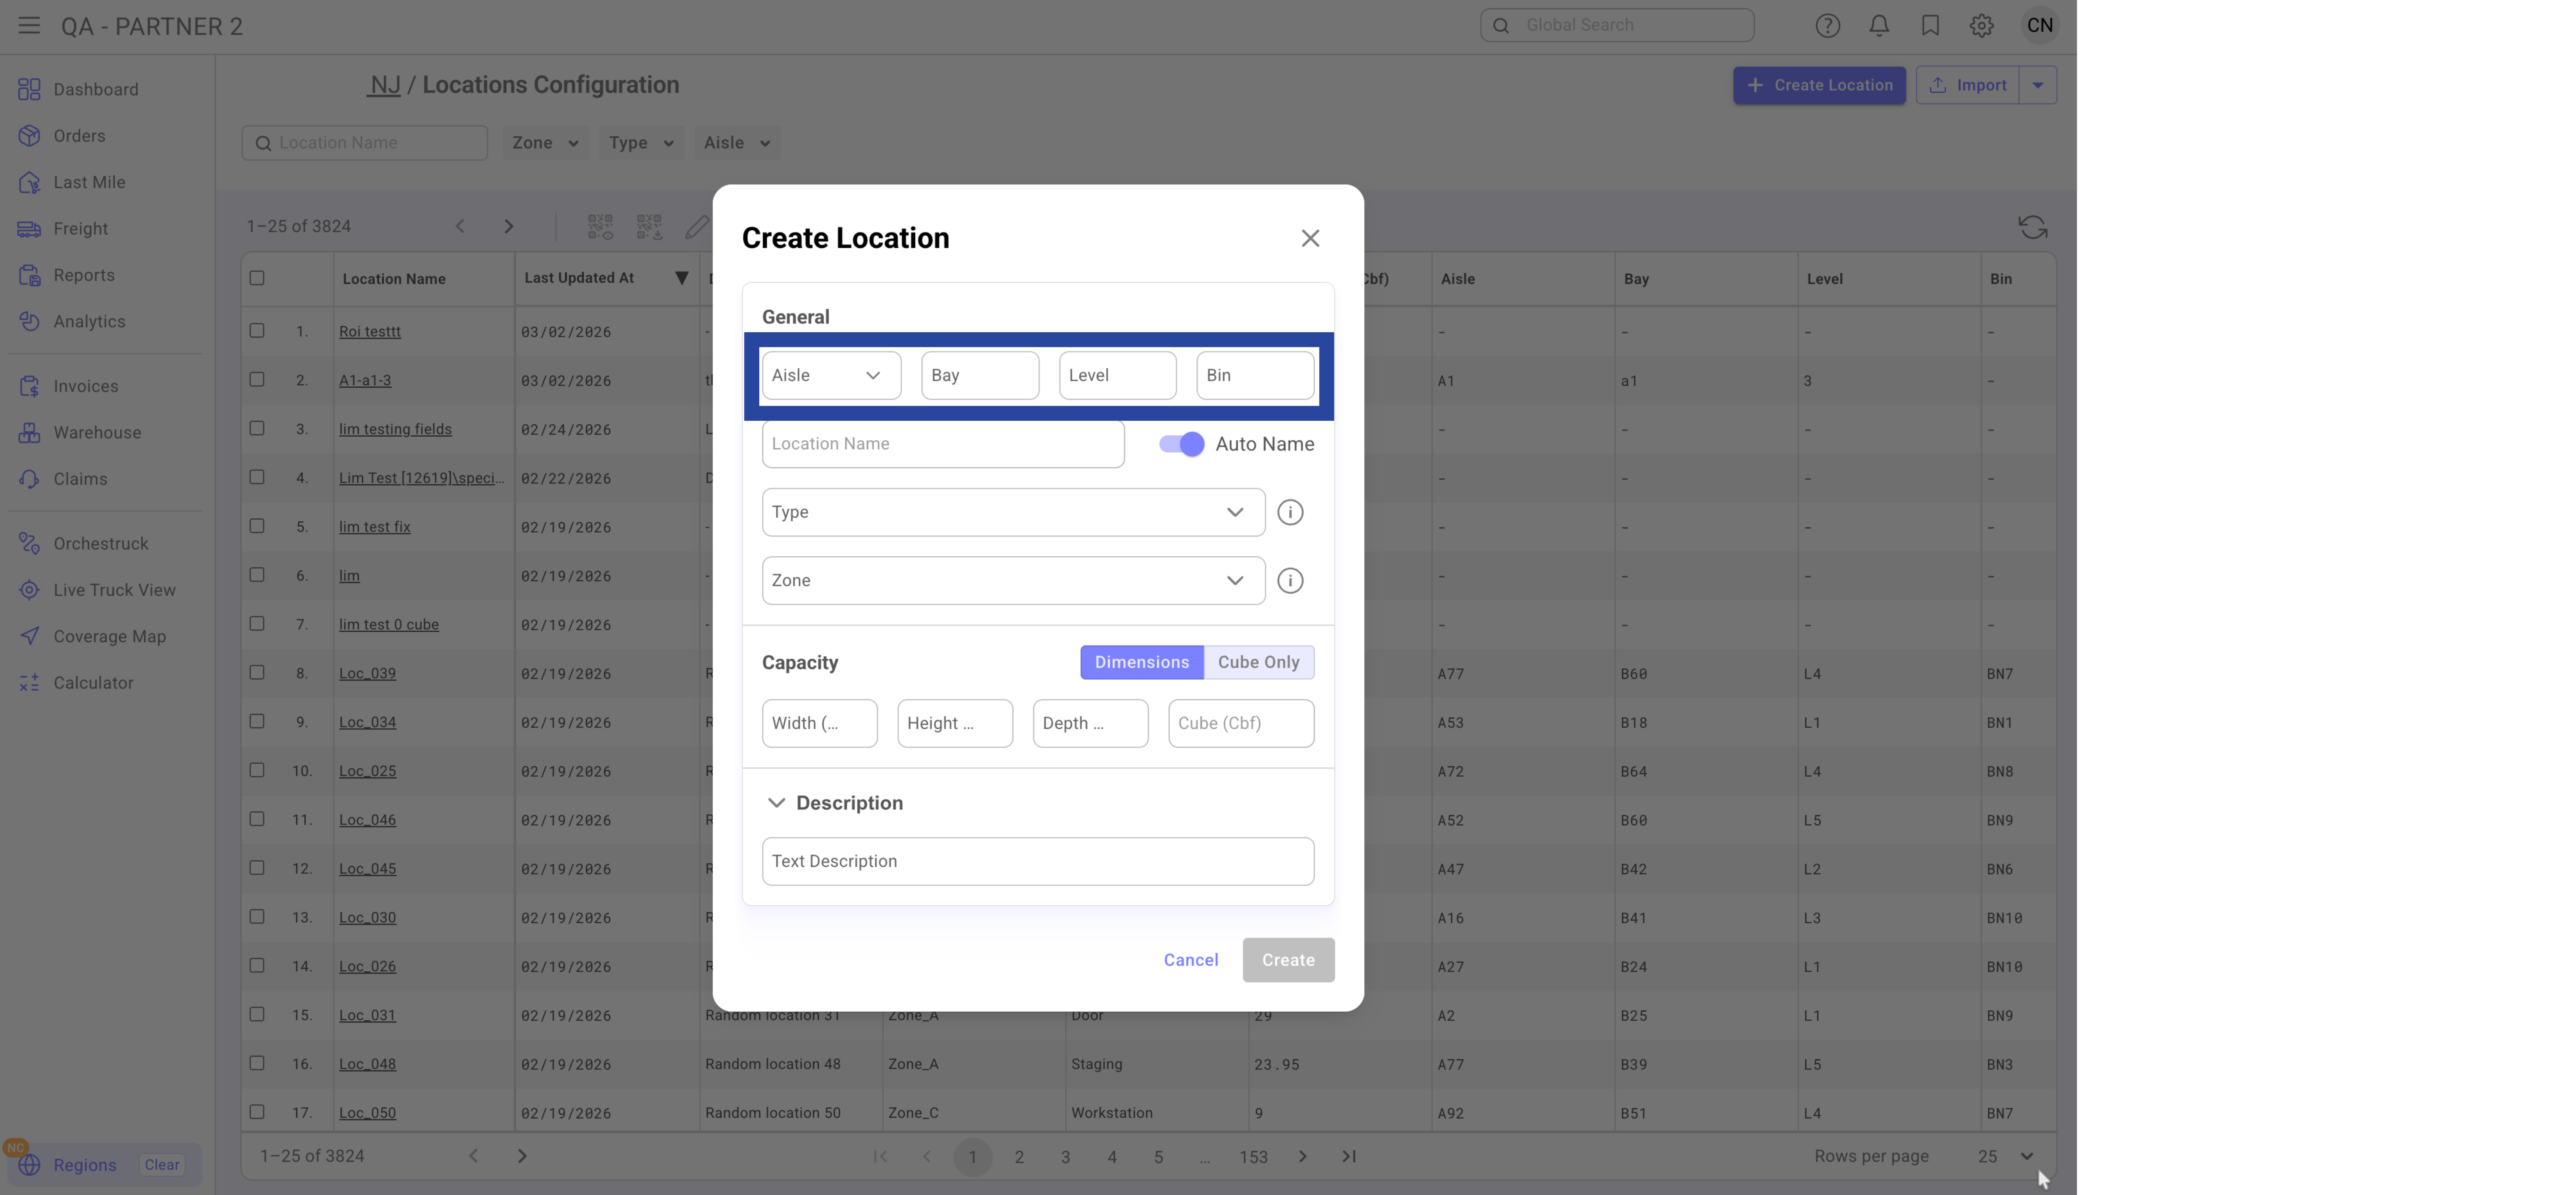
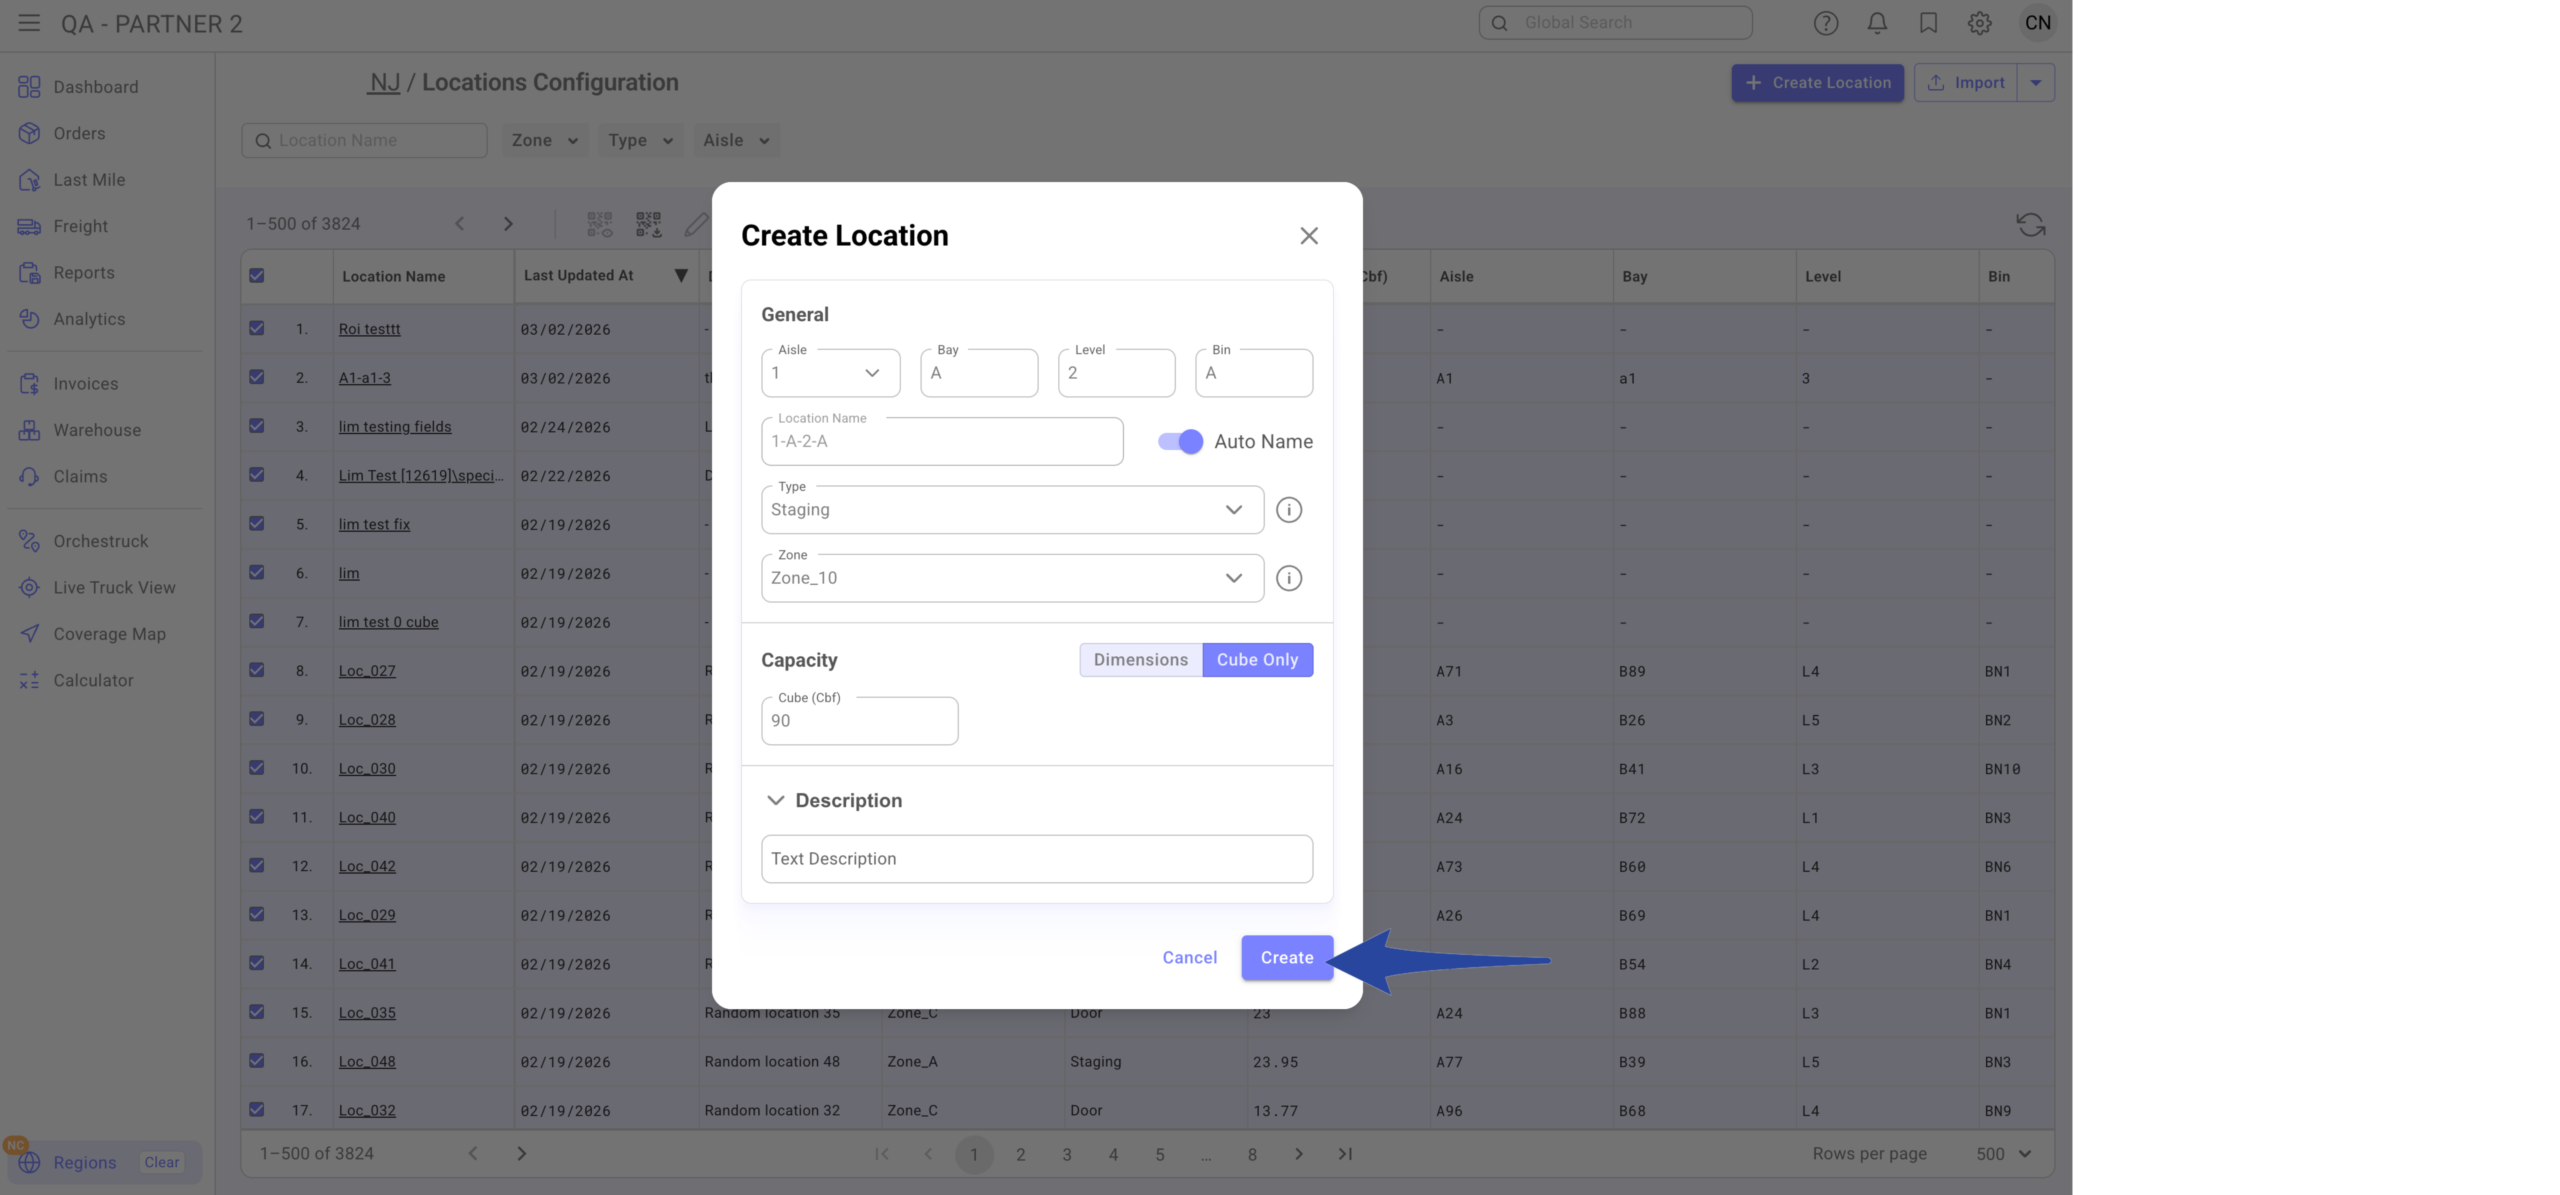
When entered, the system auto-generates the location name.
Example:
-
Aisle: 1
-
Bay: A
-
Level: 2
-
Bin: A
Location name becomes 1-A-2-A
Â
B. If you prefer, you can turn off Auto-Name and enter a custom name (e.g., Location Demo)
** Only the Location Name is mandatory, all other fields are optional.
Â
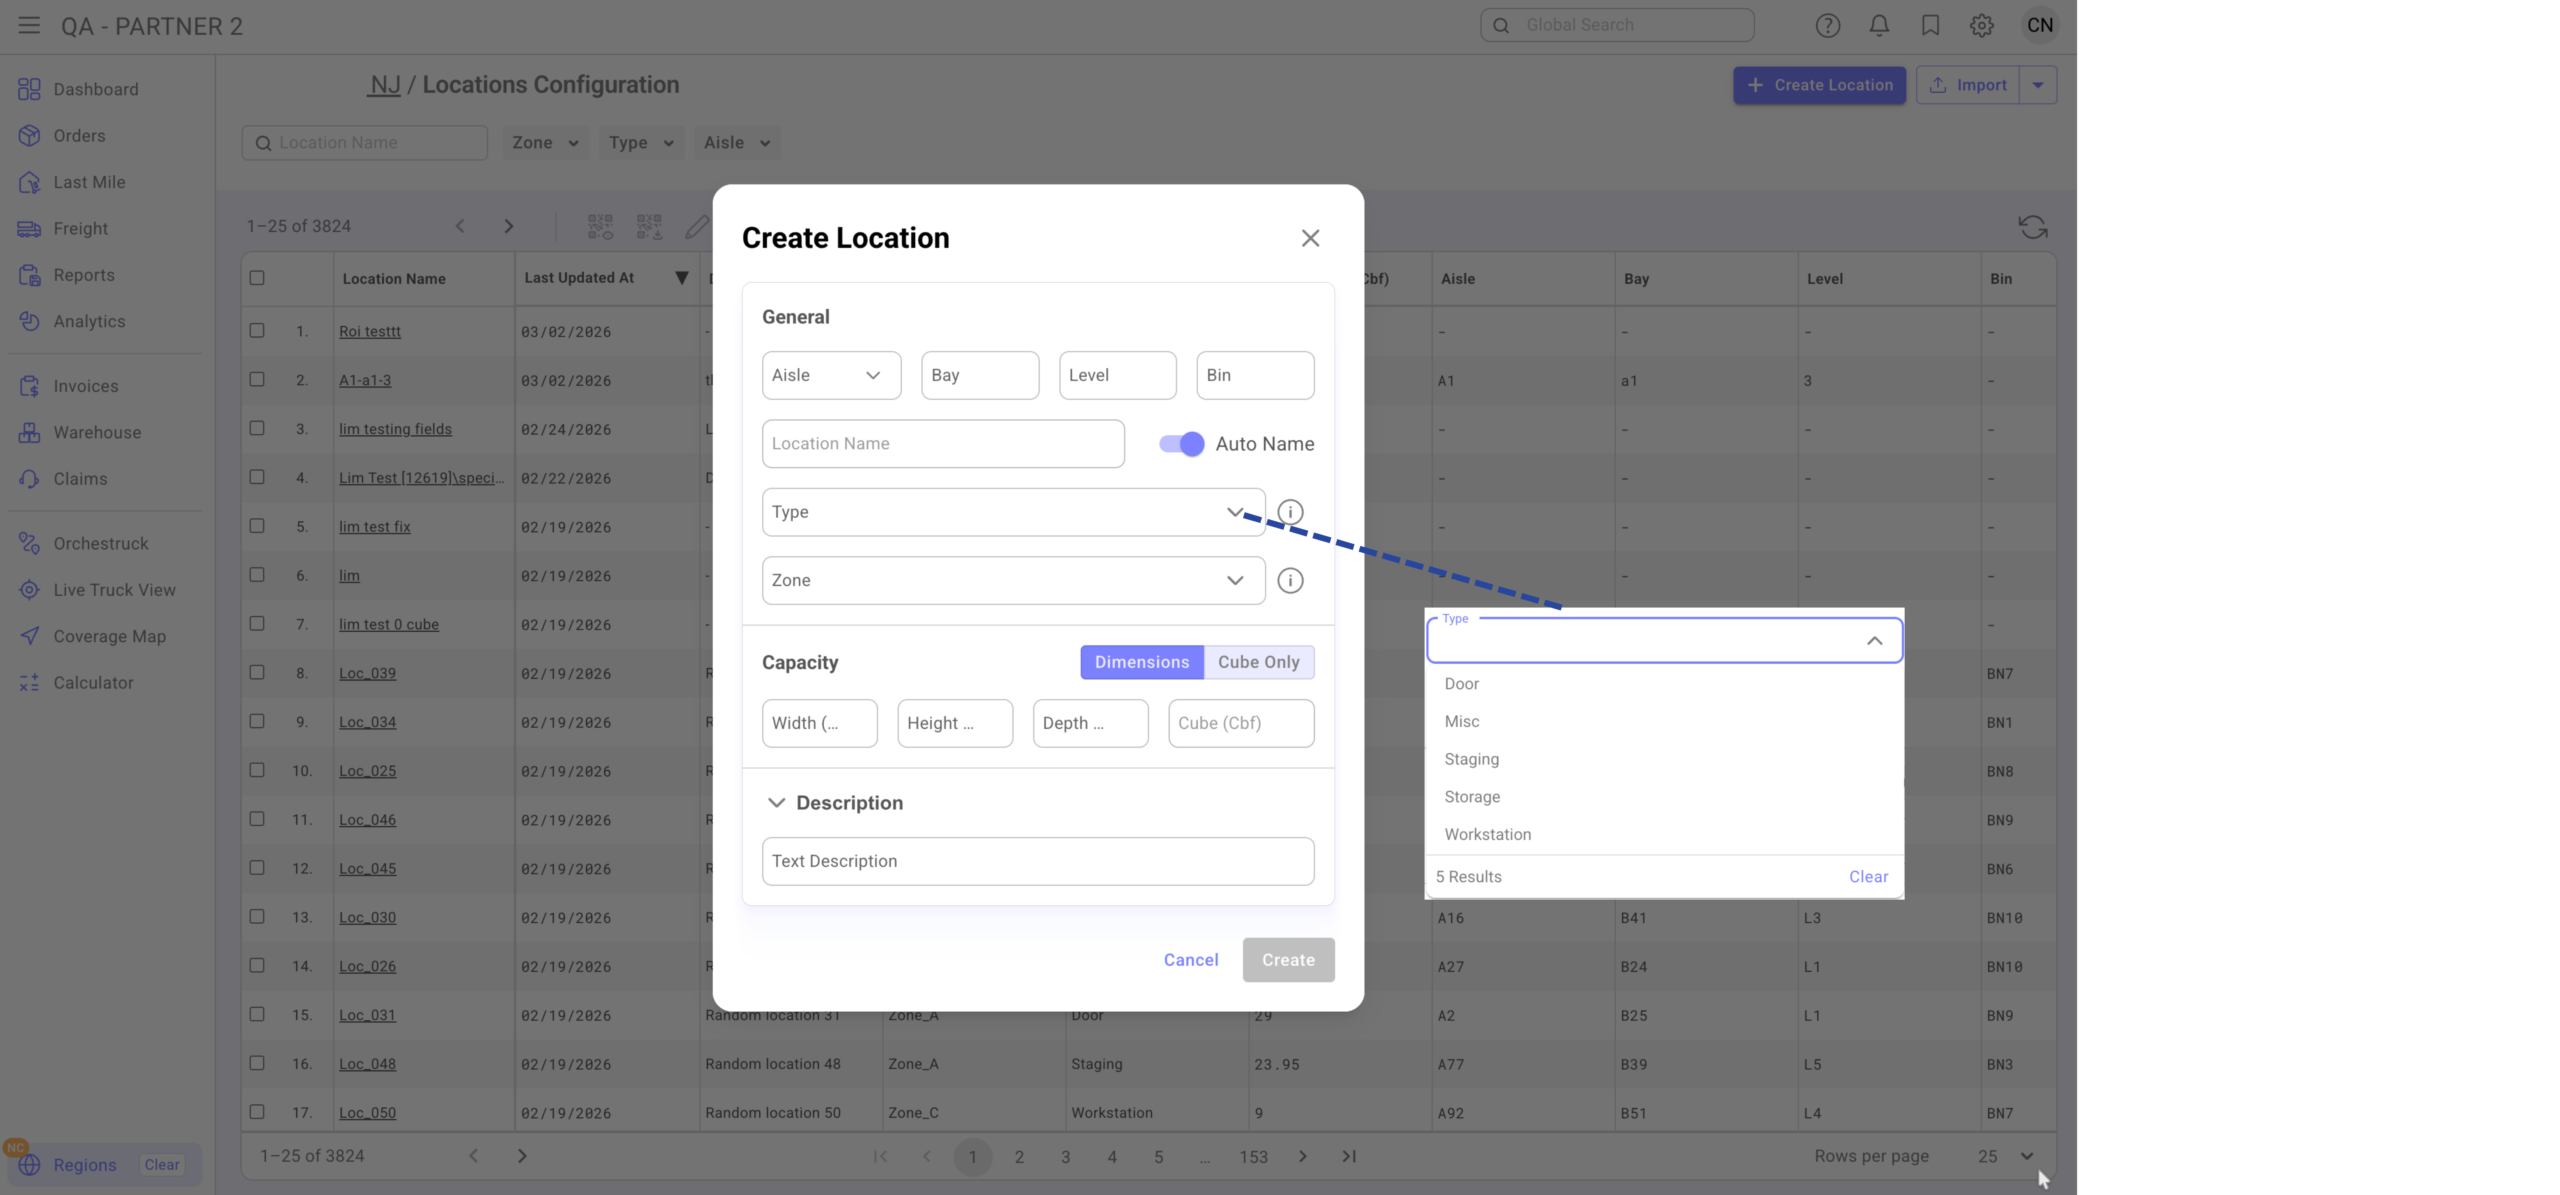
C. Location Type (Optional)
Define the functional role of the location:
-
Door
-
Staging
-
Storage
-
Workstation
-
Other
This helps:
-
Filter locations
-
Suggest locations during inbound
-
Generate future reports by function
Â
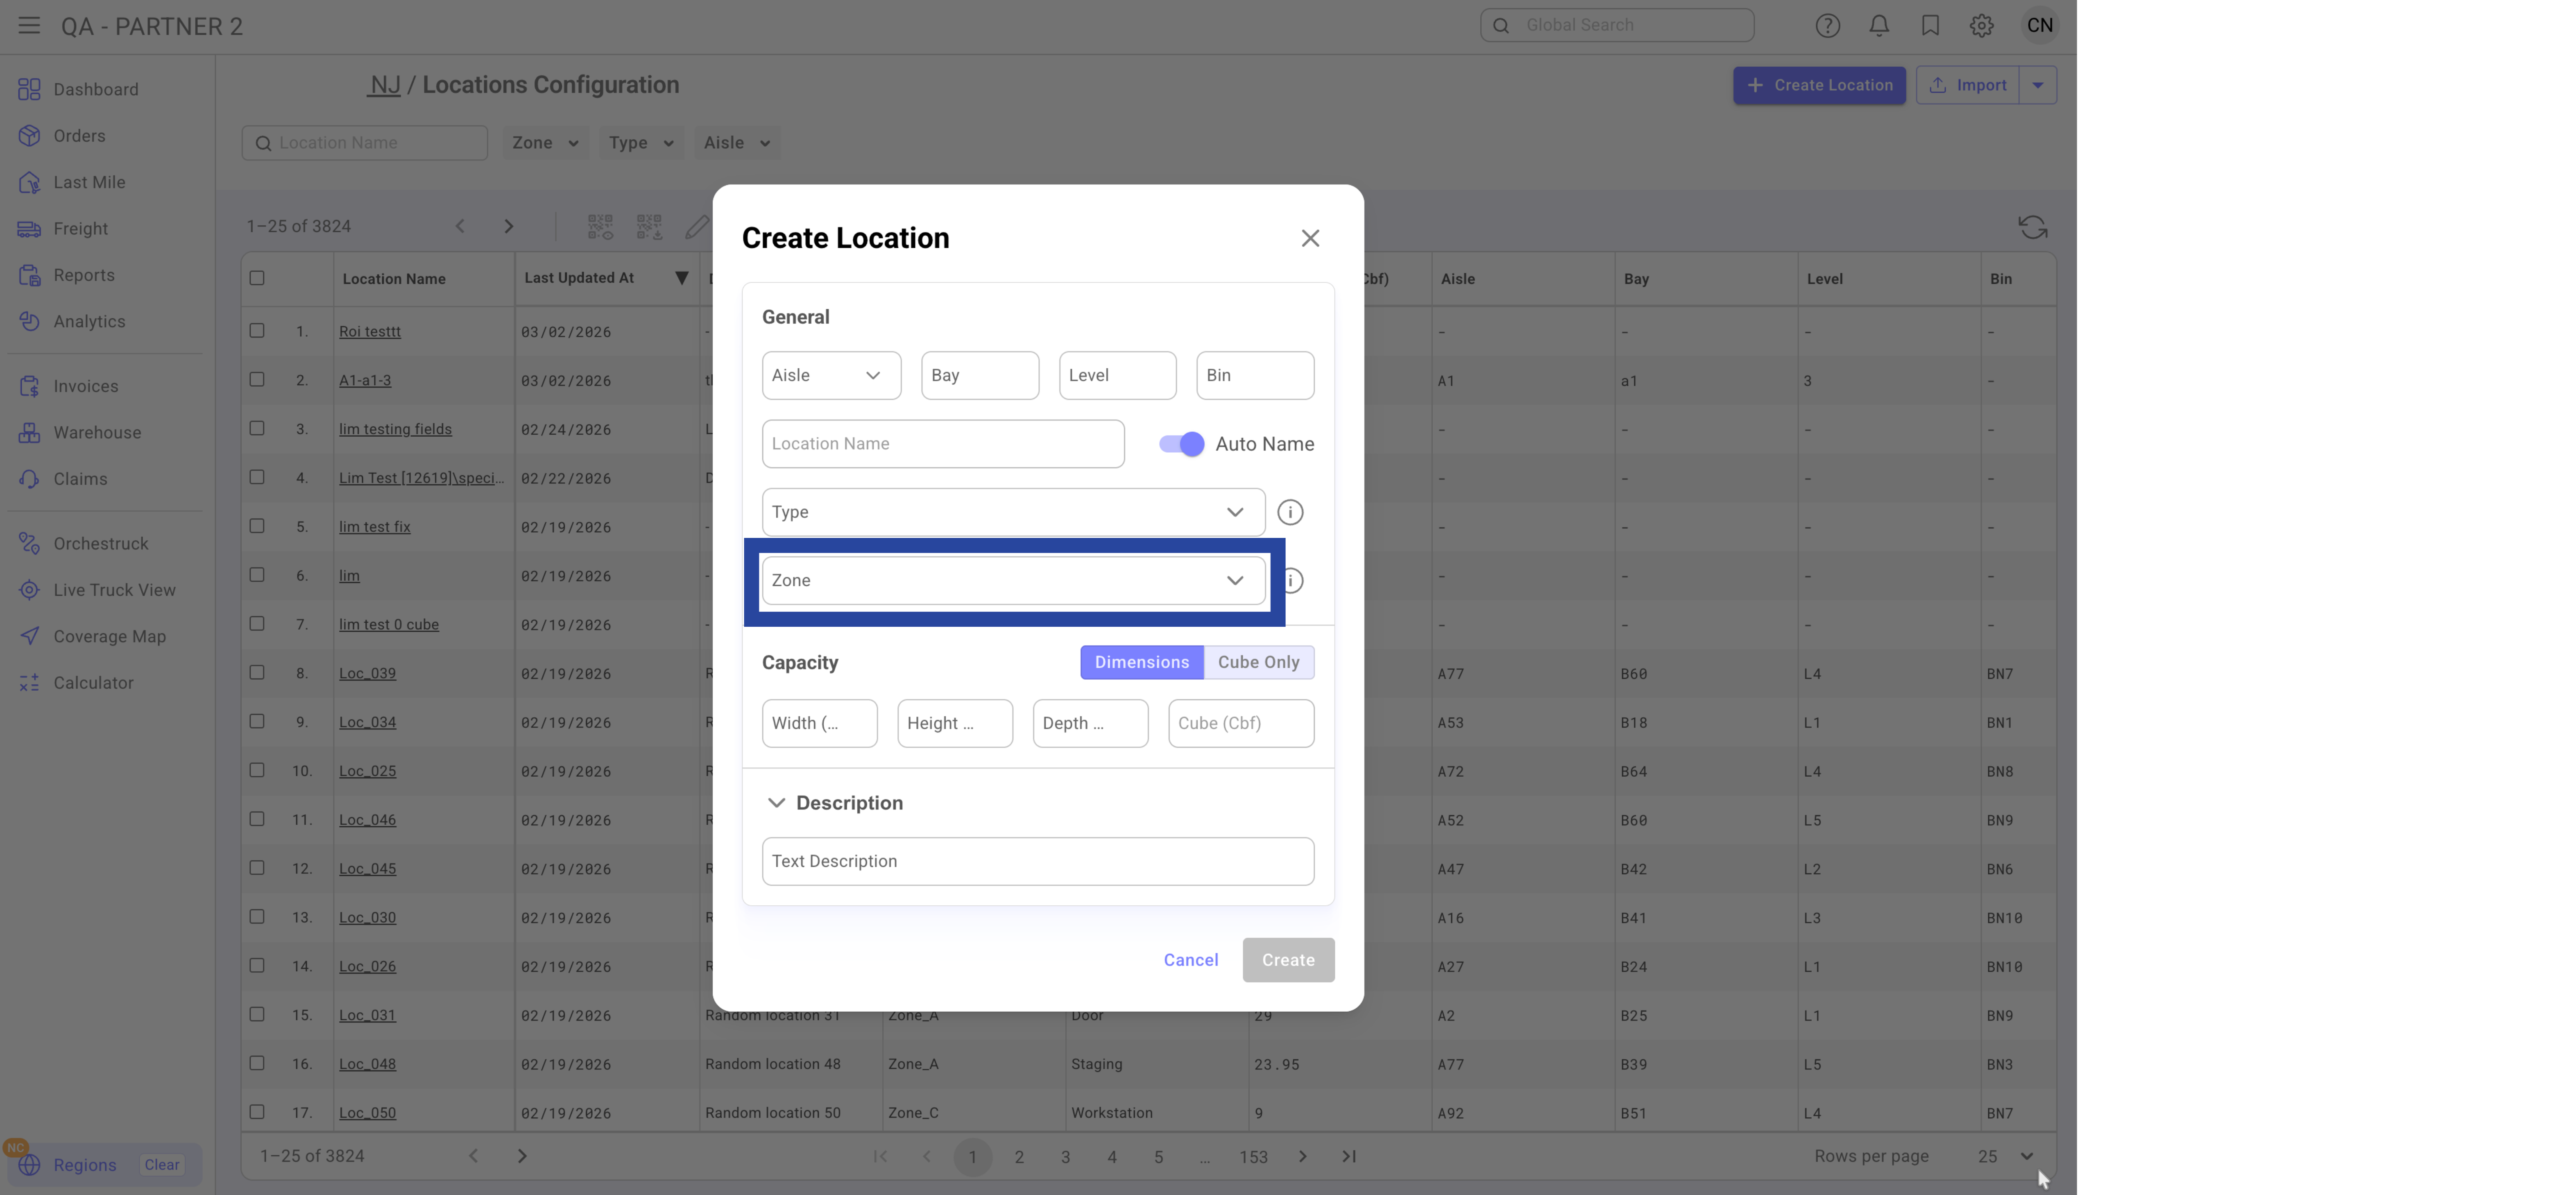
D. Zone (Optional)
Zones allow grouping by warehouse areas like:
-
Receiving
-
Picking
-
Storage
-
Custom areas (e.g., “Green Areaâ€)
Benefits:
-
Filter by zone
-
Future rule-based automation
-
Zone-level reporting
You can create zones directly while creating the location.
Â
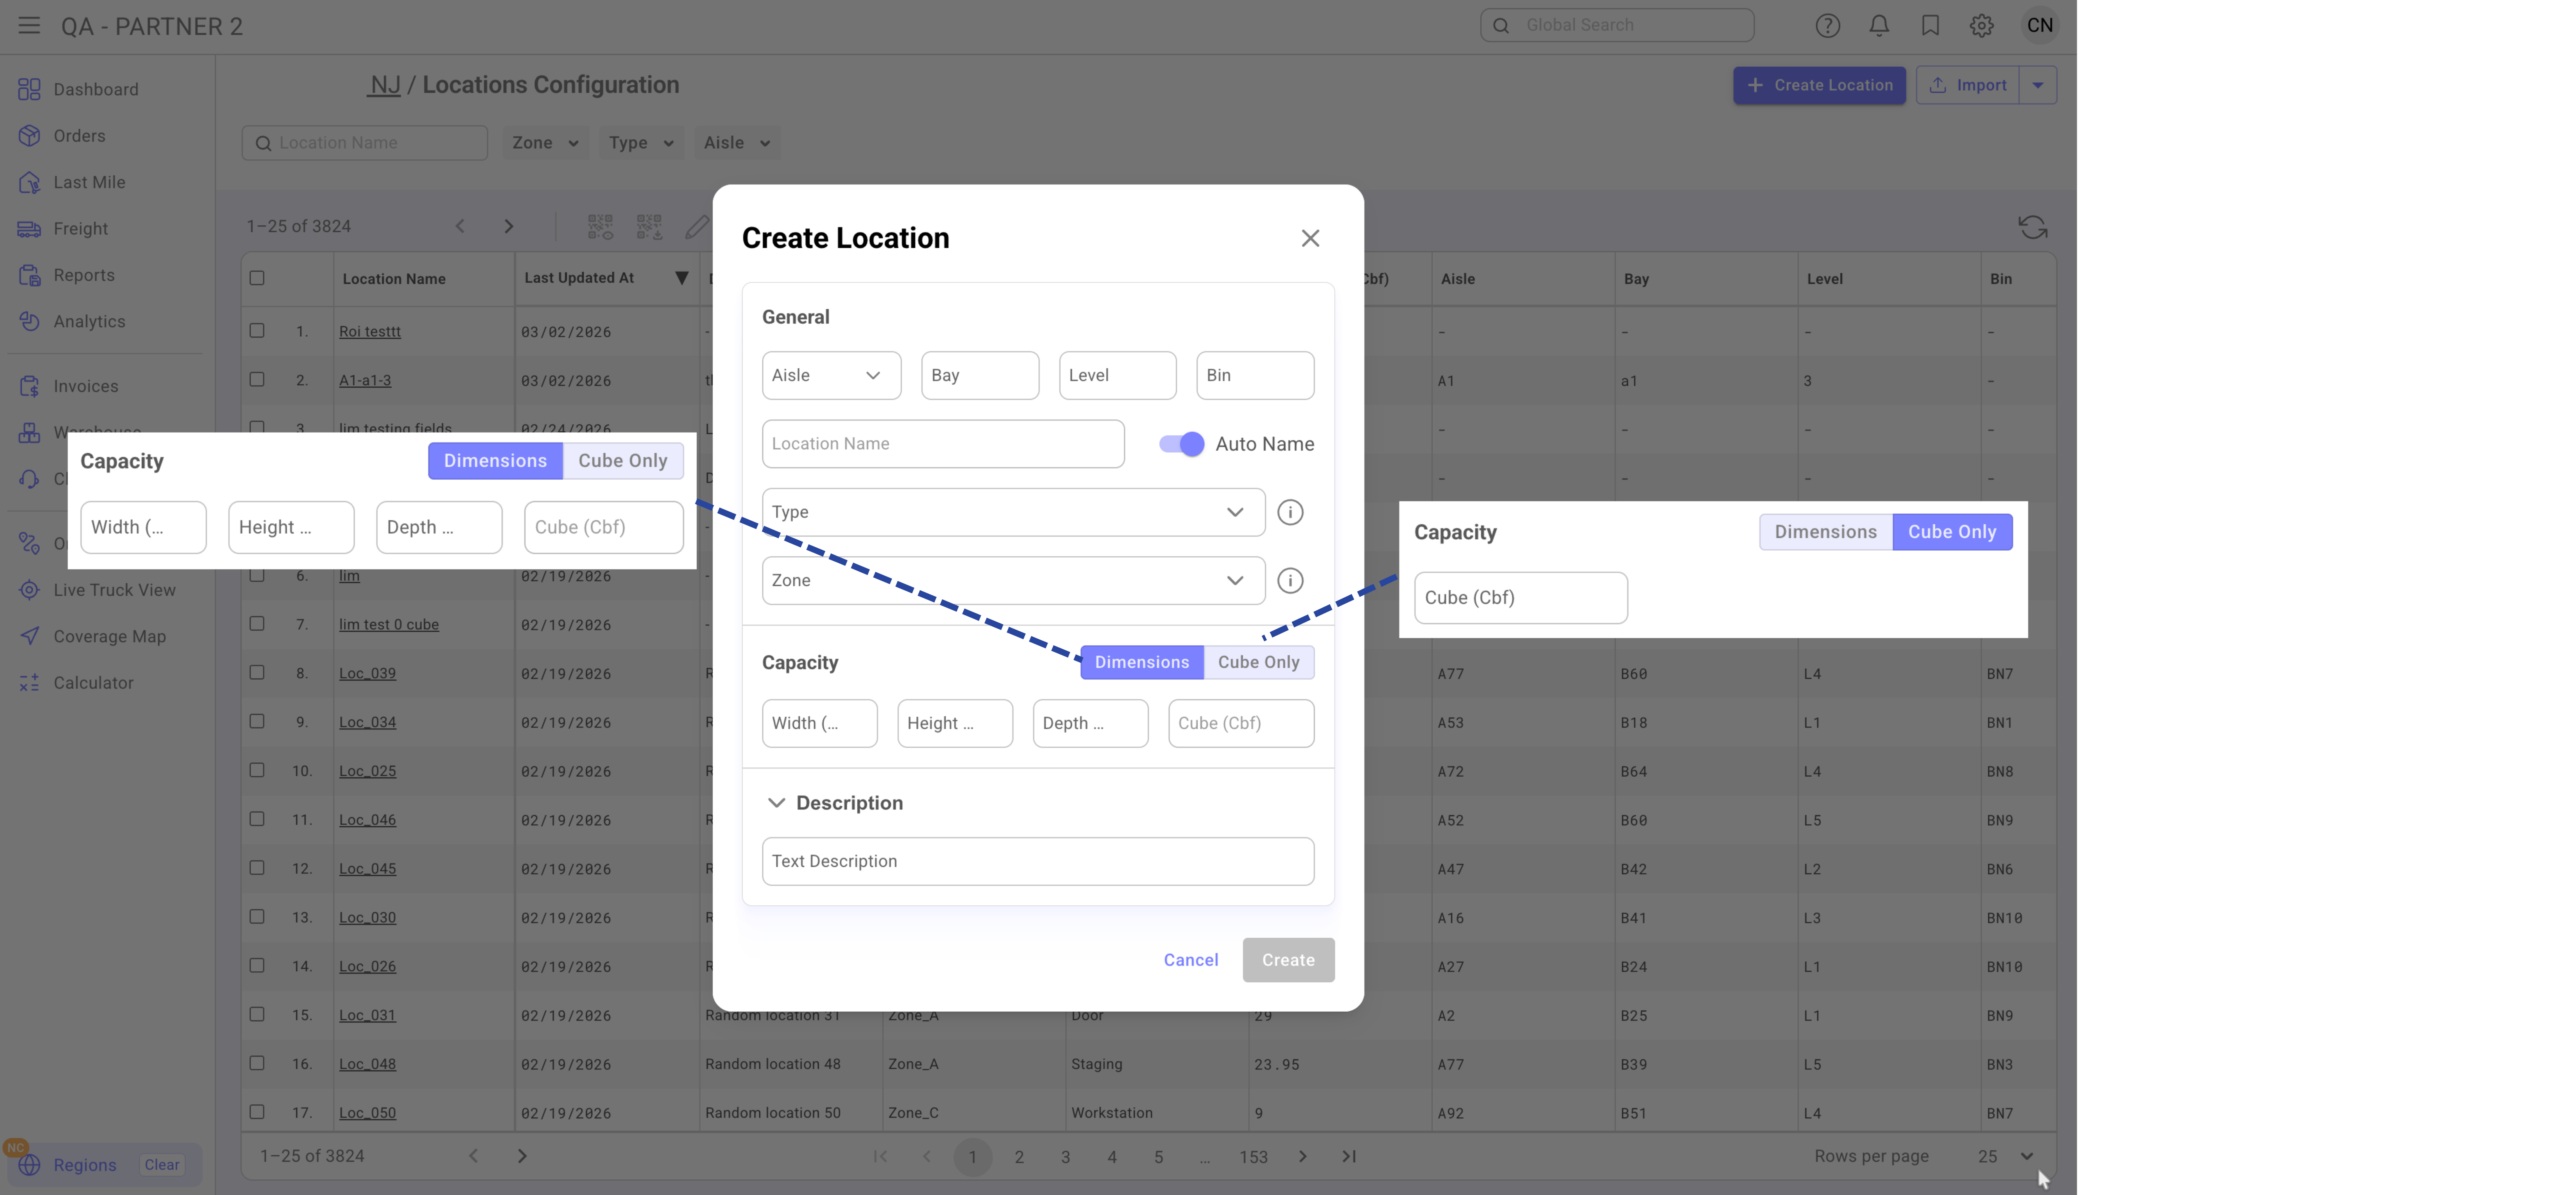
E. Capacity (Optional)
Define:
-
Width (inches)
-
Height (inches)
-
Depth (inches)
Or enter cube directly.
Â
The system:
-
Calculates cube automatically
-
Tracks cube usage
-
Flags locations nearing capacity (future warning behavior)
Â
F. Description (Optional)
Free text field for internal notes.
Step 6
Click Create.
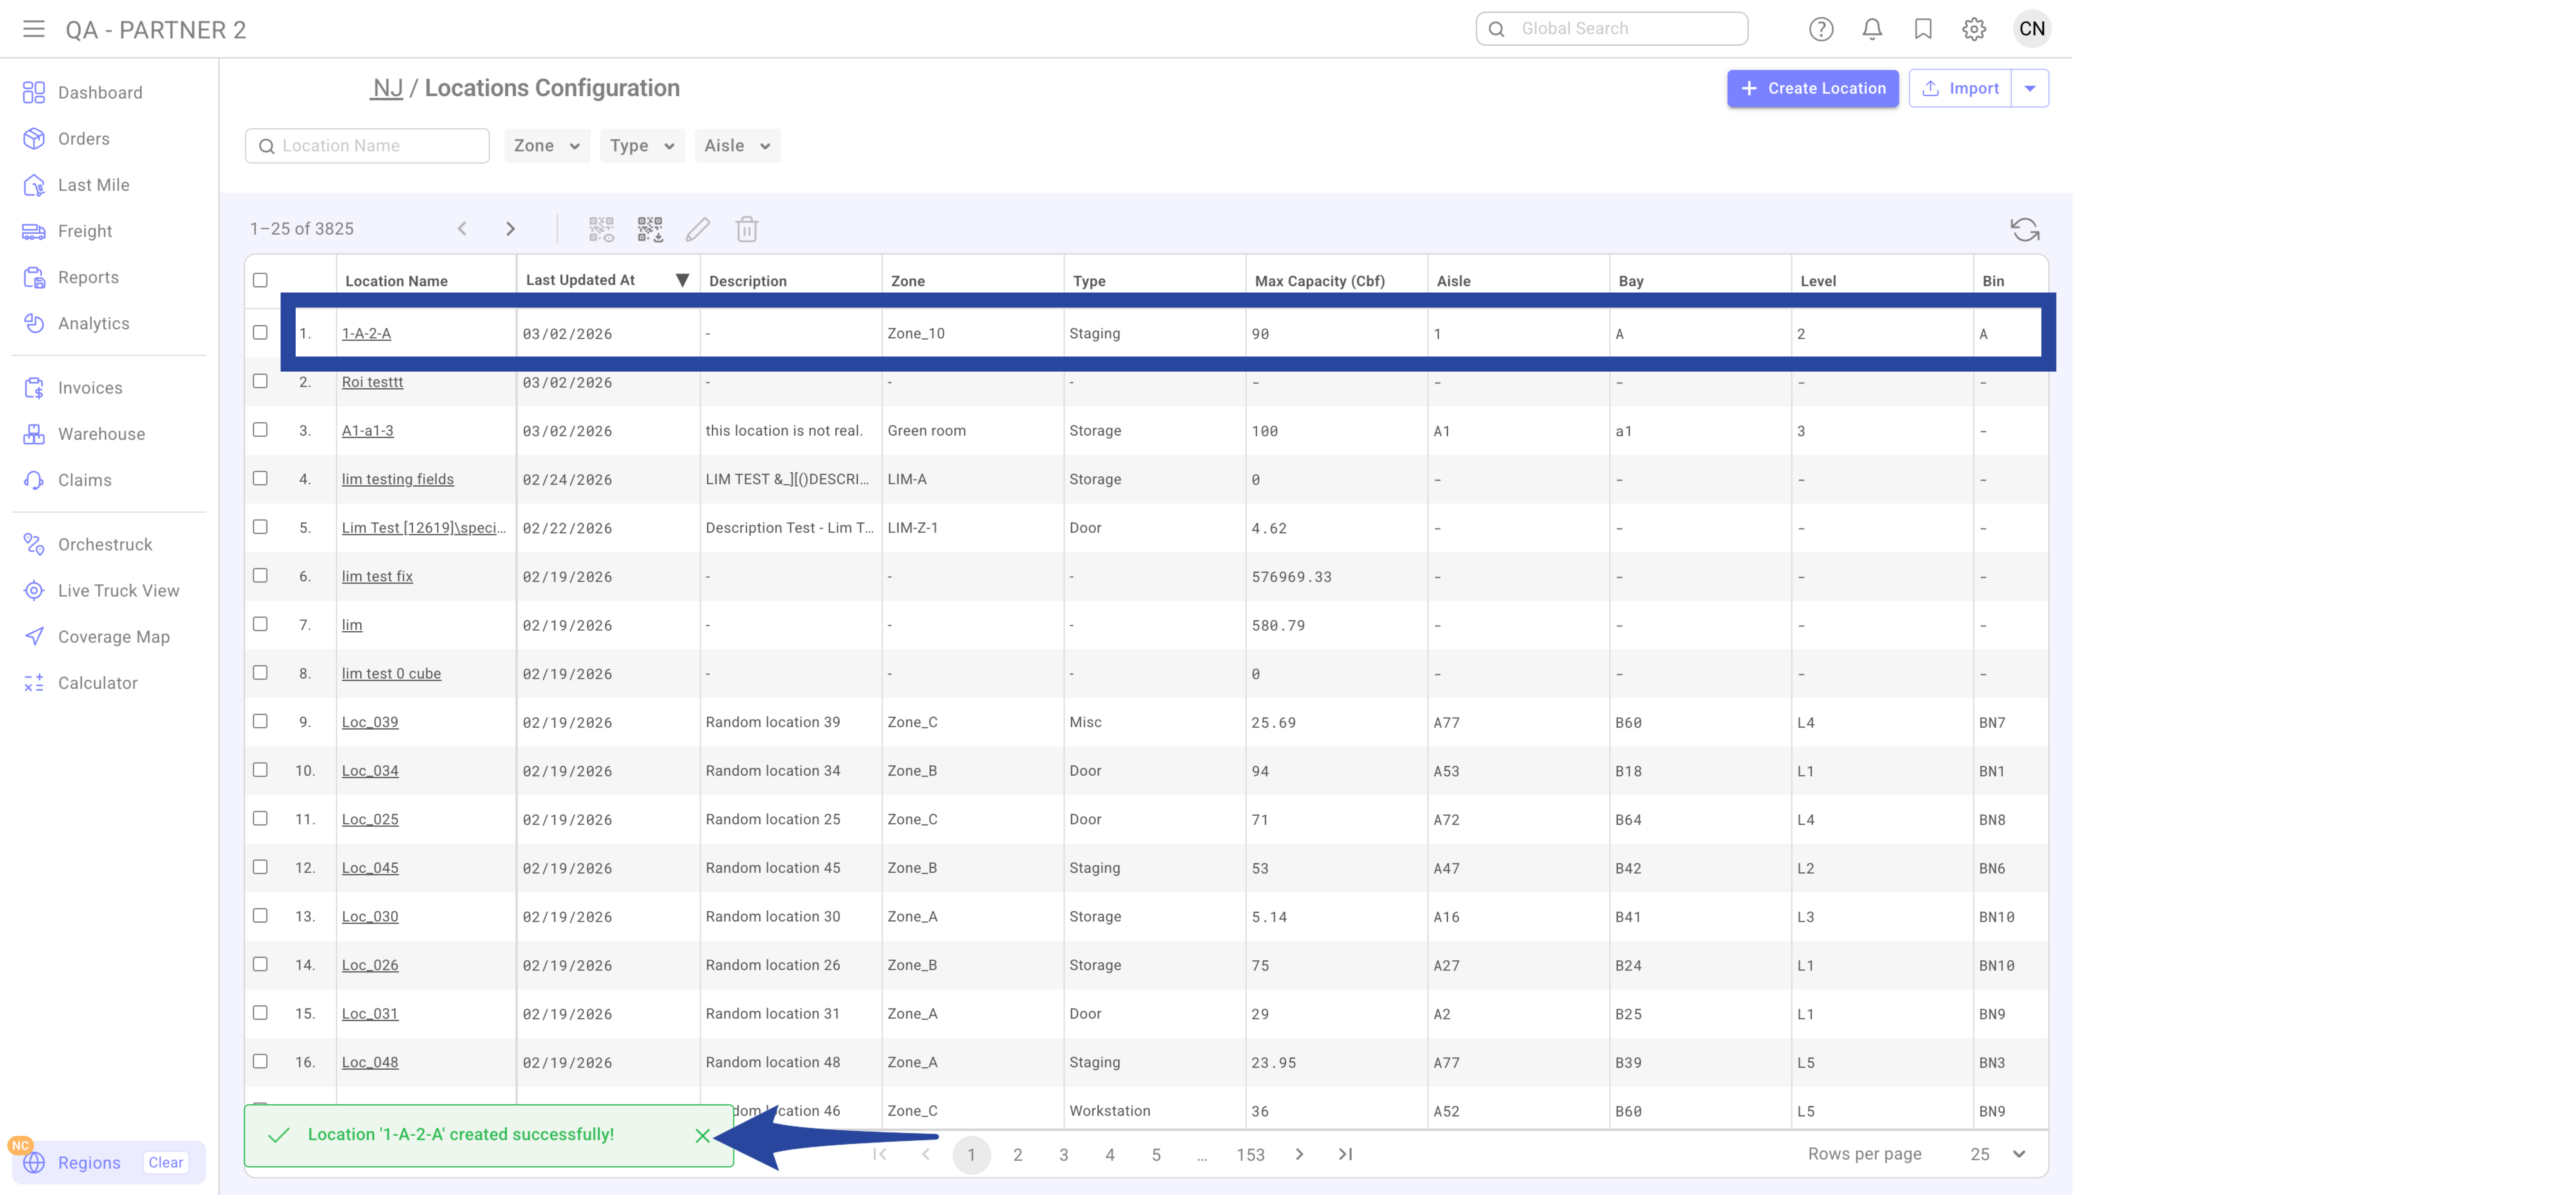
Confirmation that the location has been successfully created.
Bulk Import Locations
Step 1
Click the gear icon from the main Dashboard and select Regions.
Â
Step 2
Navigate to the correct Region. And select the specific Region you wish to import locations.
Â
Step 3
Go to Locations tab and click Open Locations Configuration.
Â
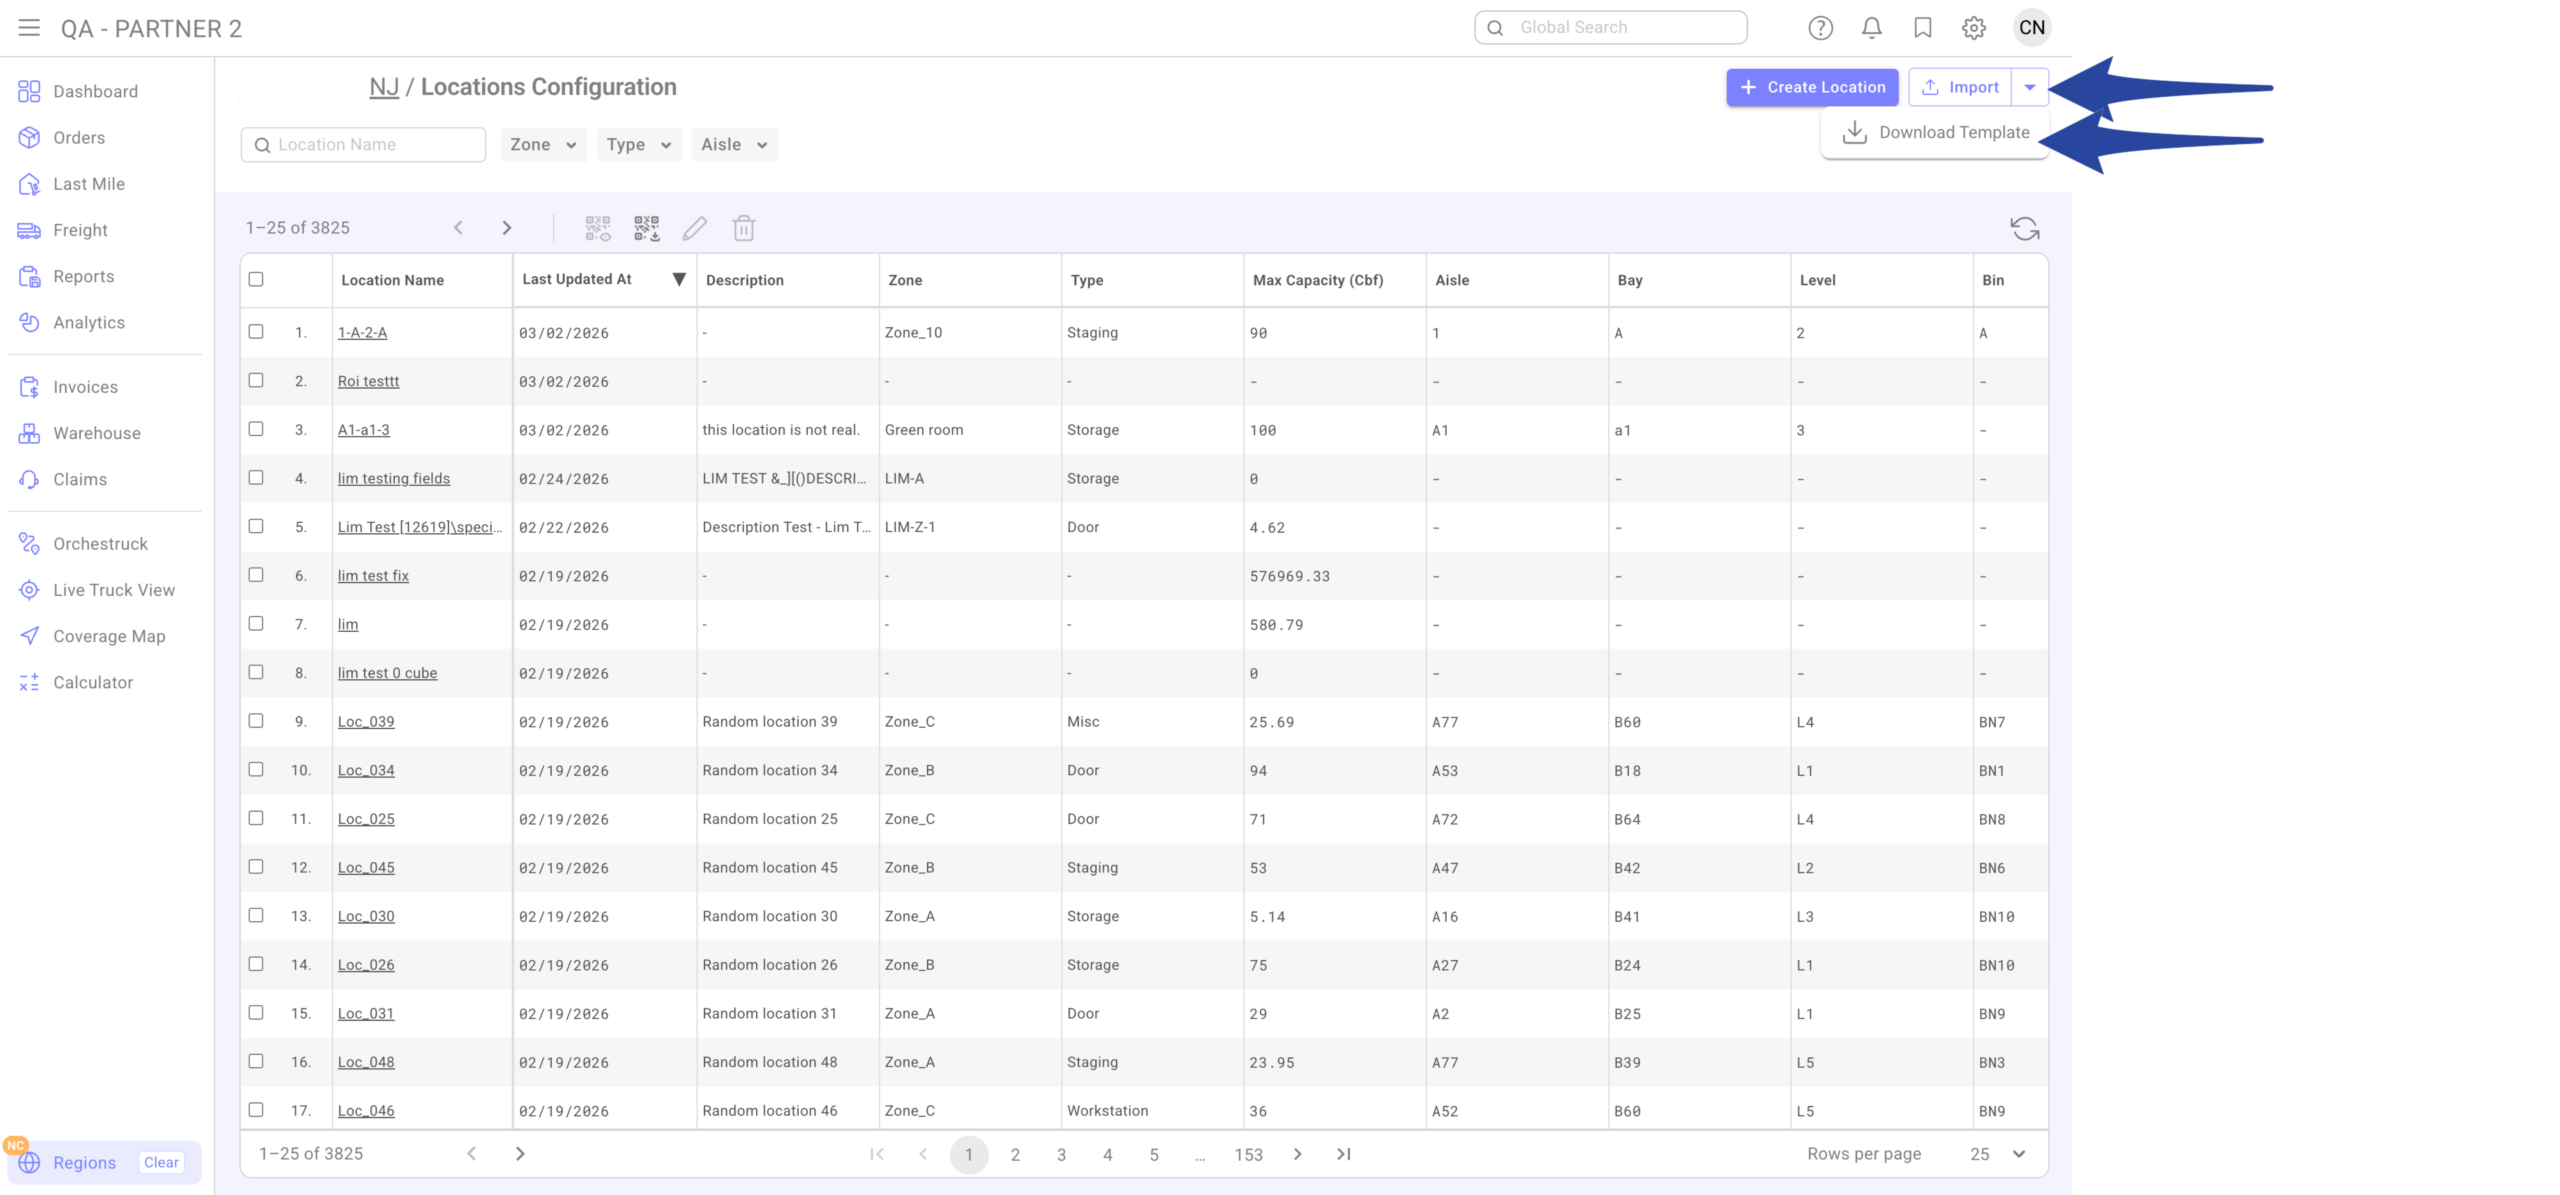
Step 4
Click the drop-down arrow and select Download Template
Â
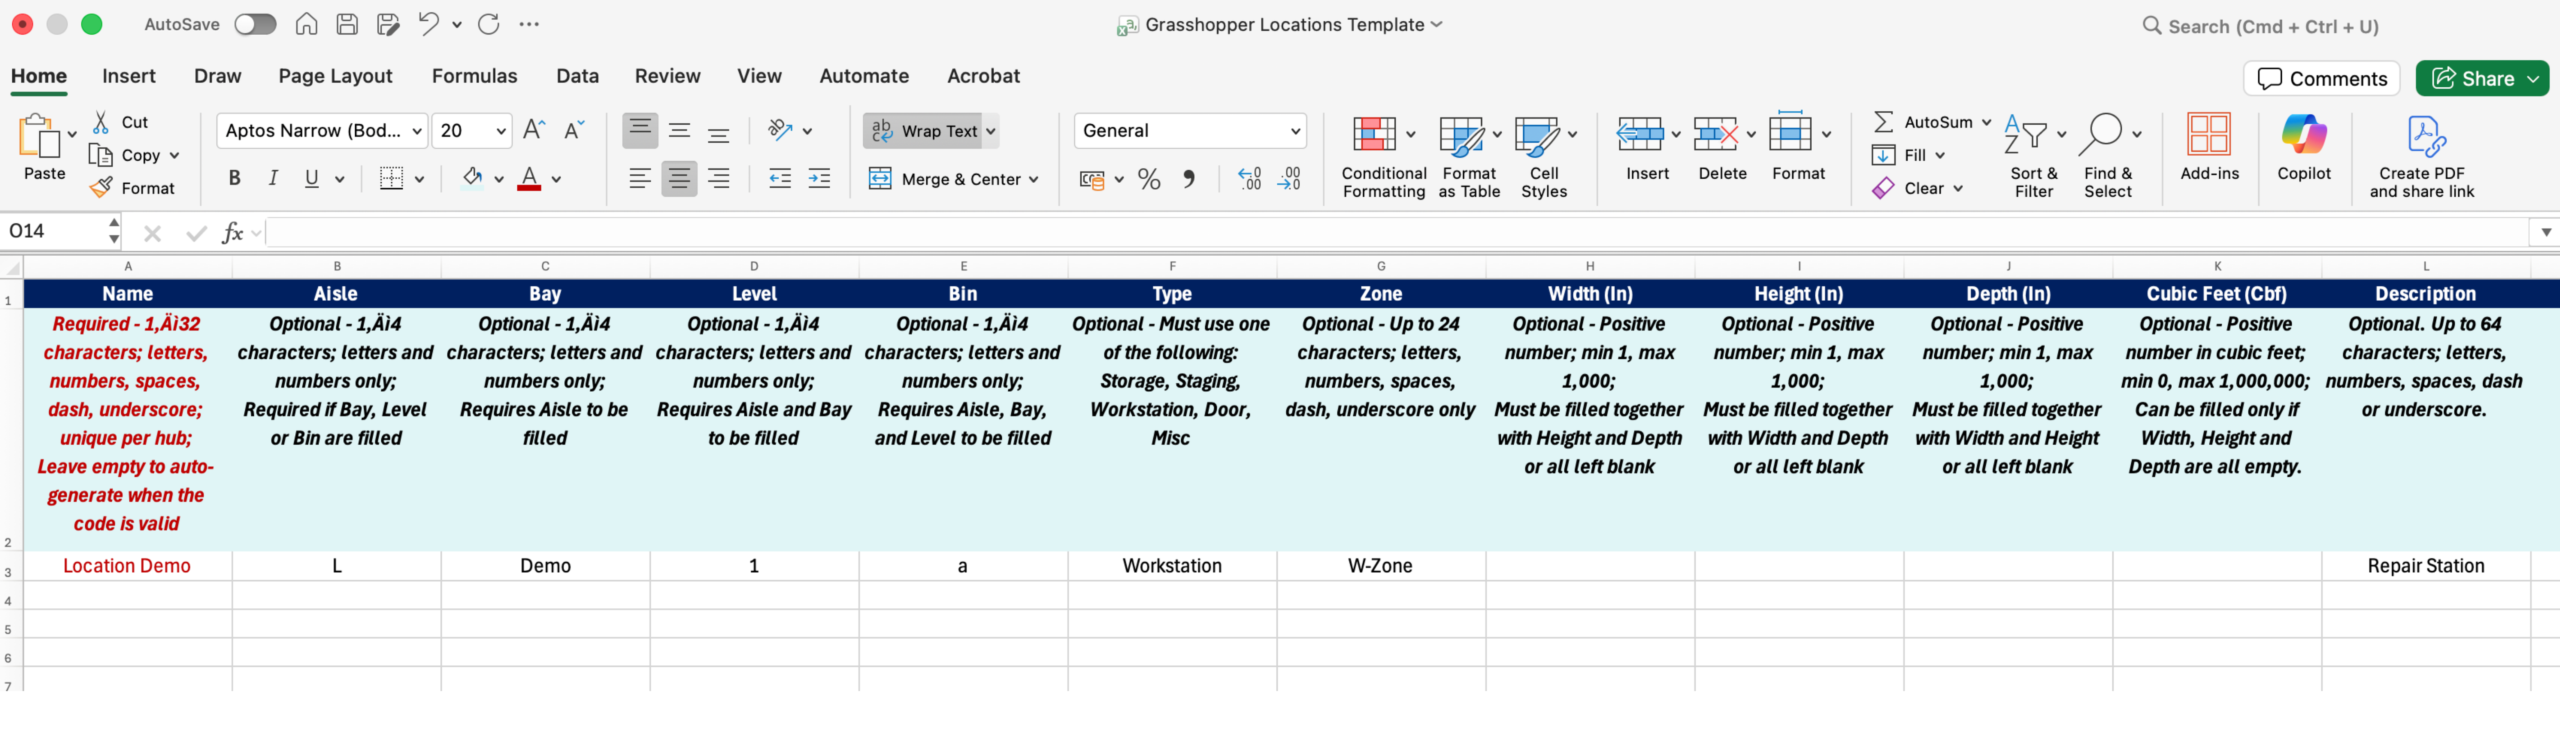
Step 5
Fill in the template:
-
Name (Required)
-
Aisle
-
Bay
-
Level
-
Bin
-
Type (must match allowed values)
-
Zone
-
Dimensions
-
Description
All limitations are explained inside the template placeholders.
Do NOT delete:
-
Header Row
-
Placeholder row (currently required)
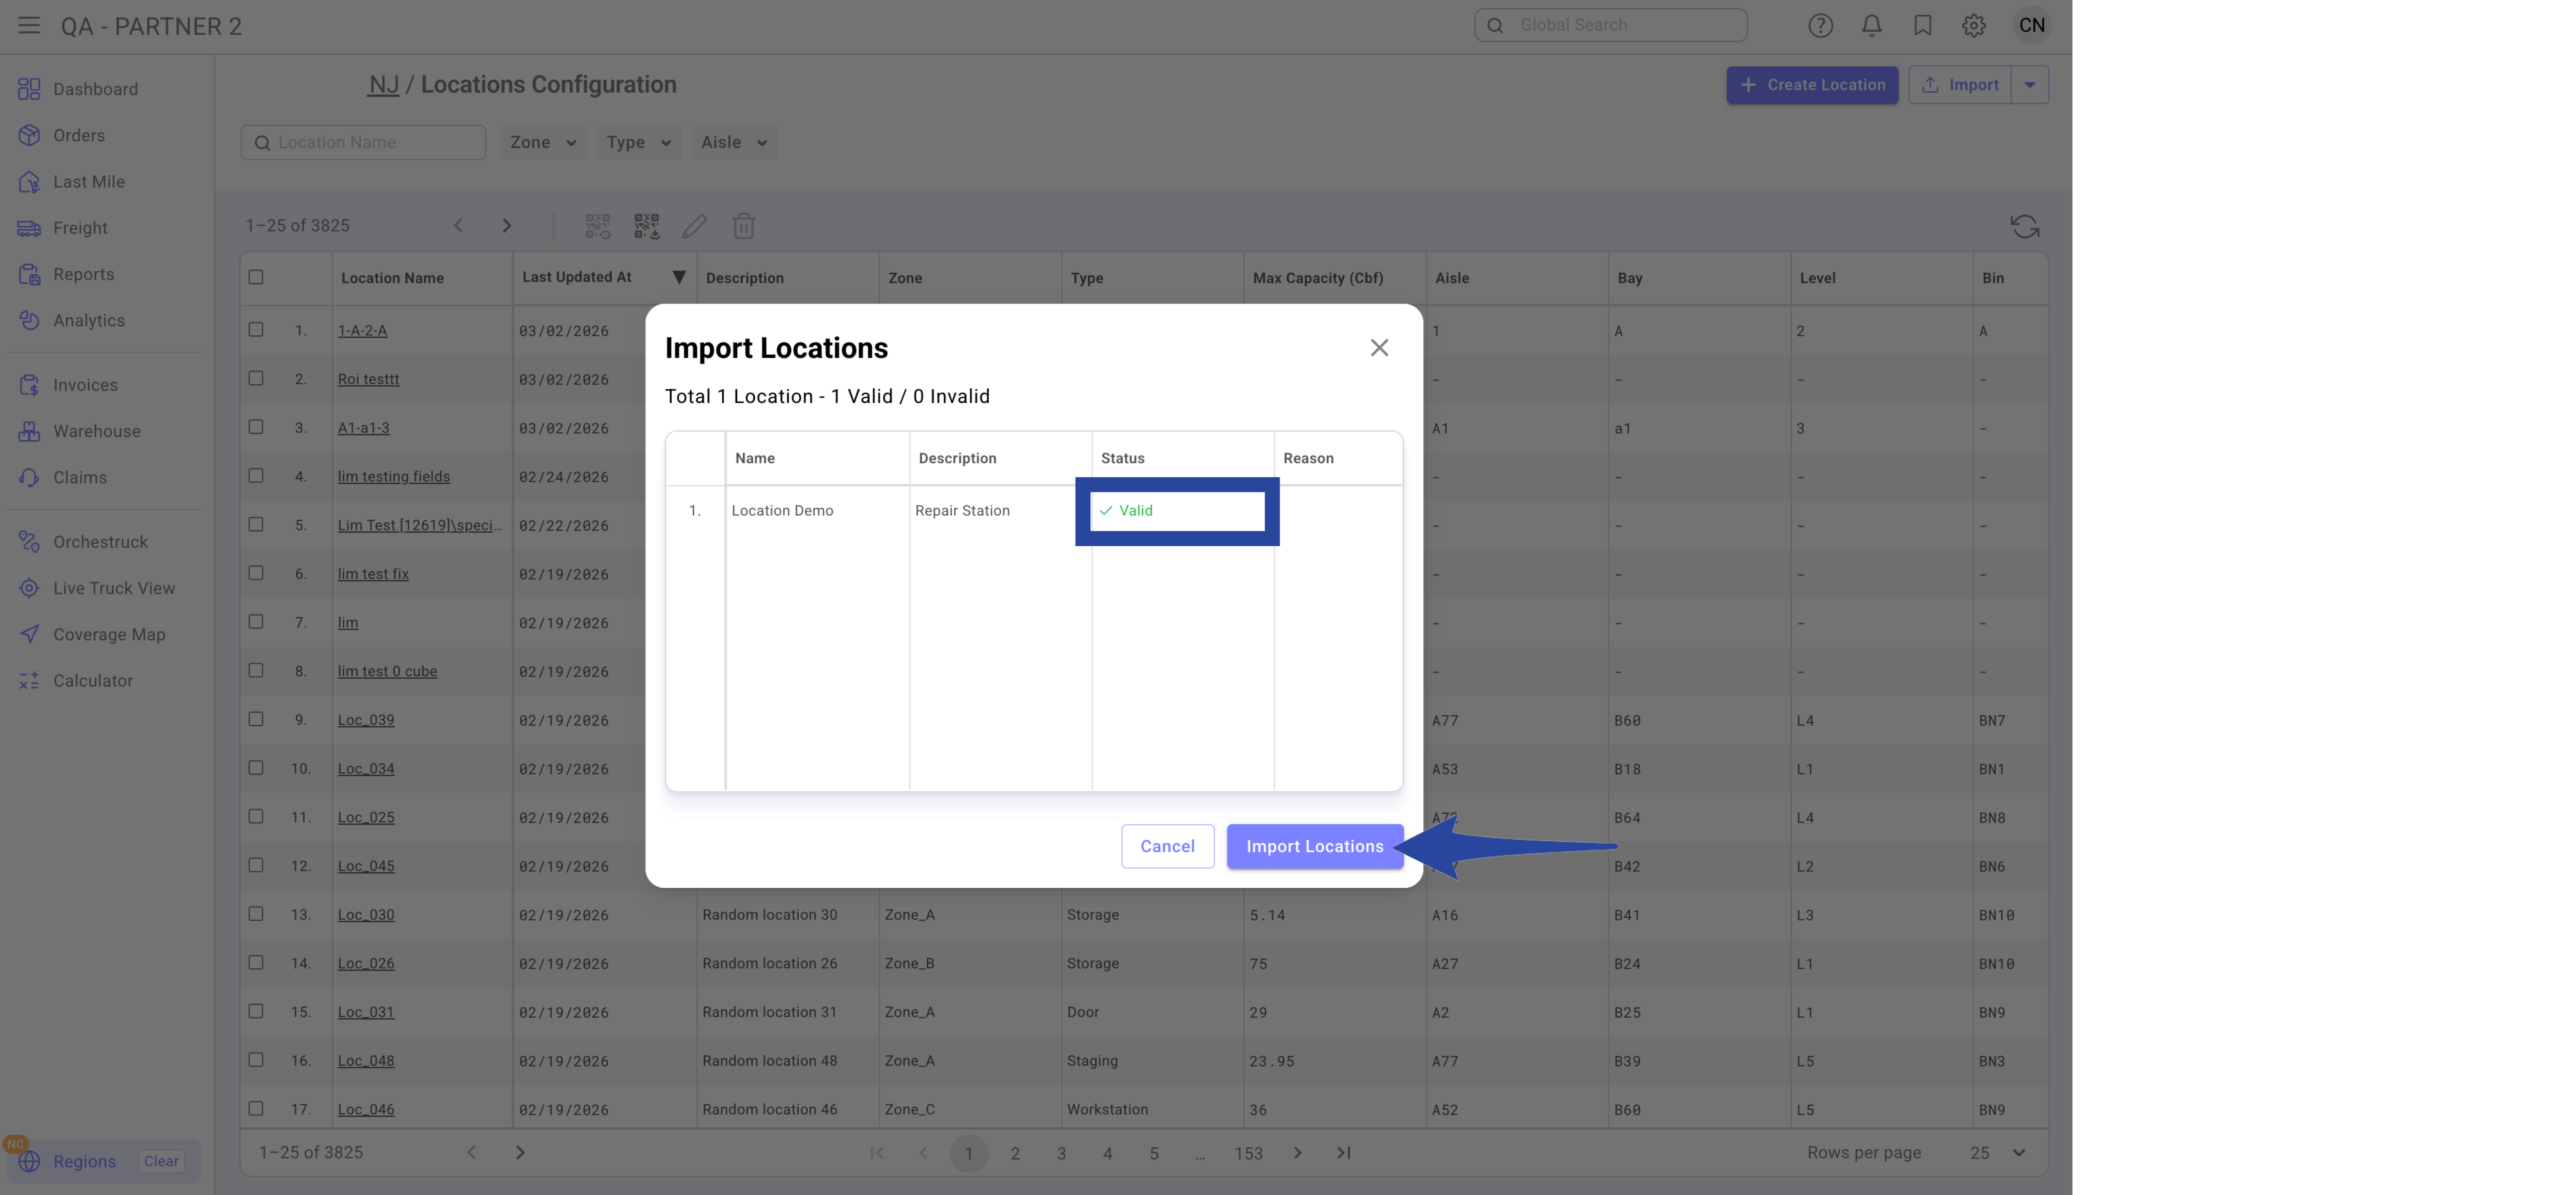
Step 6
Upload the file in CSV. Review the preview screen and click Import Location.
If a location already exists, it will update (not duplicate). Location Name and Code cannot be changed after creation.
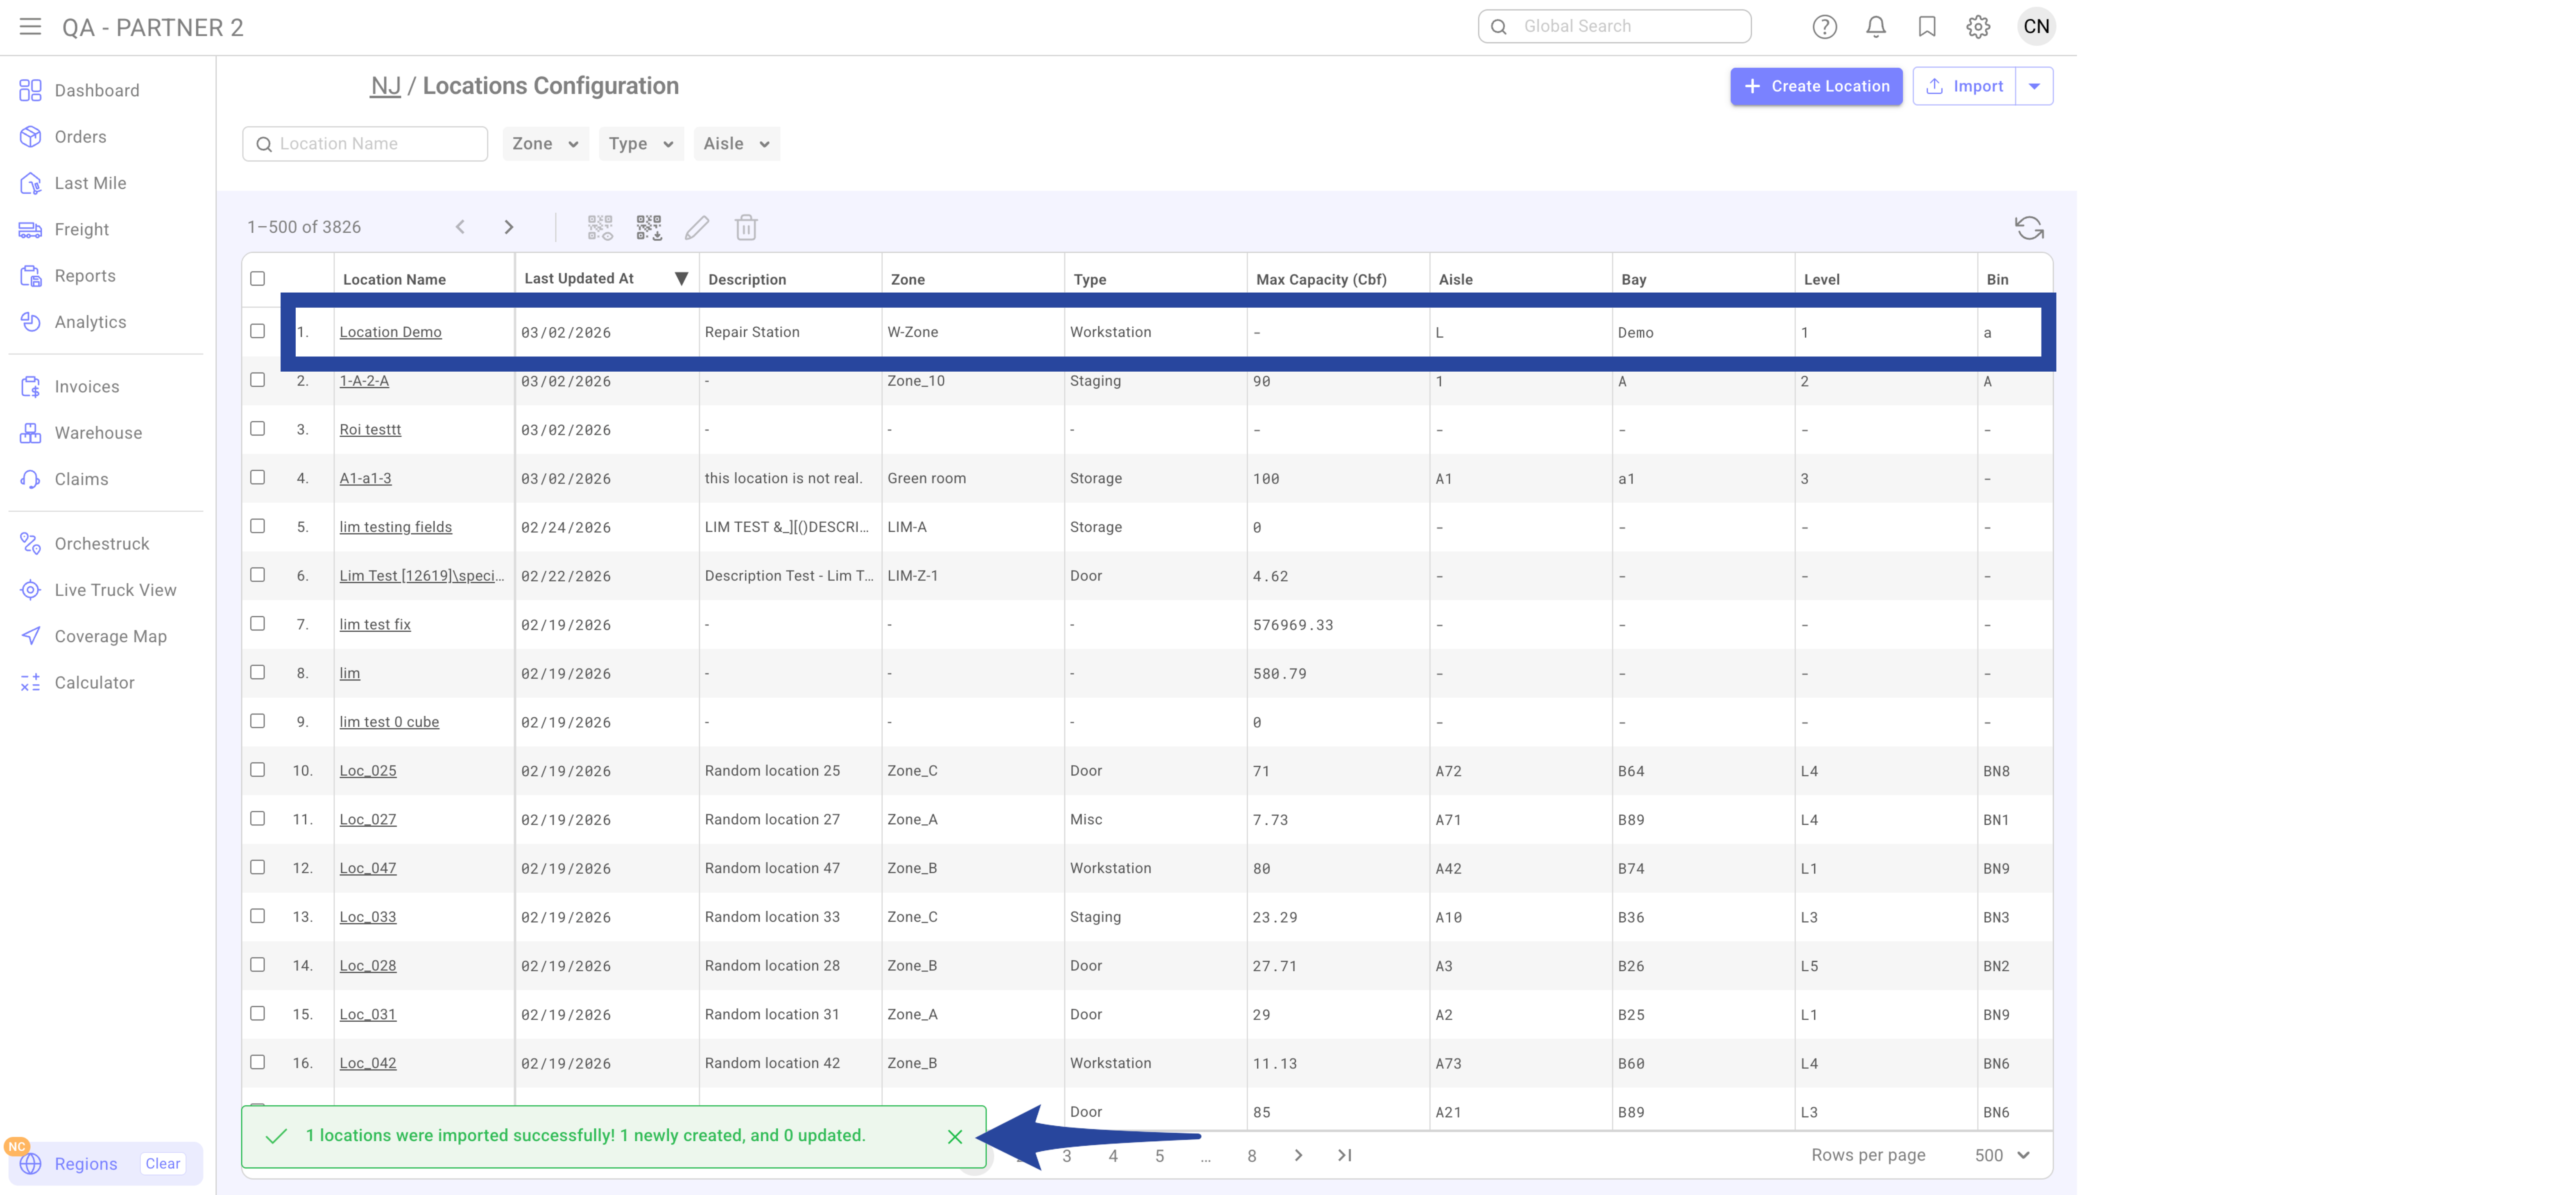
Confirmation that the location(s) has been successfully imported.Â
Â
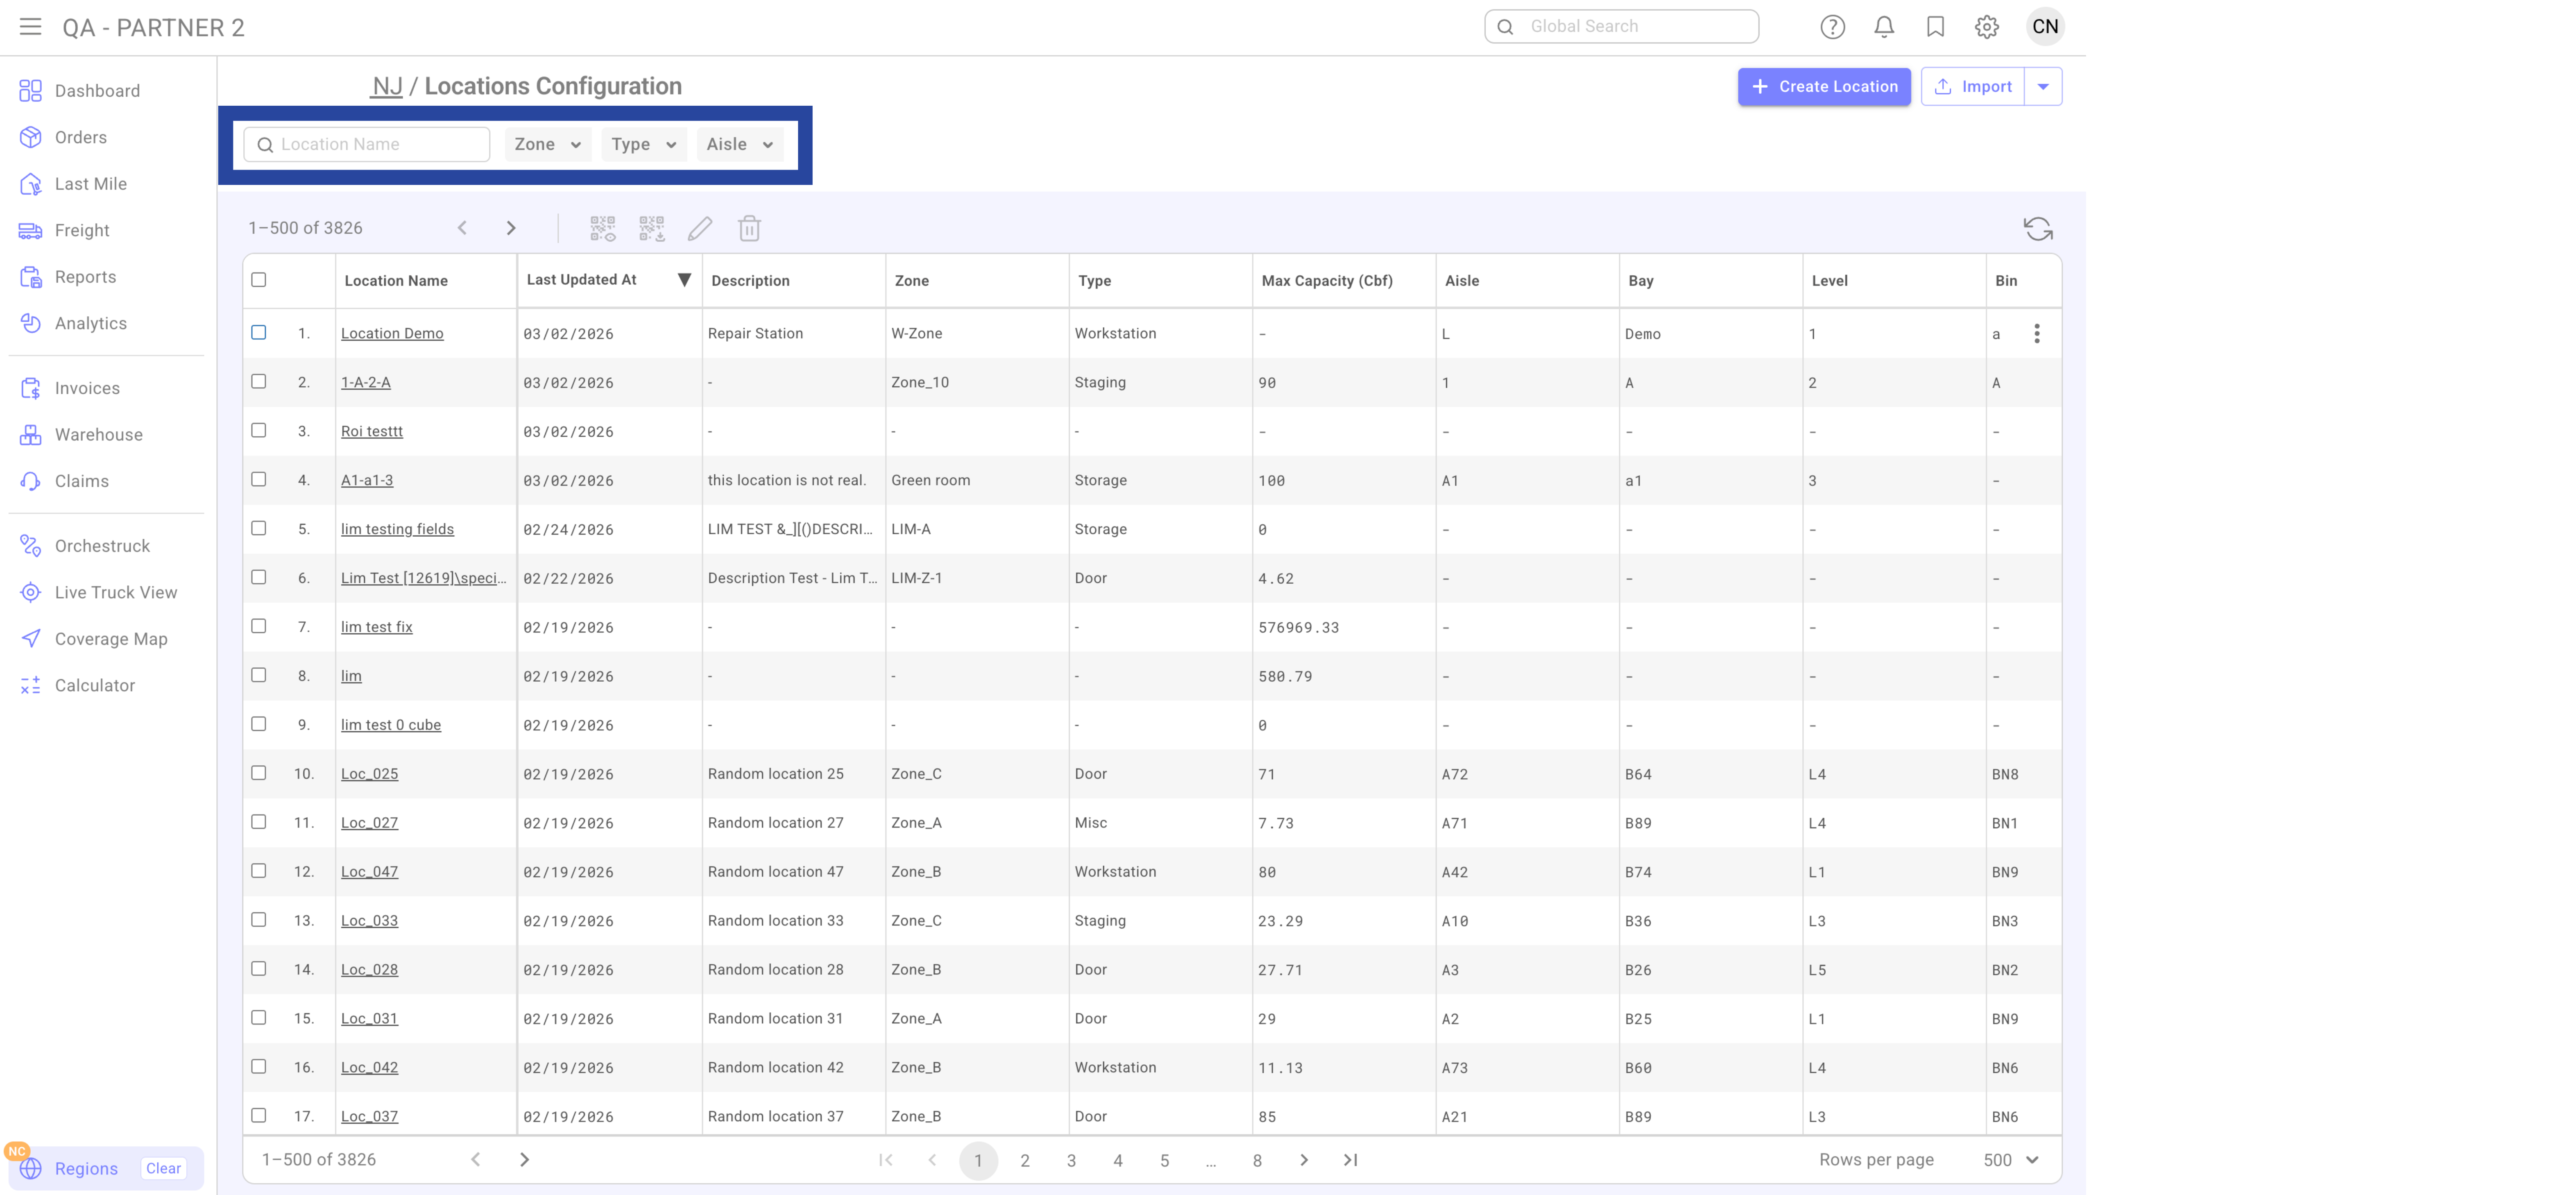
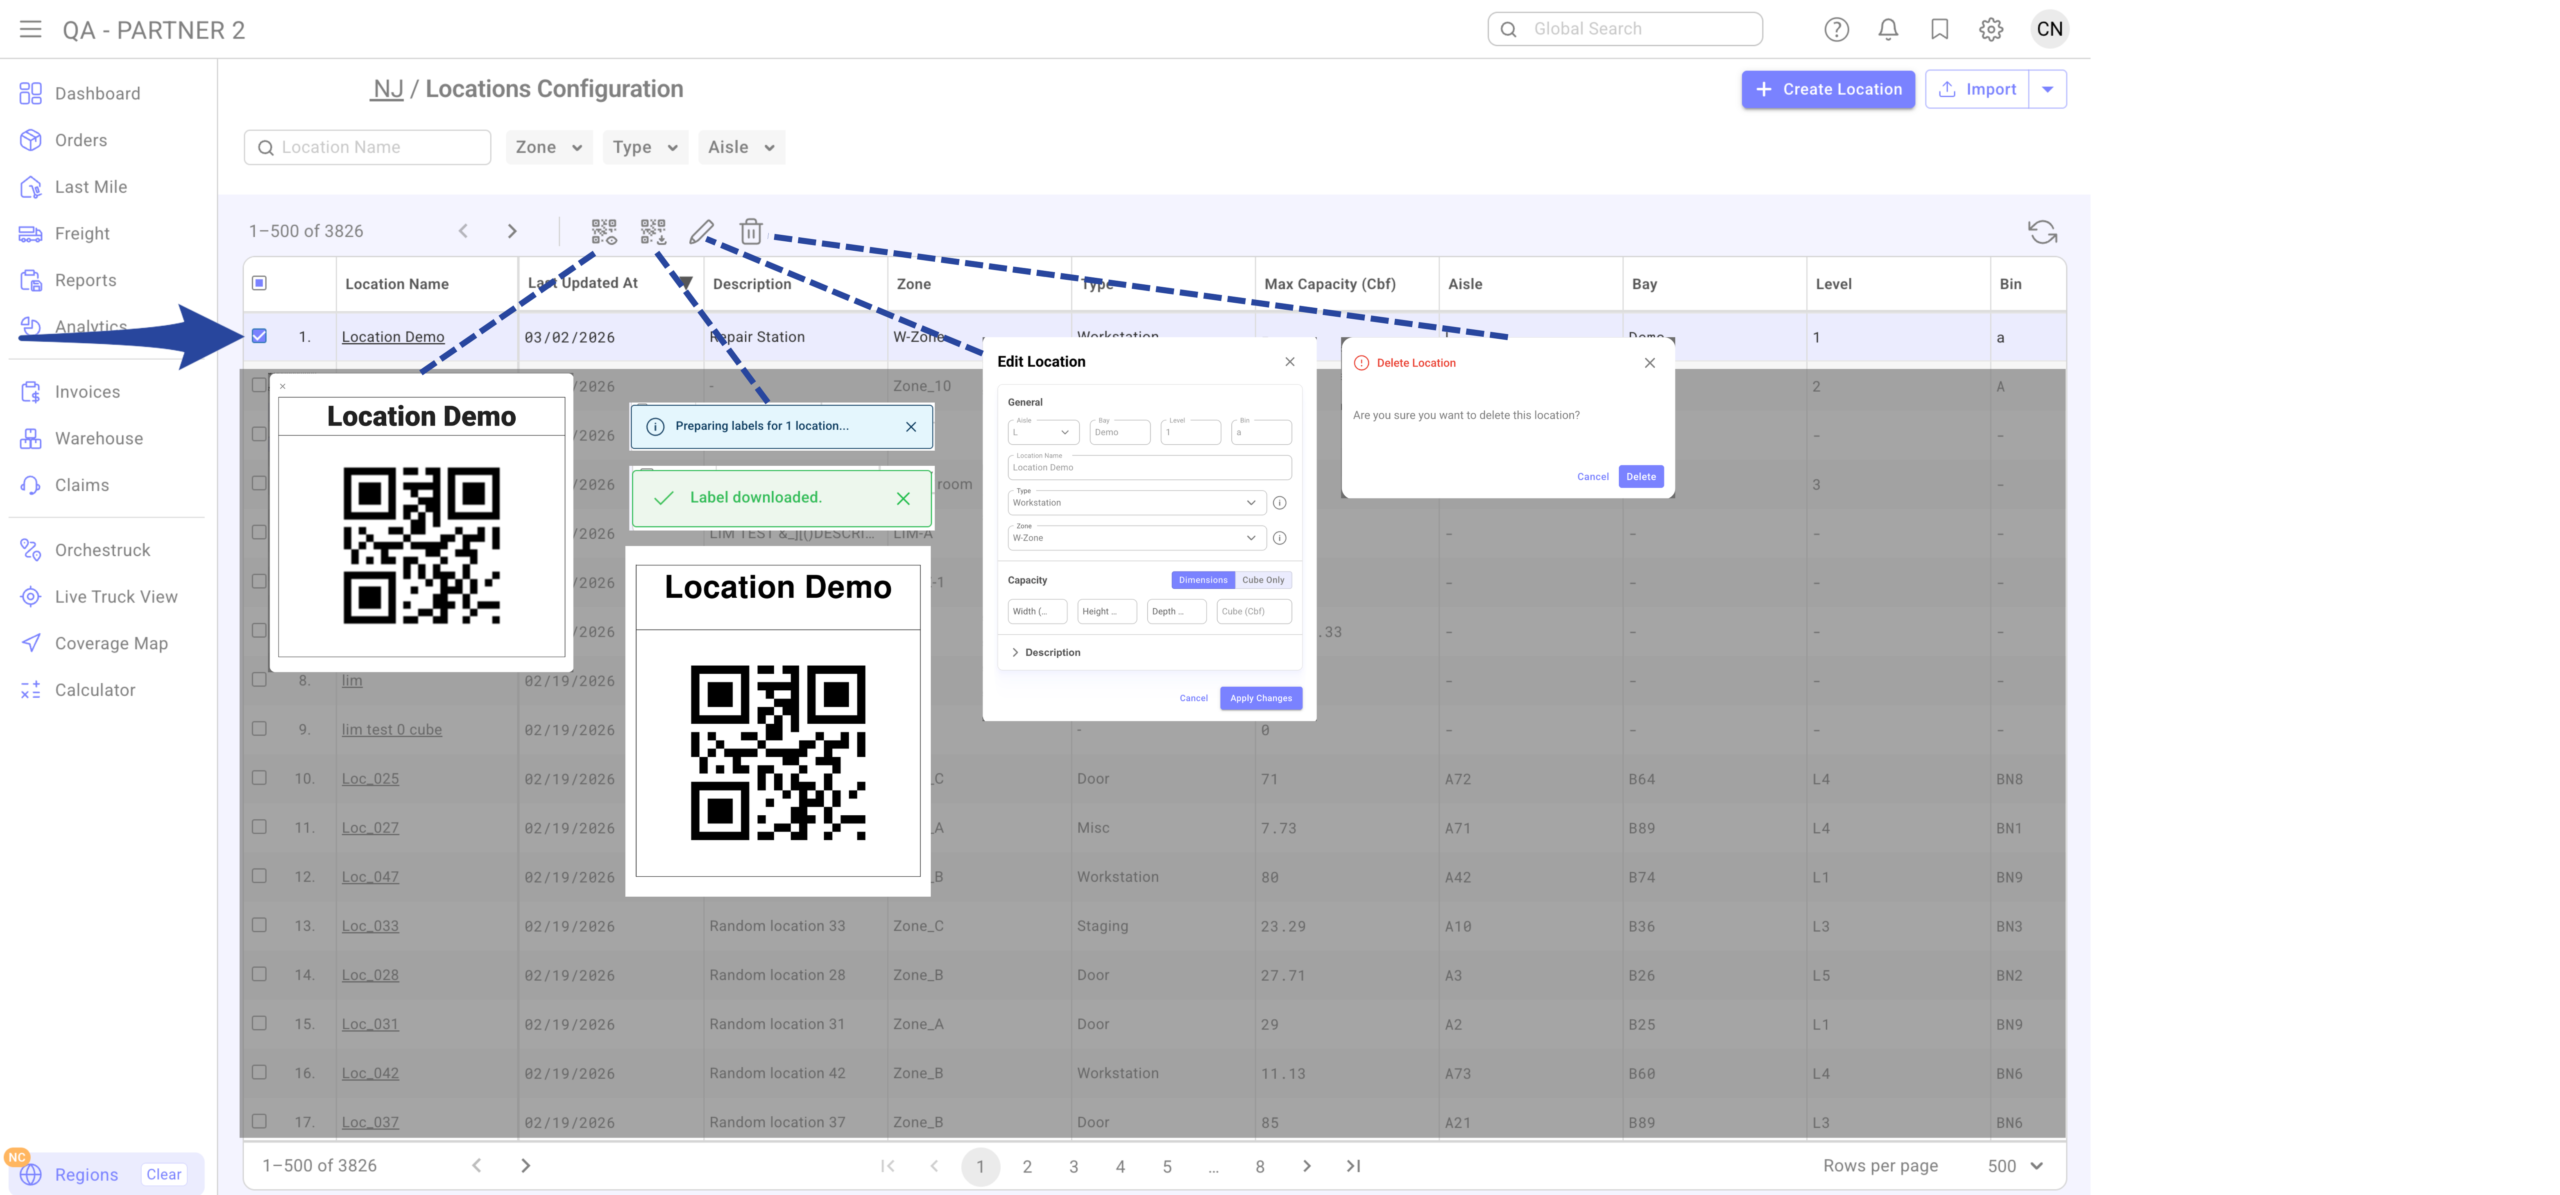
From the Locations Grid you can:
-
Search by name
-
Filter by:
-
Zone
-
Type
-
Aisle
-
-
Preview Labels
-
Download Labels (individual or bulk)
-
Edit Location
-
Delete Location
Â