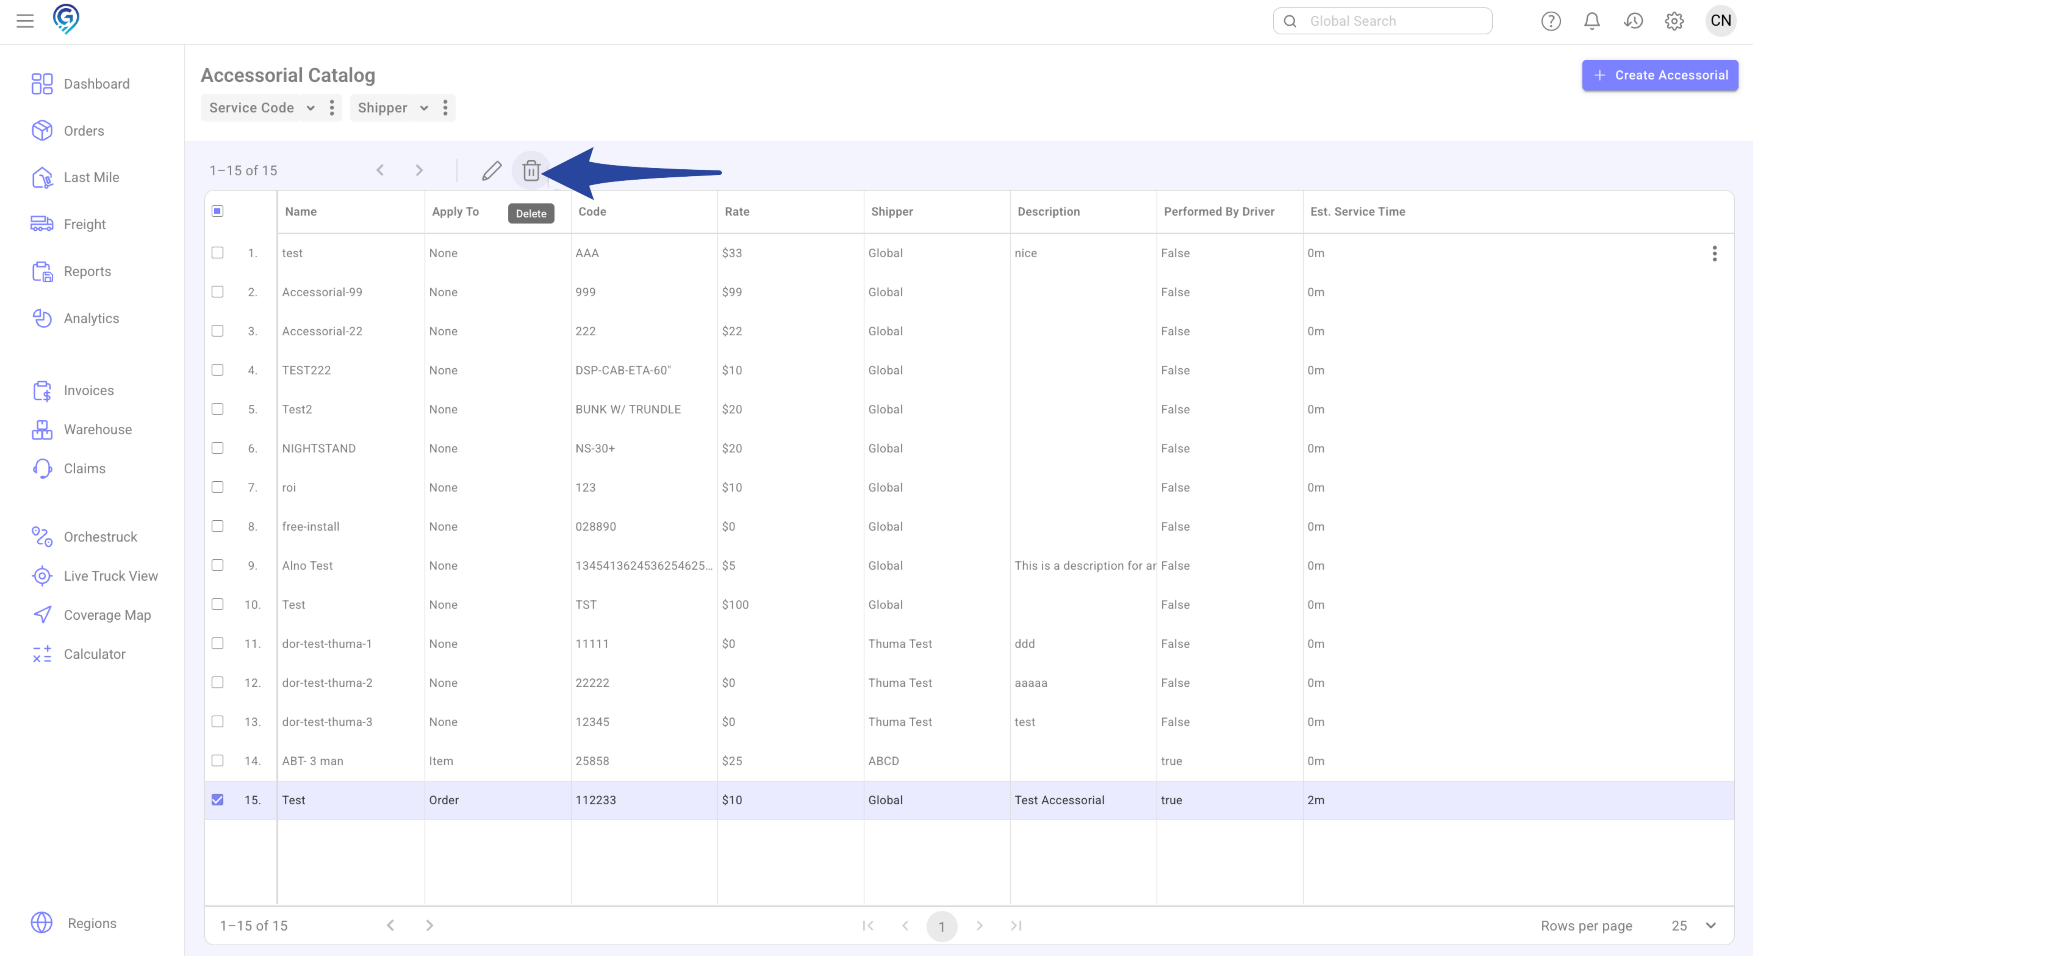
Follow the steps below to create, edit, or delete an Accessorial in the system:
Create Accessorial – Global
Step 1
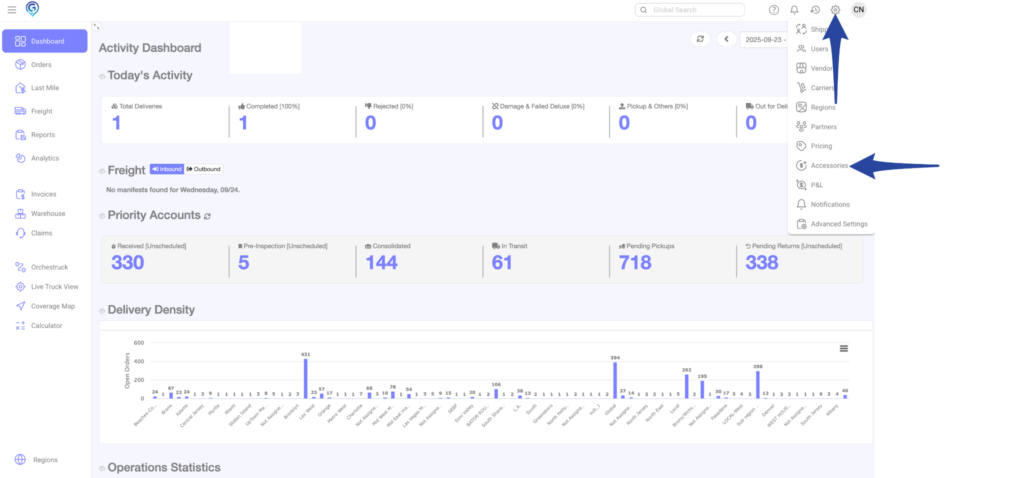
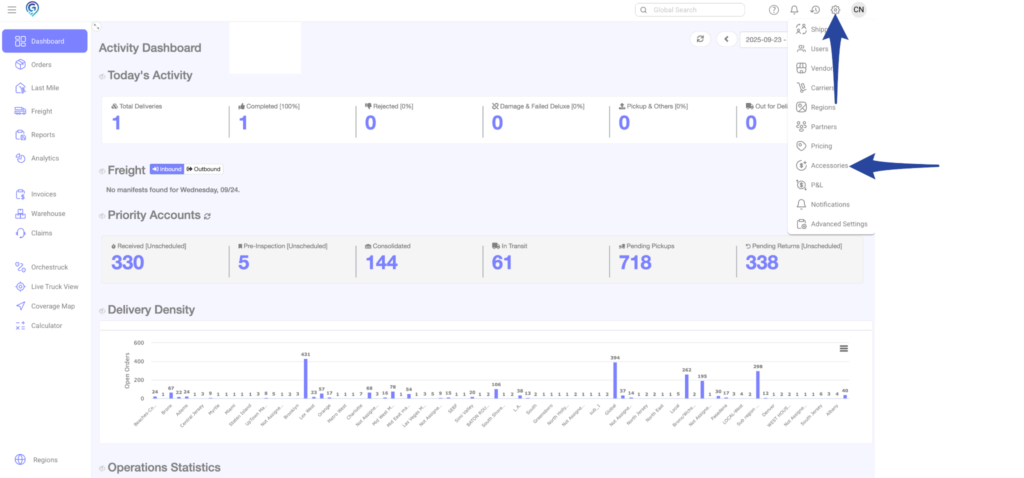
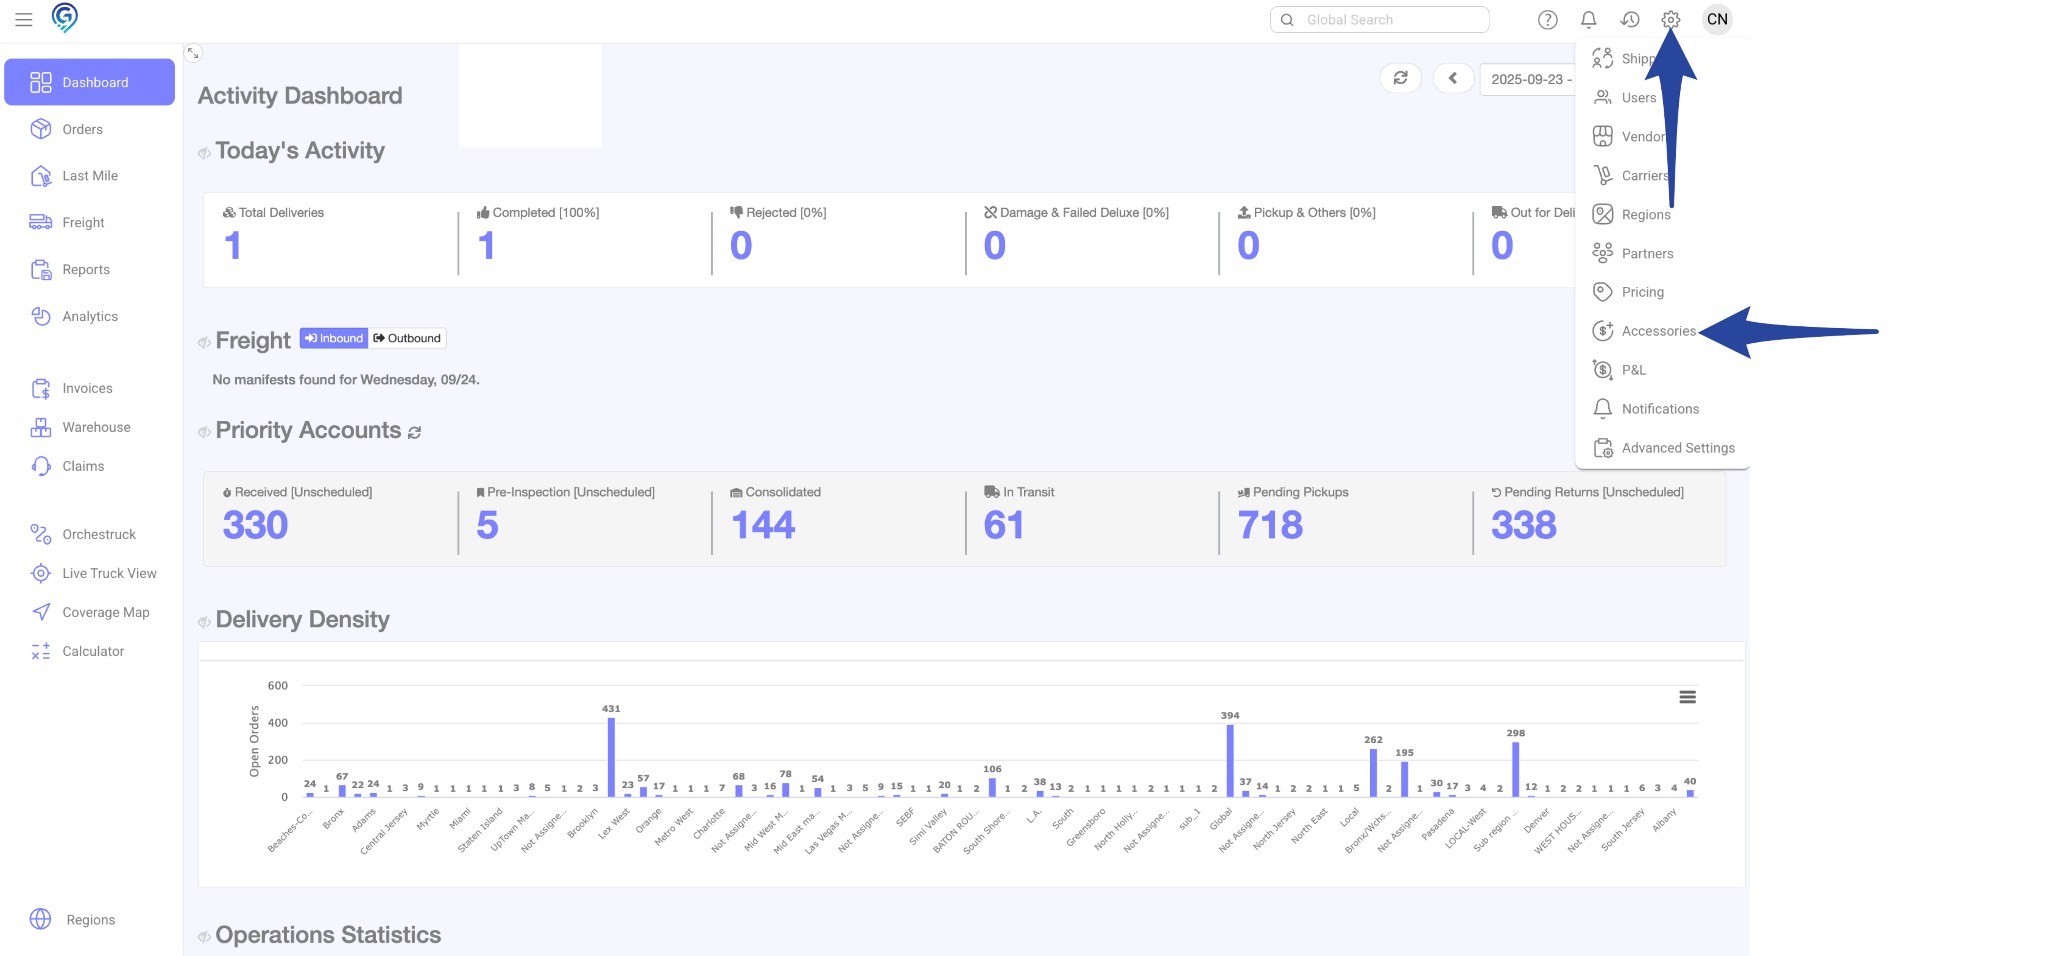
Click the Gear icon and select Accessories from the menu.
Step 2
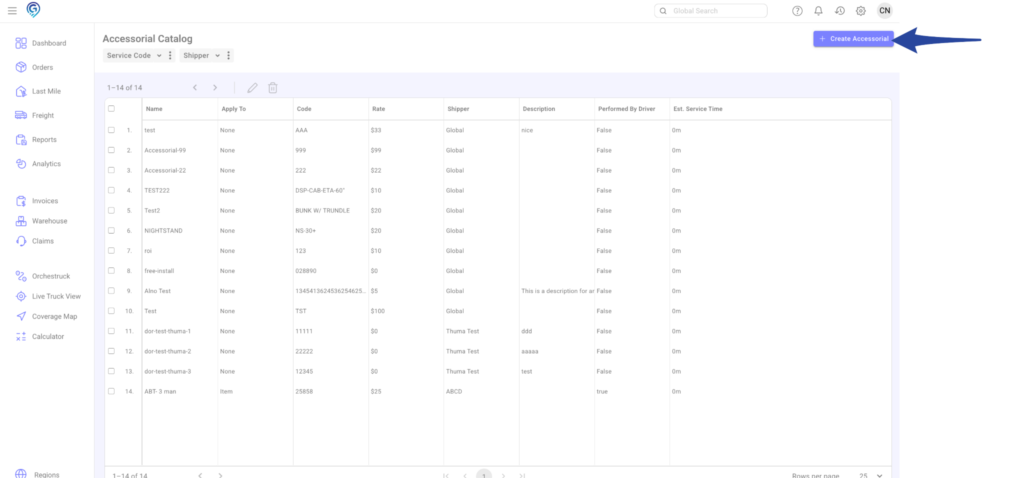
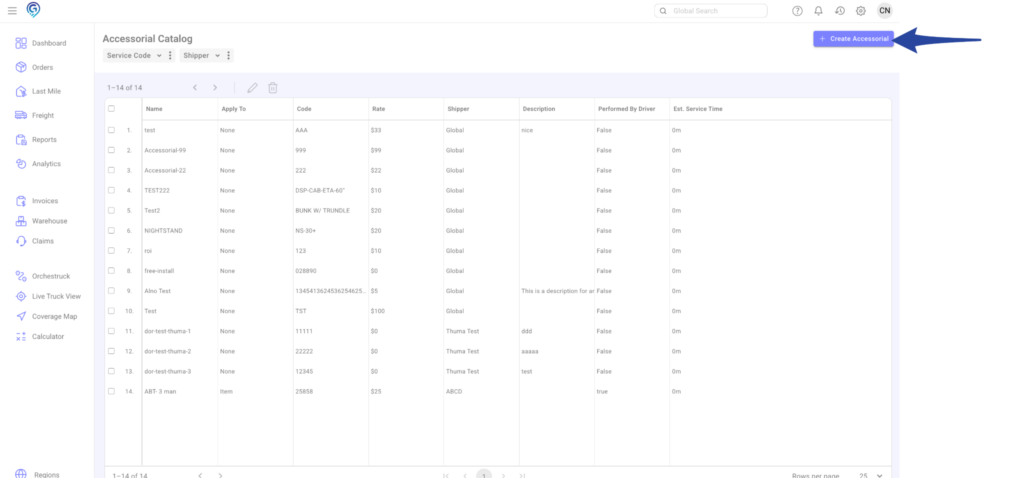
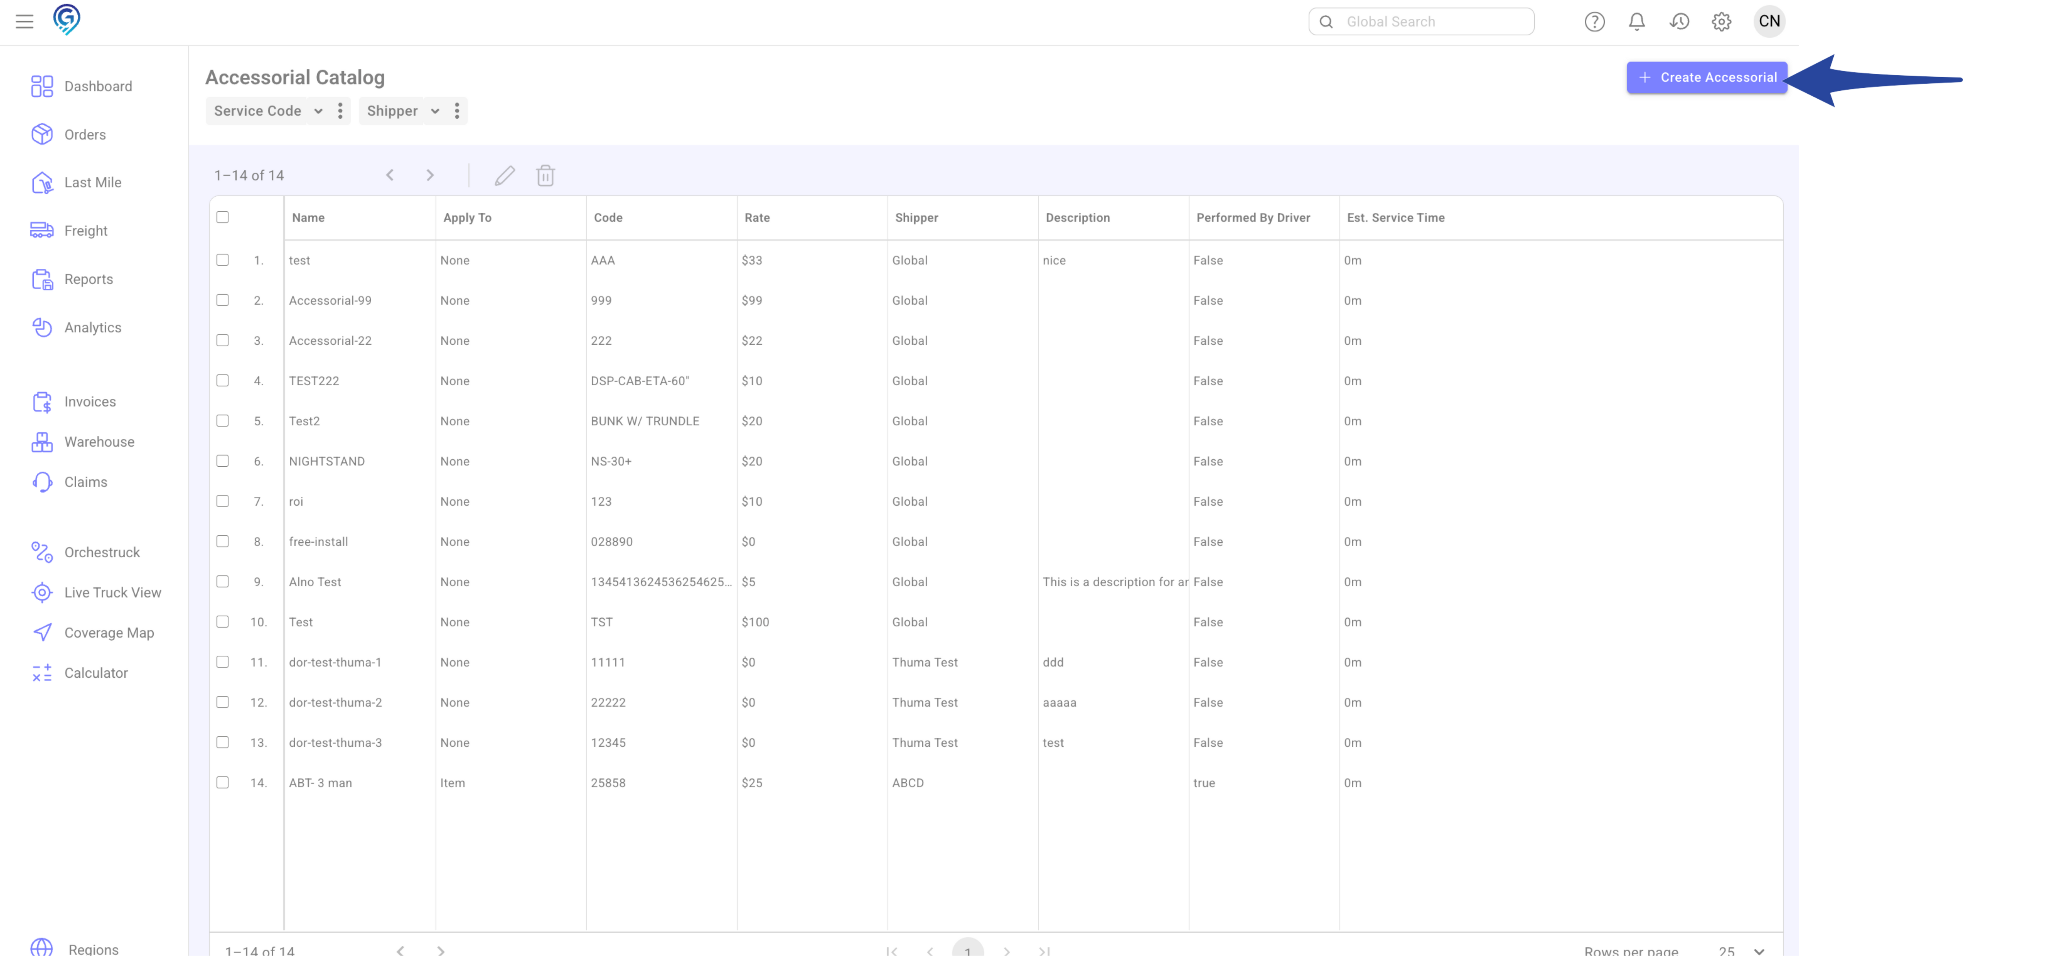
Click +Create Accessorial.
Step 3
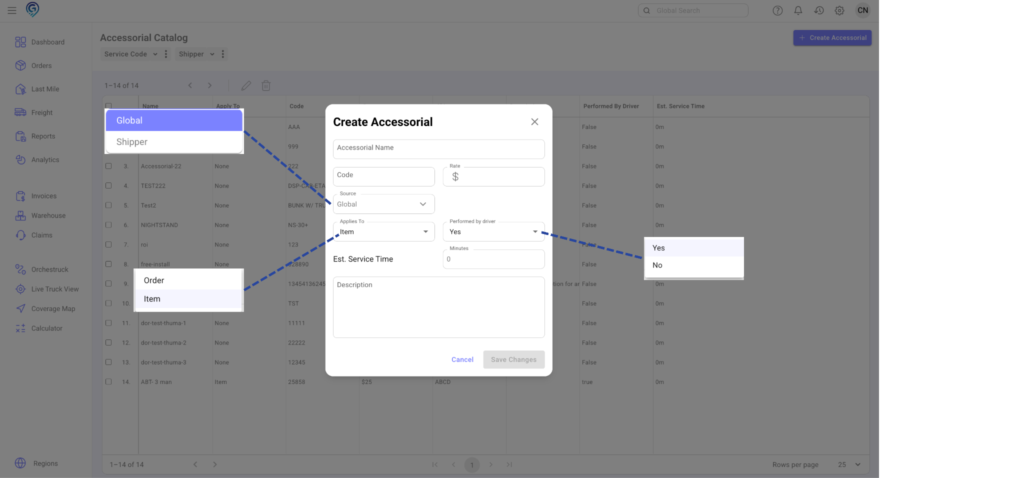
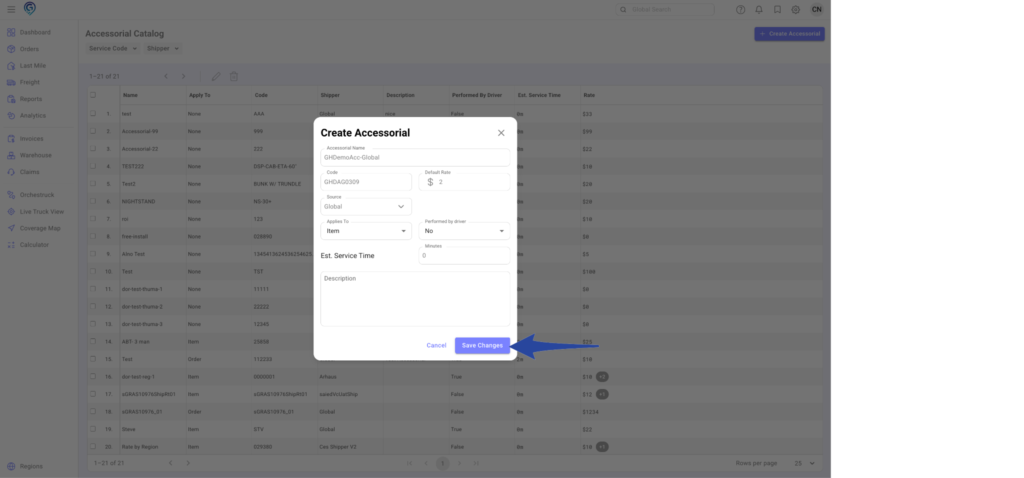
Enter Accessorial Details.
- Accessorial Name – Provide a descriptive name
- Code – Enter the code for this Accessorial
- Rate – Specify the rate
- Source
- Global – Applies to all orders
- Apply To – Decide whether this Accessorial applies to the entire order or to a specific item.
- Perform by Driver – Select Yes or No:
- Yes = visible in the Driver’s app
- No = not visible in the Driver’s app
- Minutes/Service Time – Optional
- Description – Optional
Step 4
Once complete, click Save Changes.
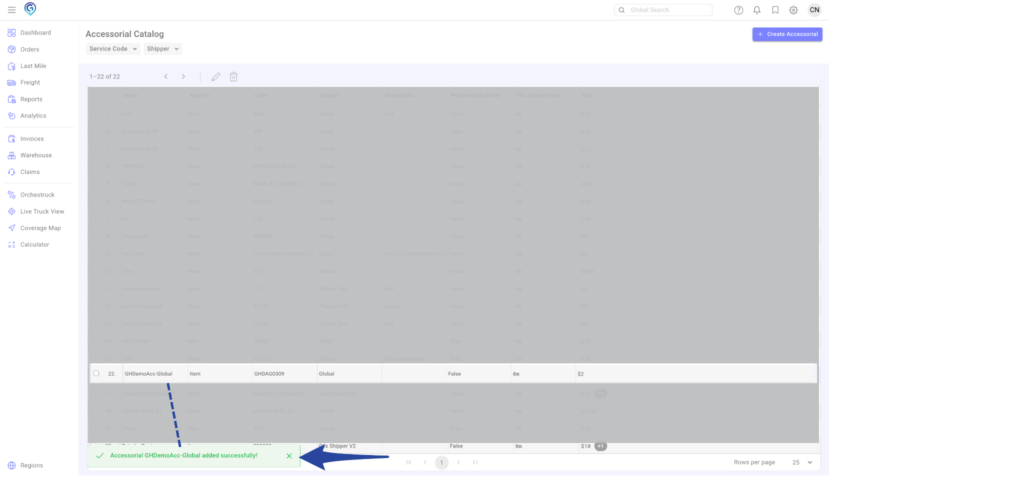
Confirmation that the Accessorial has been created.
Create Accessorial – Shipper
Step 1
Click the Gear icon and select Accessories from the menu.
Step 2
Click +Create Accessorial.
Step 3
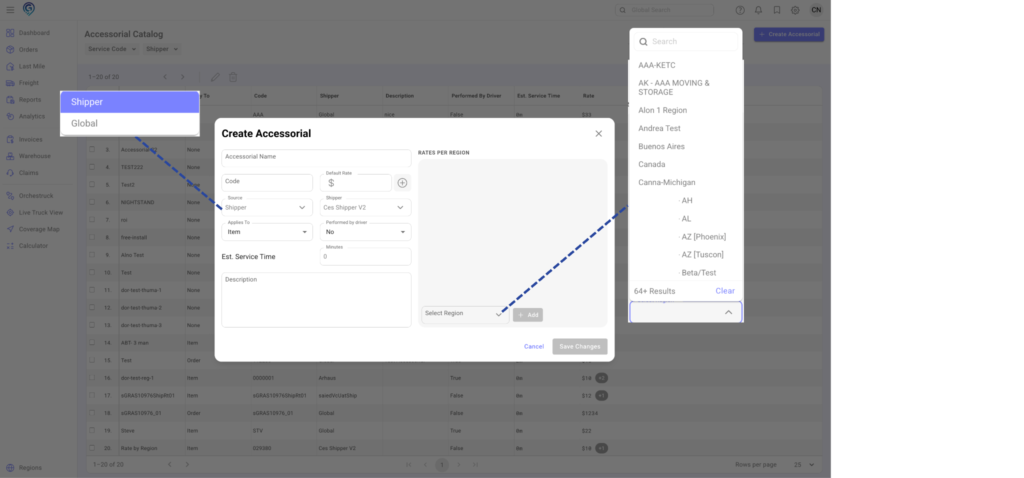
Enter Accessorial Details.
Fill out the required fields:
- Accessorial Name – Provide a descriptive name
- Code – Enter the code for this Accessorial
- Rate – Specify the rate
- Source
- Shipper – Applies only to a specific account (select the account from the list)
- Select Region – Any region chosen from the list can be assigned its own individual rate. If no region is selected, the default rate will apply, ensuring there is always a fallback when no regional rate has been set.
- Apply To – Decide whether this Accessorial applies to the entire order or to a specific item.
- Perform by Driver – Select Yes or No:
- Yes = visible in the Driver’s app
- No = not visible in the Driver’s app
- Minutes/Service Time – Optional
- Description – Optional
Step 4
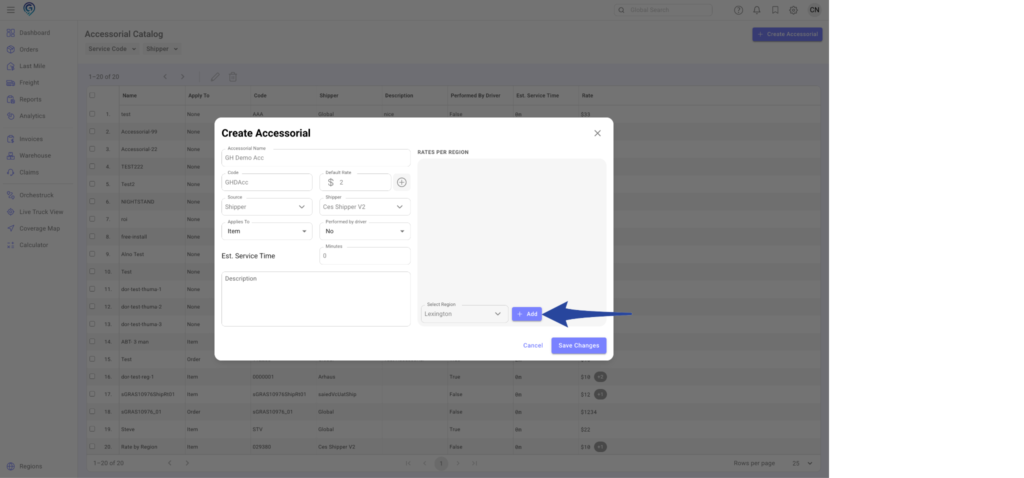
Click Add to create a rate for the selected Region.
Step 5
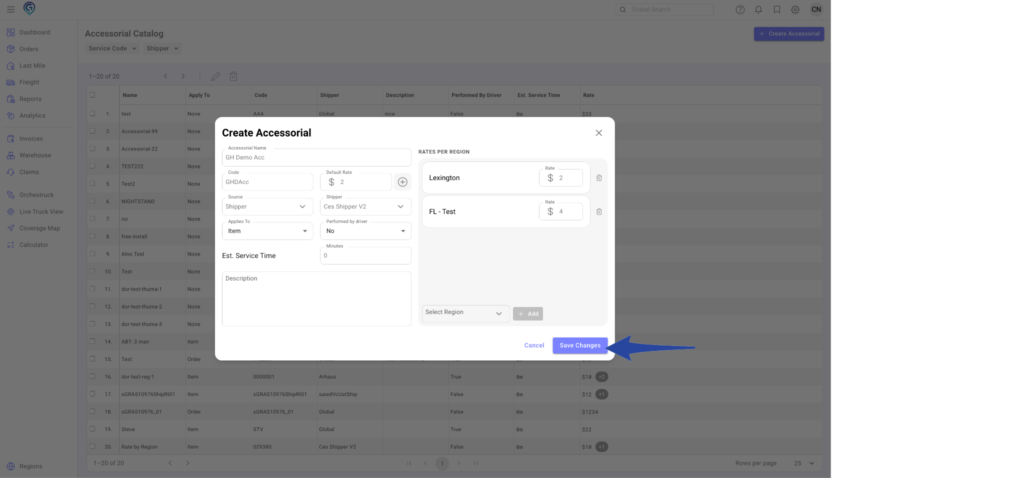
When done, click Save Changes.
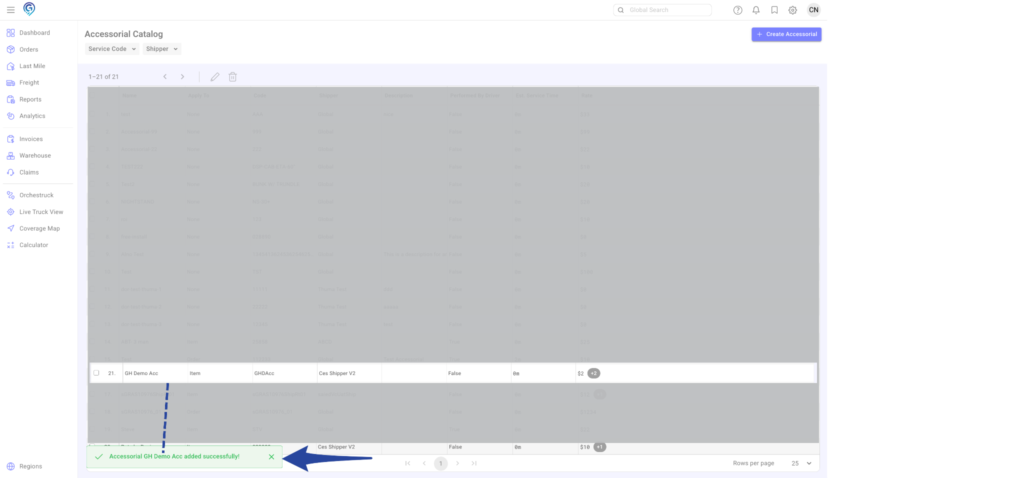
Confirmation that the Accessorial has been created.
Edit an Existing Accessorial
Step 1
Go to the Accessories list
Step 2
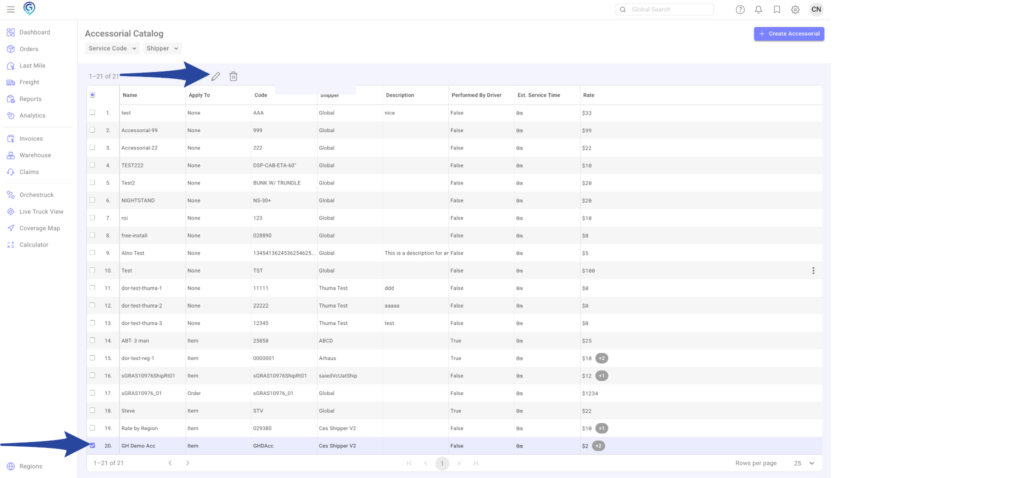
Select the Accessorial and click the Edit button (pencil icon)
- You can update the following fields:
- Accessorial Name
- Rate
- Perform by Driver (Yes/No)
- Minutes/Service Time
- Description
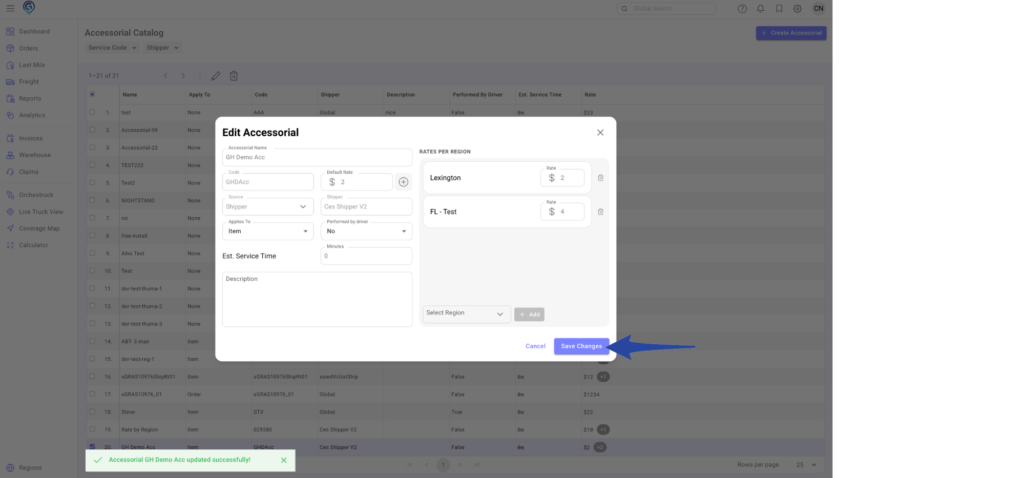
Note: You cannot edit the Code or Source (Global/Shipper)
Step 3
Click Save Changes to proceed
Delete an Accessorial
Step 1
From the Accessories list, select the Accessorial you want to delete.
.
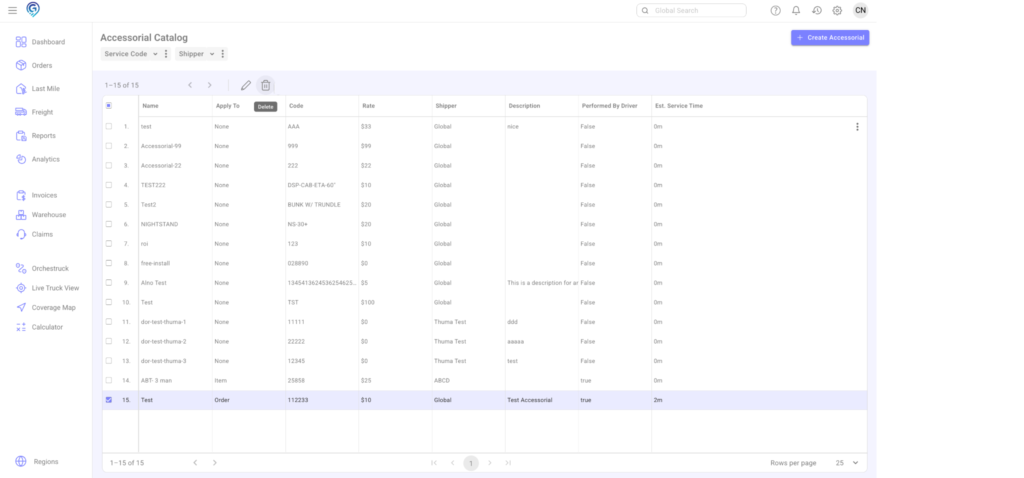
Step 2
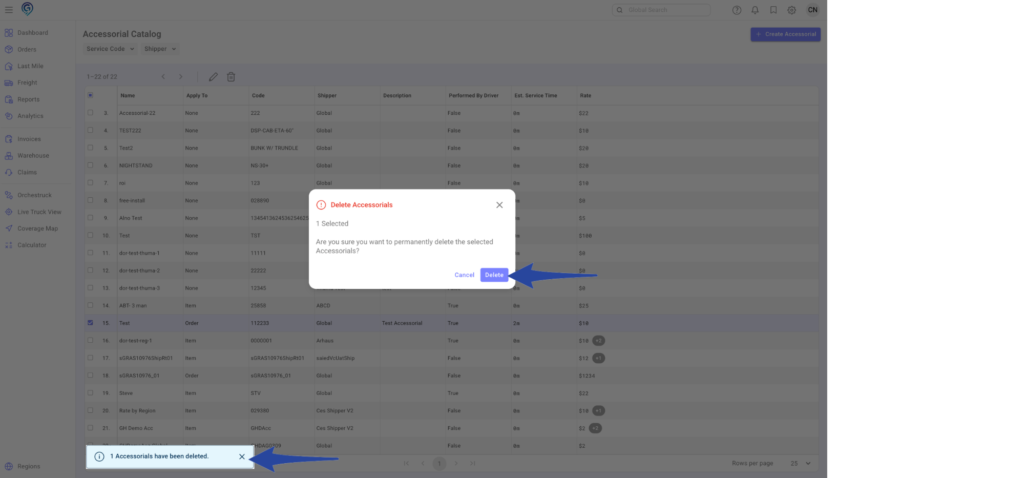
Click Delete (bin icon)
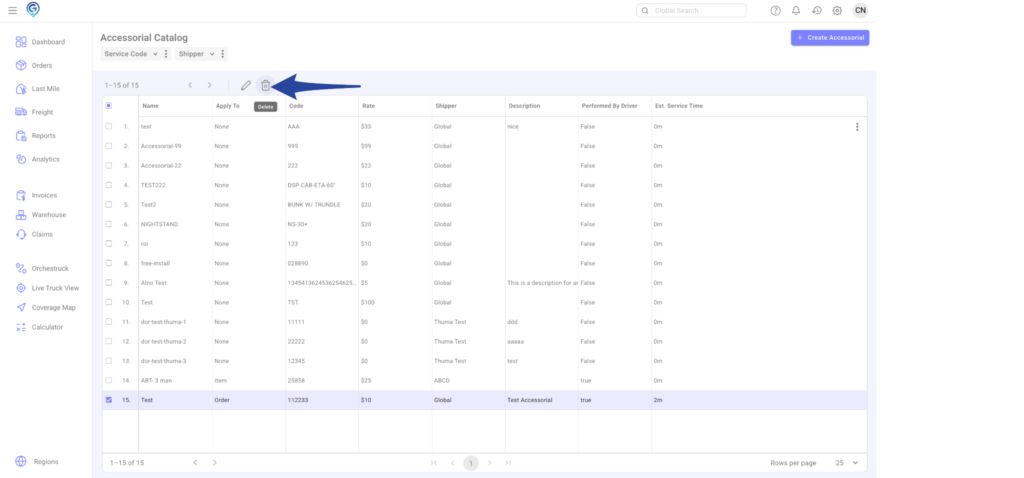
Step 3
Click Delete to proceed
Step 1: Open the Accessories Menu
- Click the Gear icon.
- Select Accessories from the menu.
Step 2: Create a New Accessorial
- Click + Create Accessorial.
Step 3: Enter Accessorial Details
Fill out the required fields:
Accessorial Name – Provide a descriptive name
- Code – Enter the code for this Accessorial
- Rate – Specify the rate
- Source – Choose one of the following:
- Global – Applies to all orders
- Shipper – Applies only to a specific account (select the account from the list)
- Global – Applies to all orders
- Apply To – Decide whether this Accessorial applies to the entire order or to a specific item.
- Perform by Driver – Select Yes or No:
- Yes = visible in the Driver’s app
- No = not visible in the Driver’s app
- Yes = visible in the Driver’s app
- Minutes/Service Time – Optional
- Description – Optional
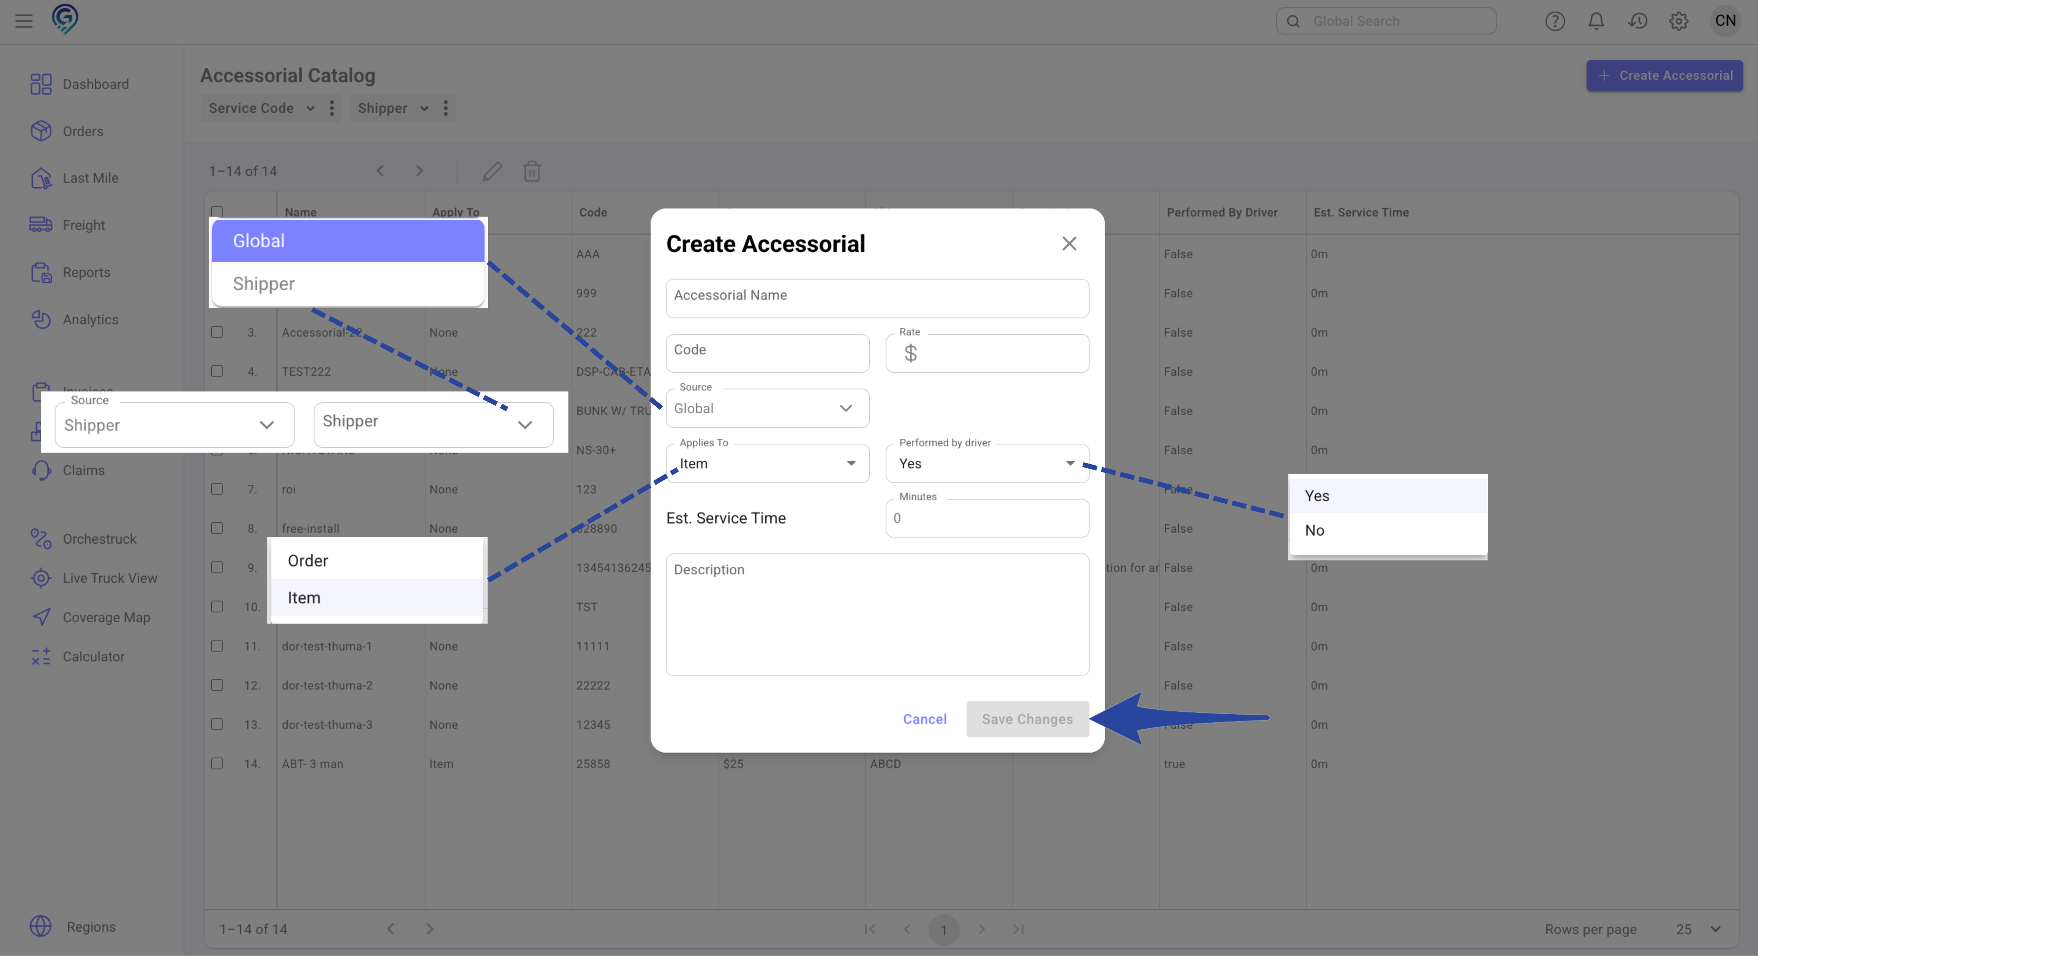
Once complete, click Save Changes.
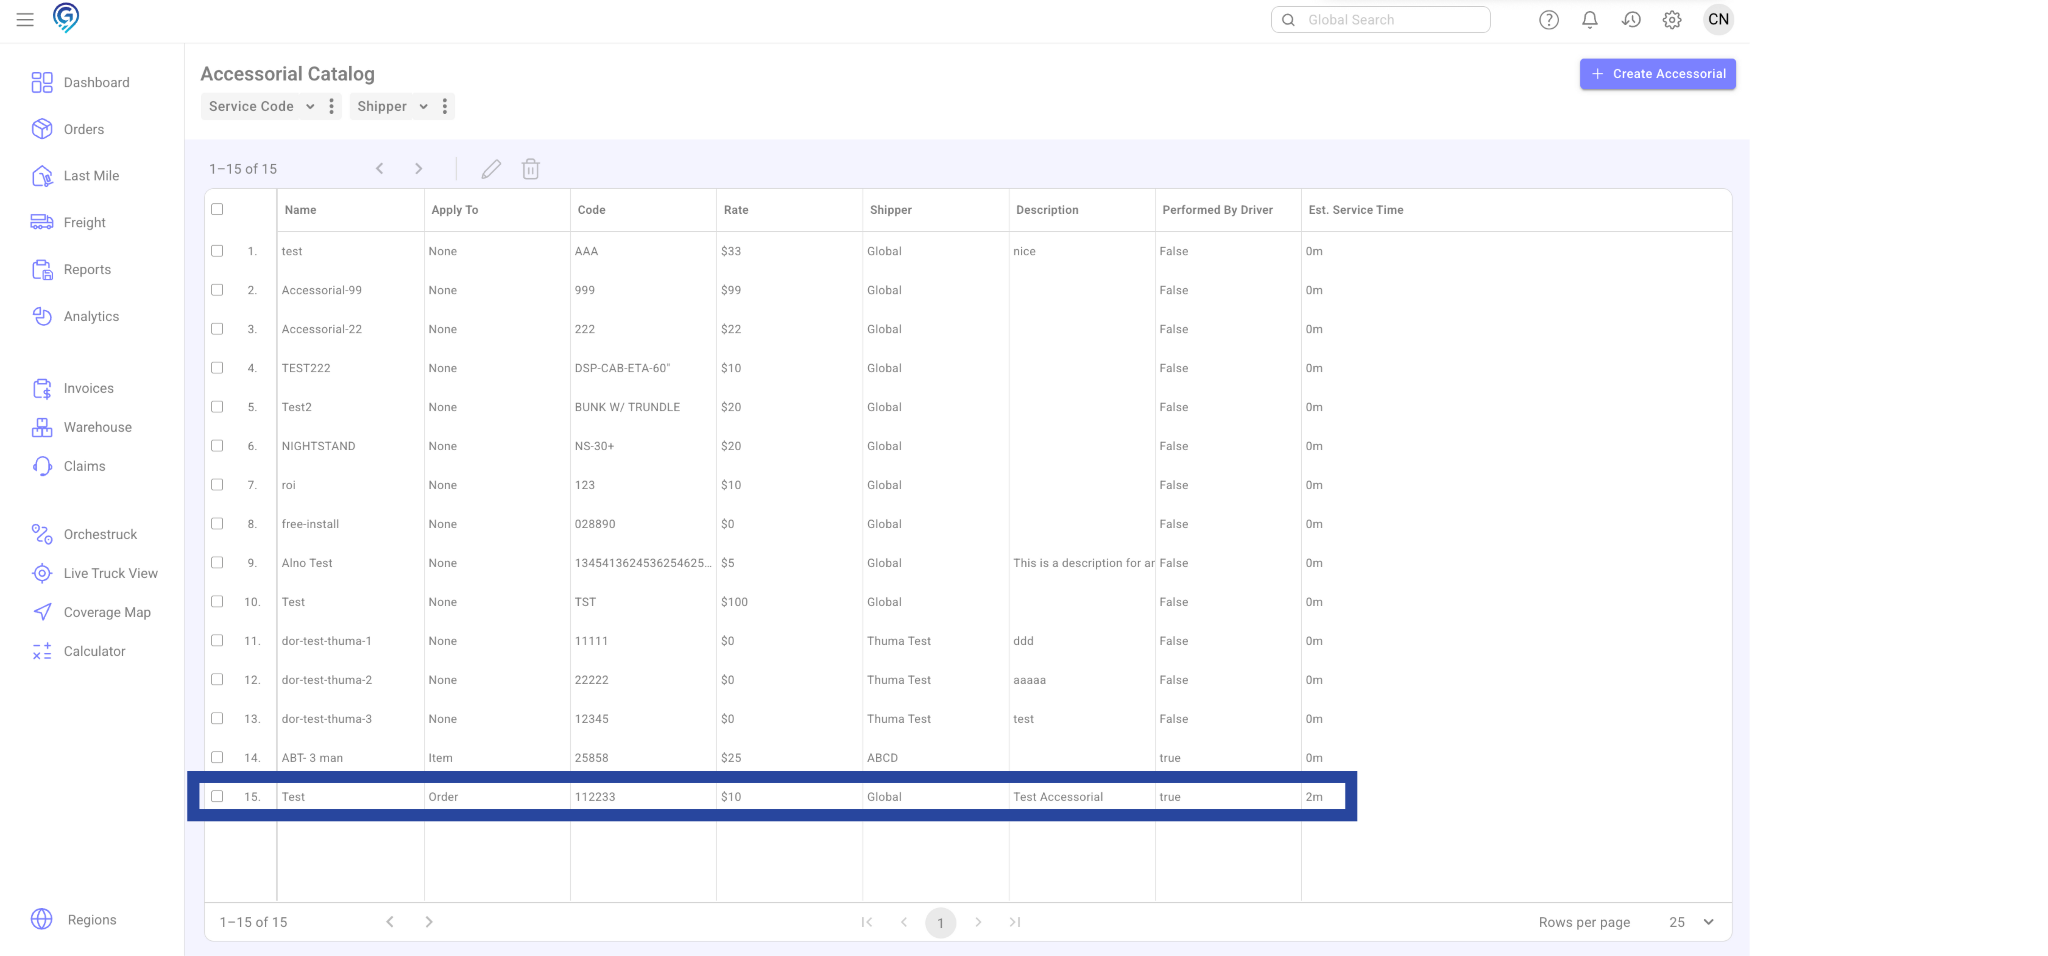
Edit an Existing Accessorial
- Go to the Accessories list
- Select the Accessorial and click the Edit button (pencil icon)
- You can update the following fields:
- Accessorial Name
- Rate
- Perform by Driver (Yes/No)
- Minutes/Service Time
- Description
- Accessorial Name
- Note: You cannot edit the Code or Source (Global/Shipper)
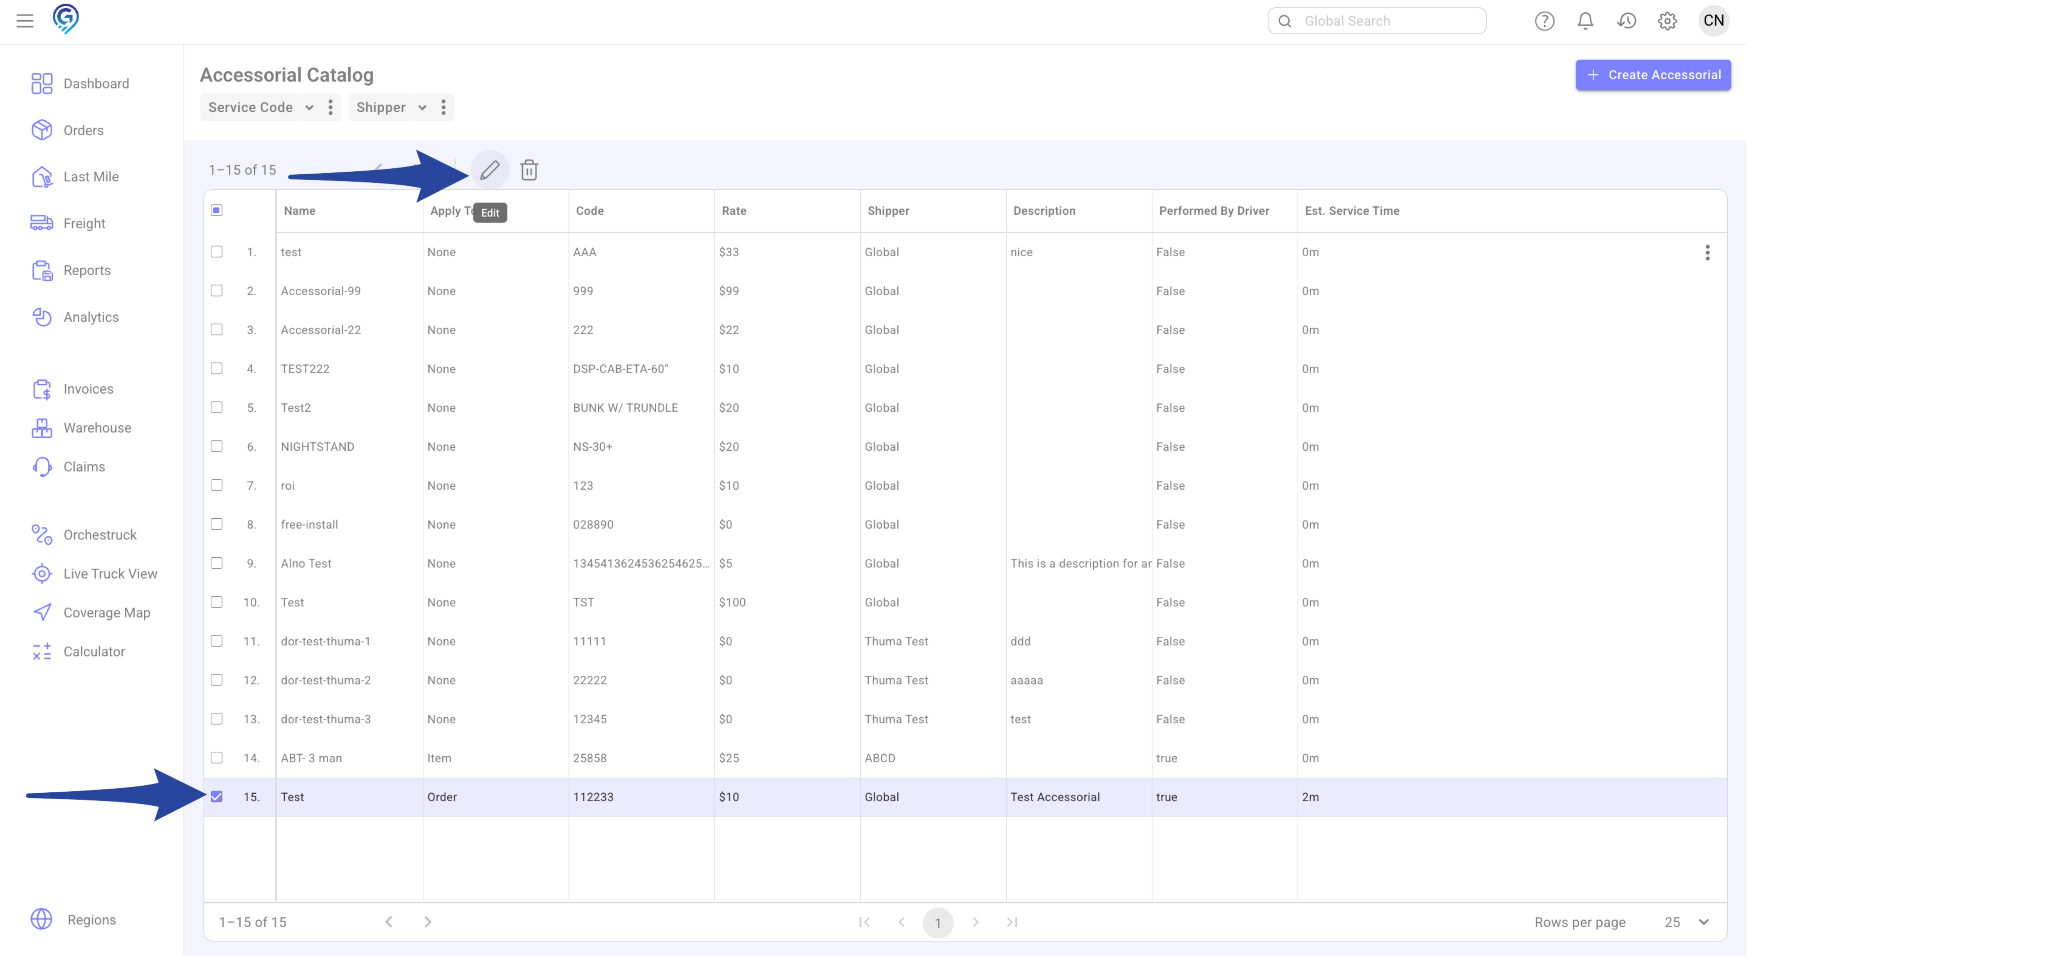
Delete an Accessorial
- From the Accessories list, select the Accessorial you want to remove.
- Click the Delete option (bin icon)