Step 1
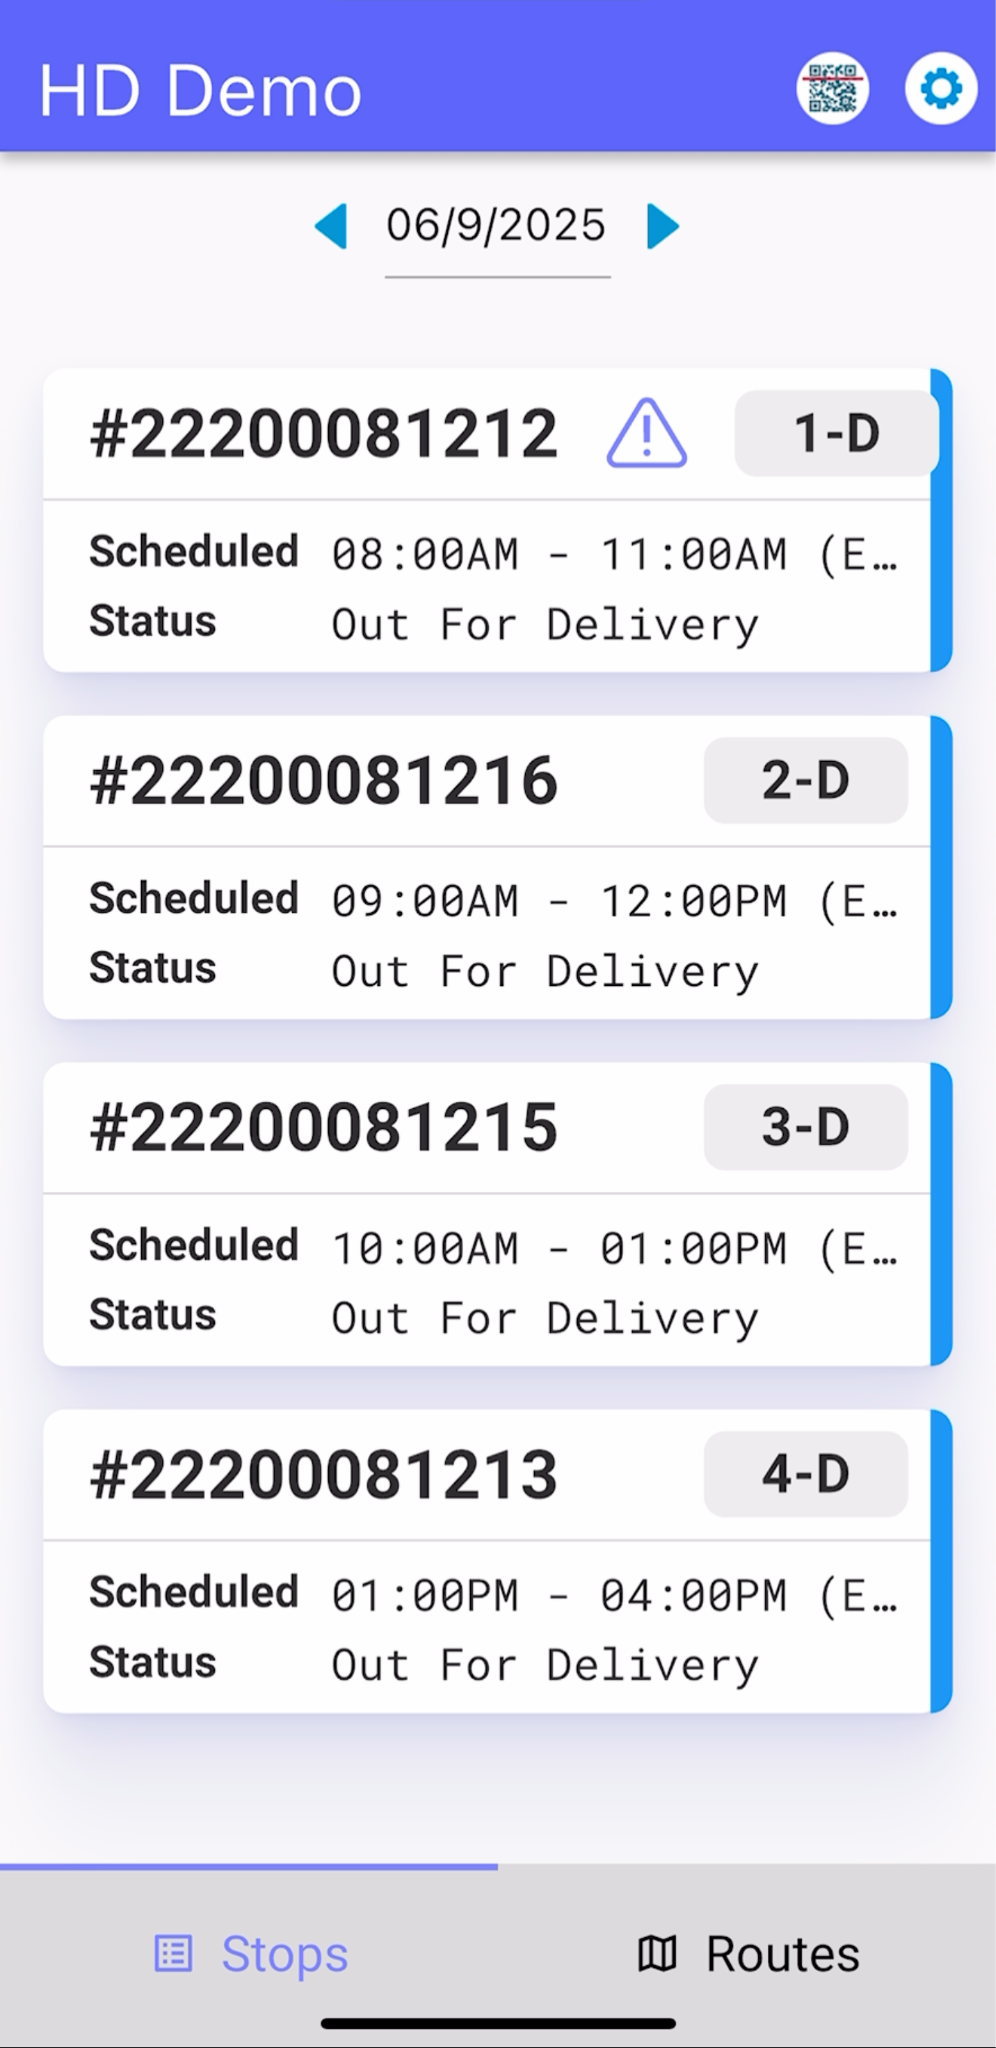
Choose the stop or order to be completed
Step 2
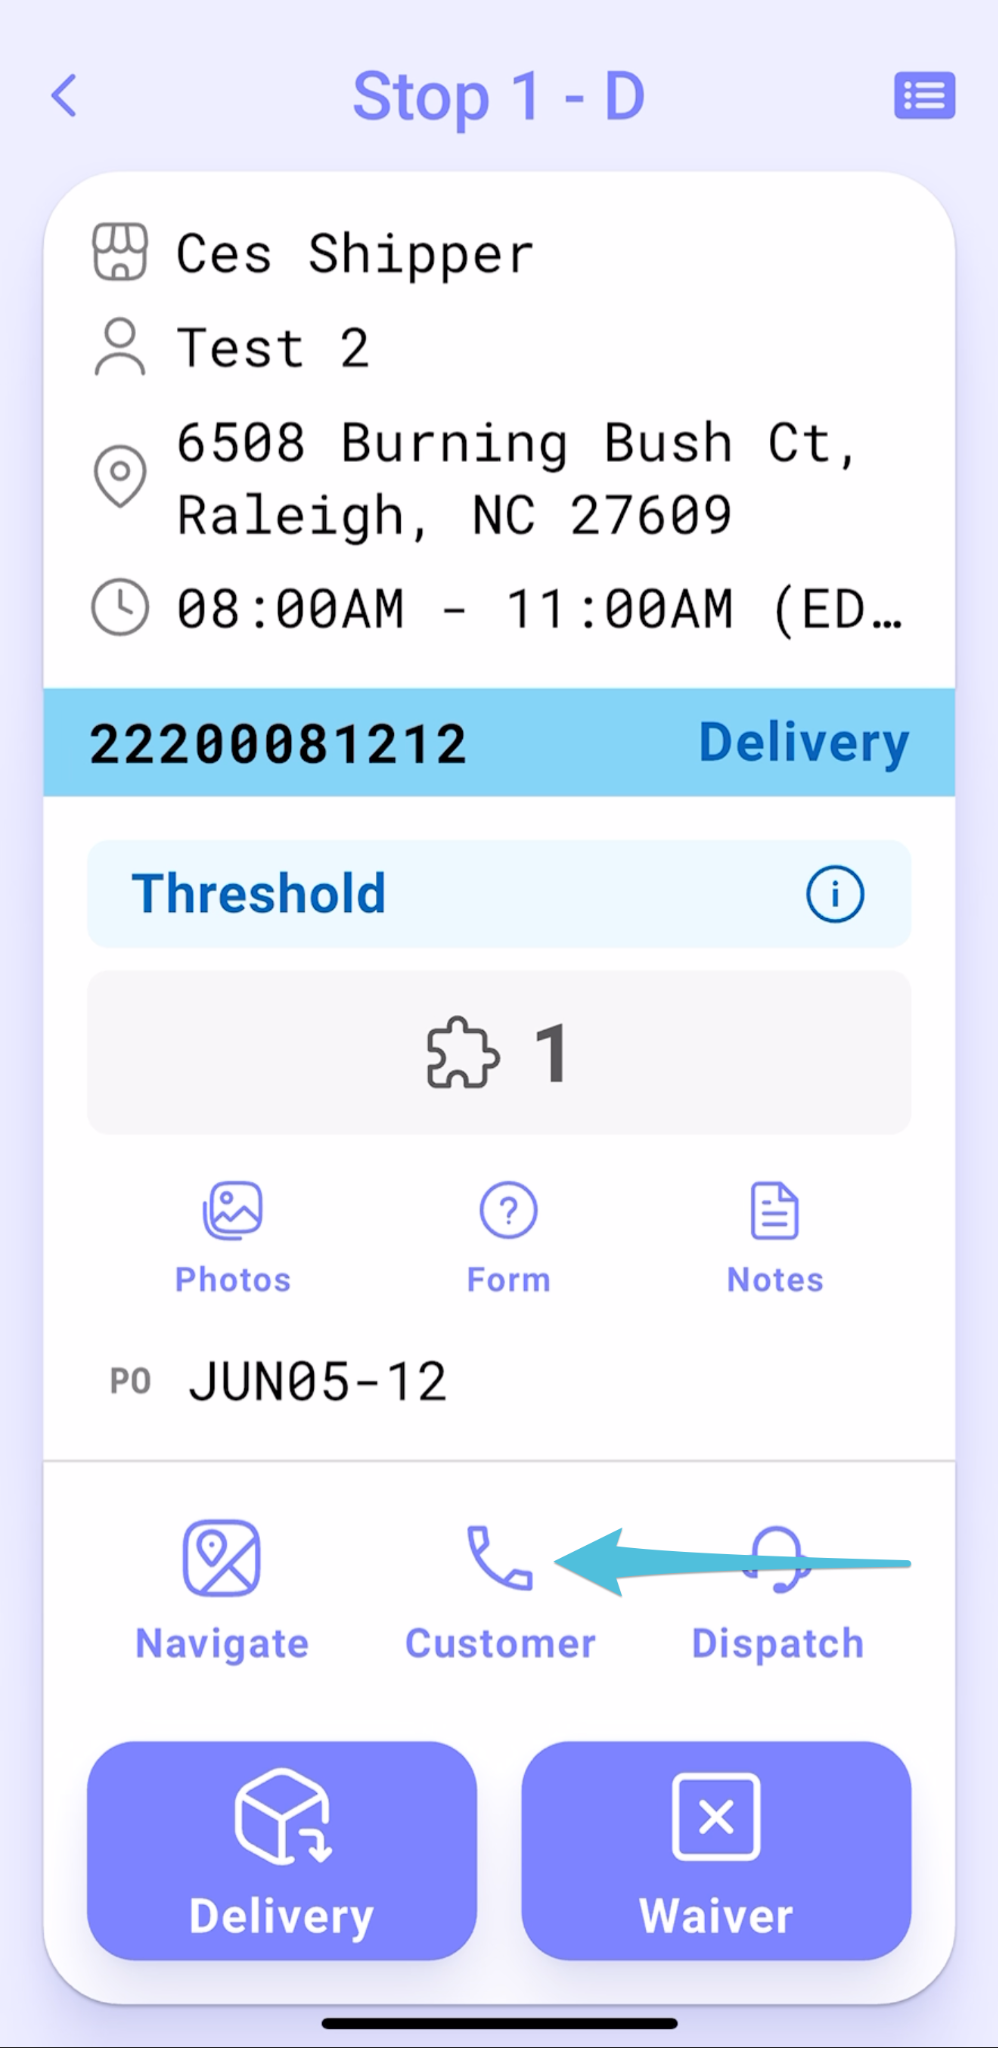
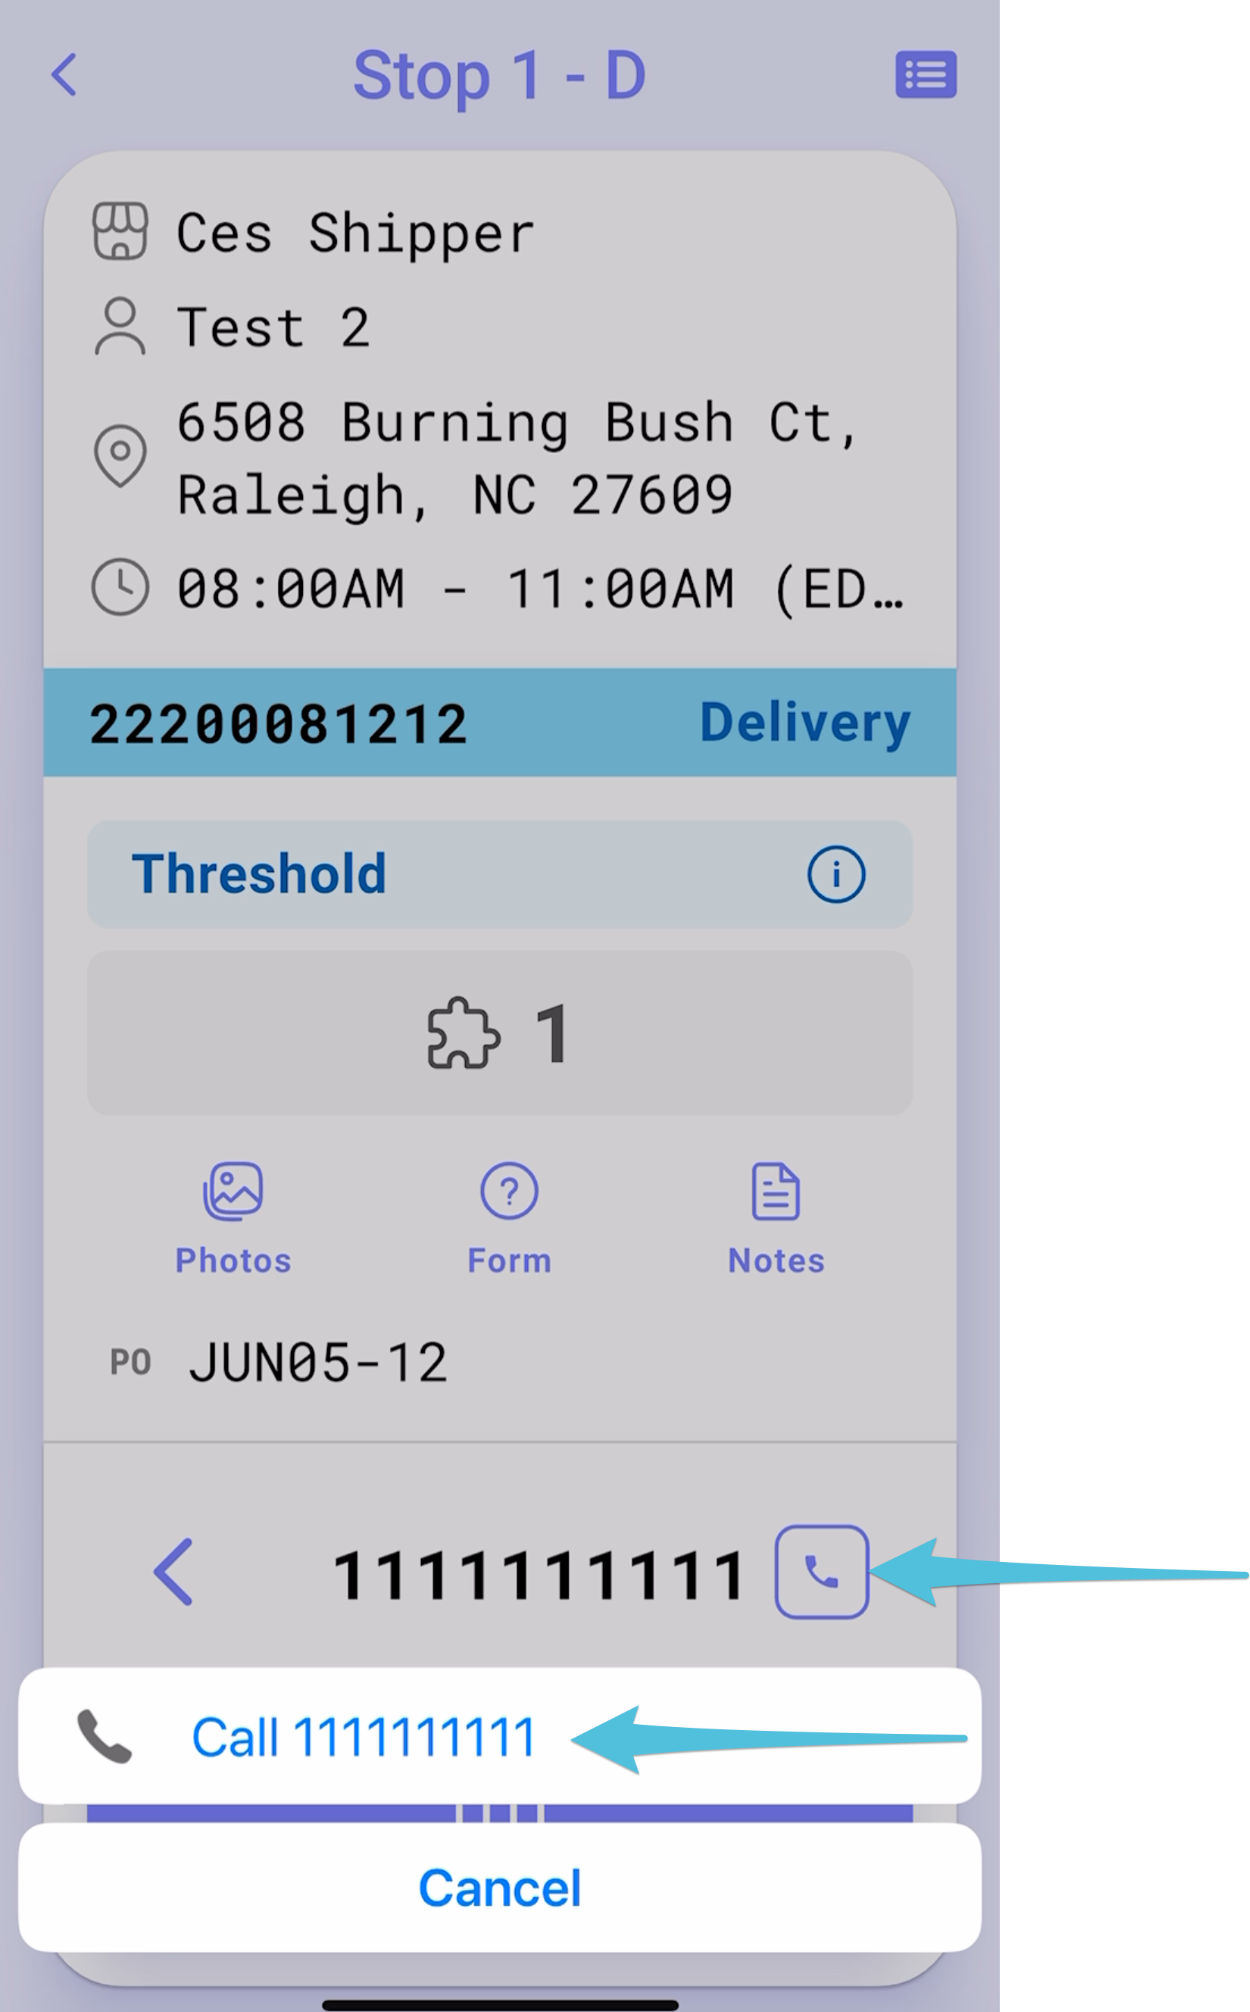
Tap on Customer Phone icon then the contact number to make a Pre-call
Step 3
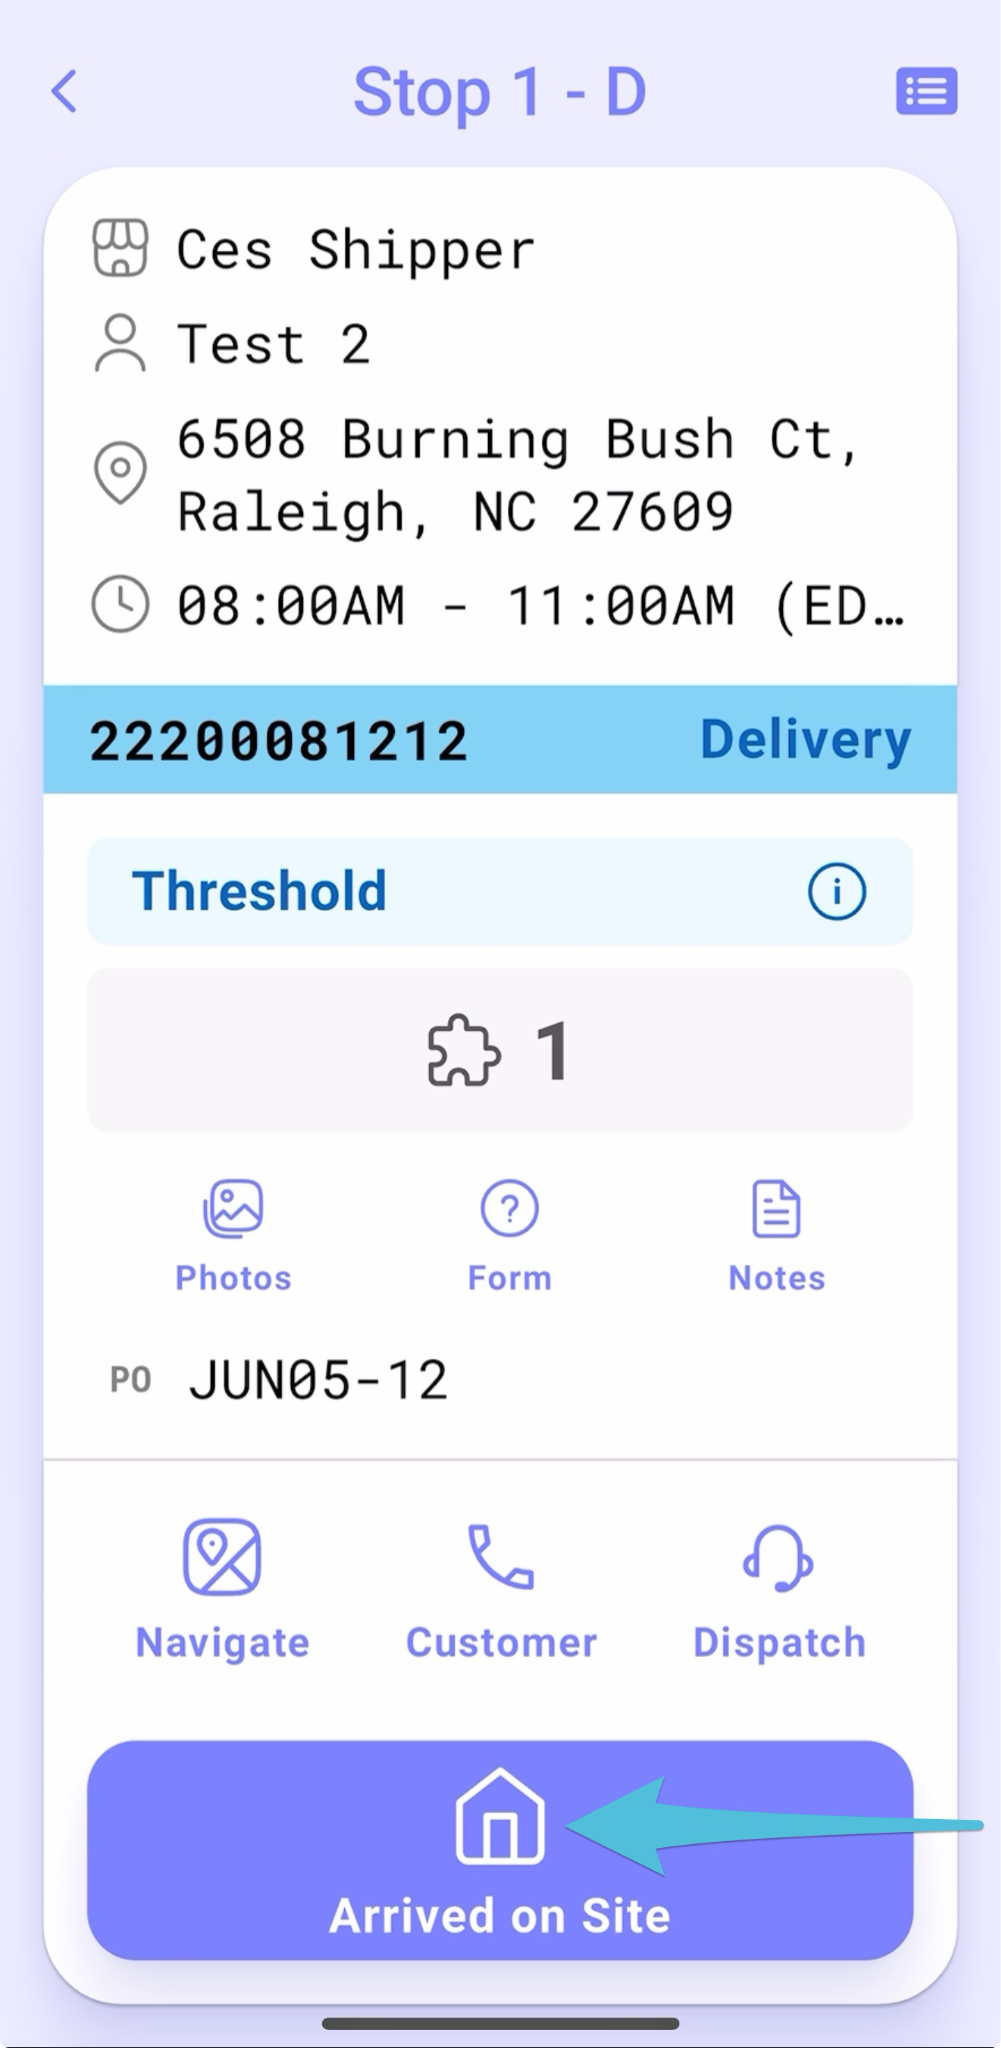
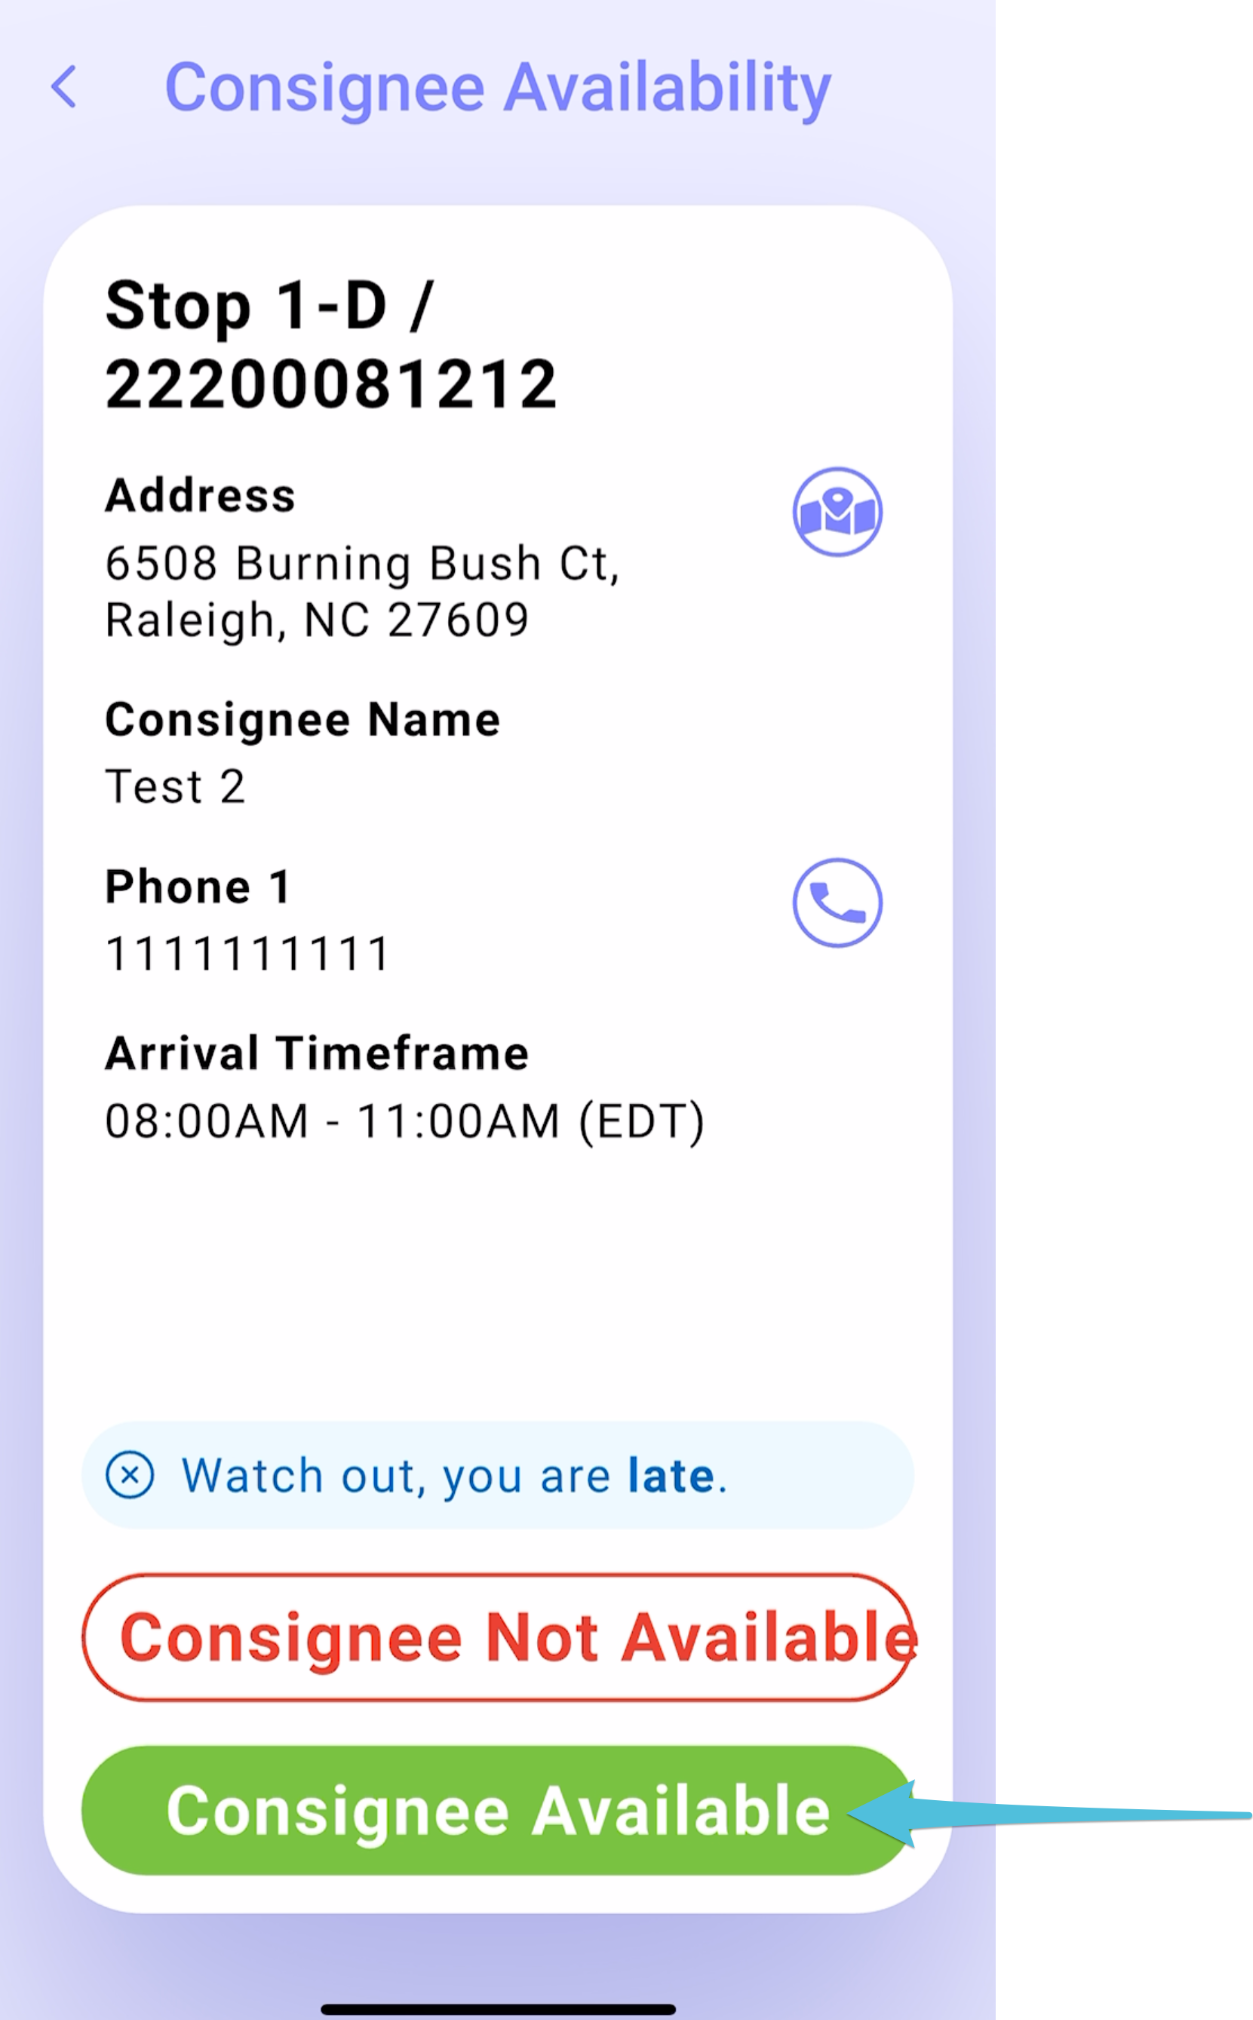
Tap Arrived on Site then select Consignee Available.
Step 4
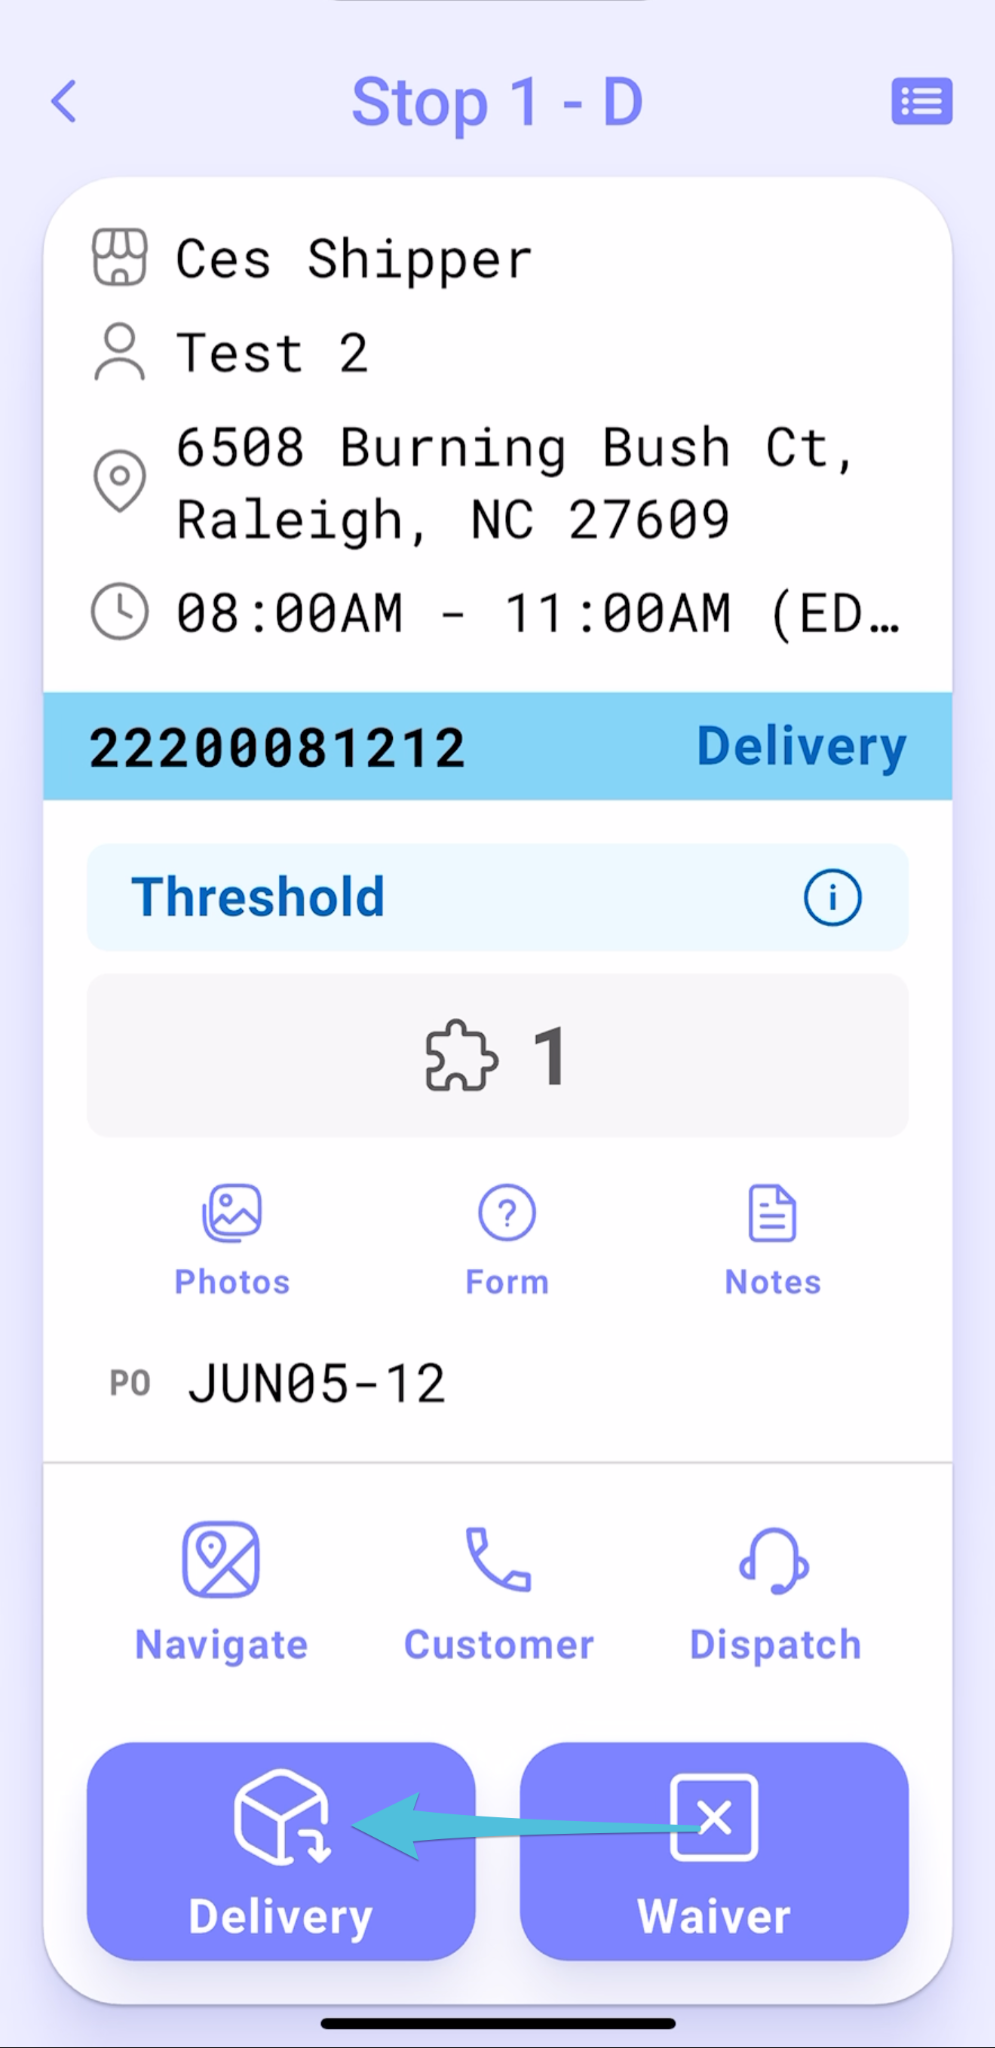
Tap Delivery
Step 5
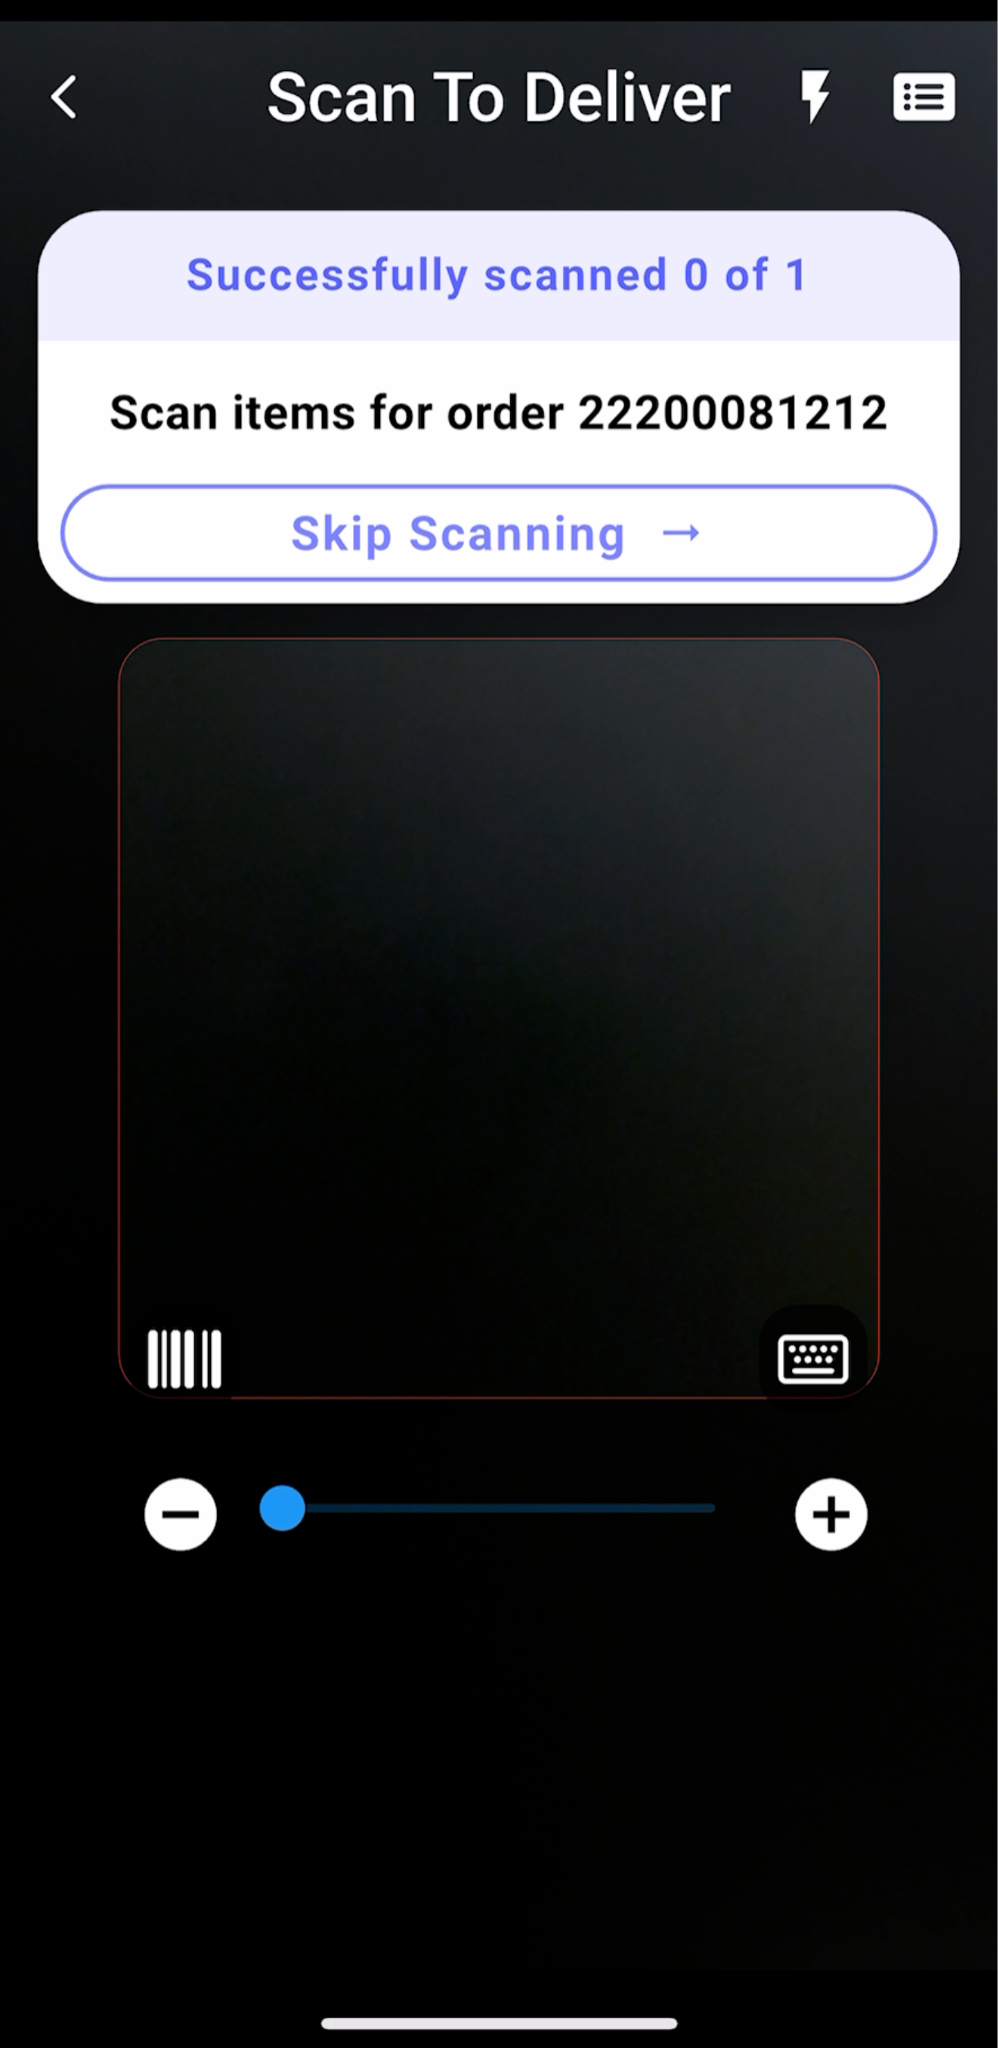
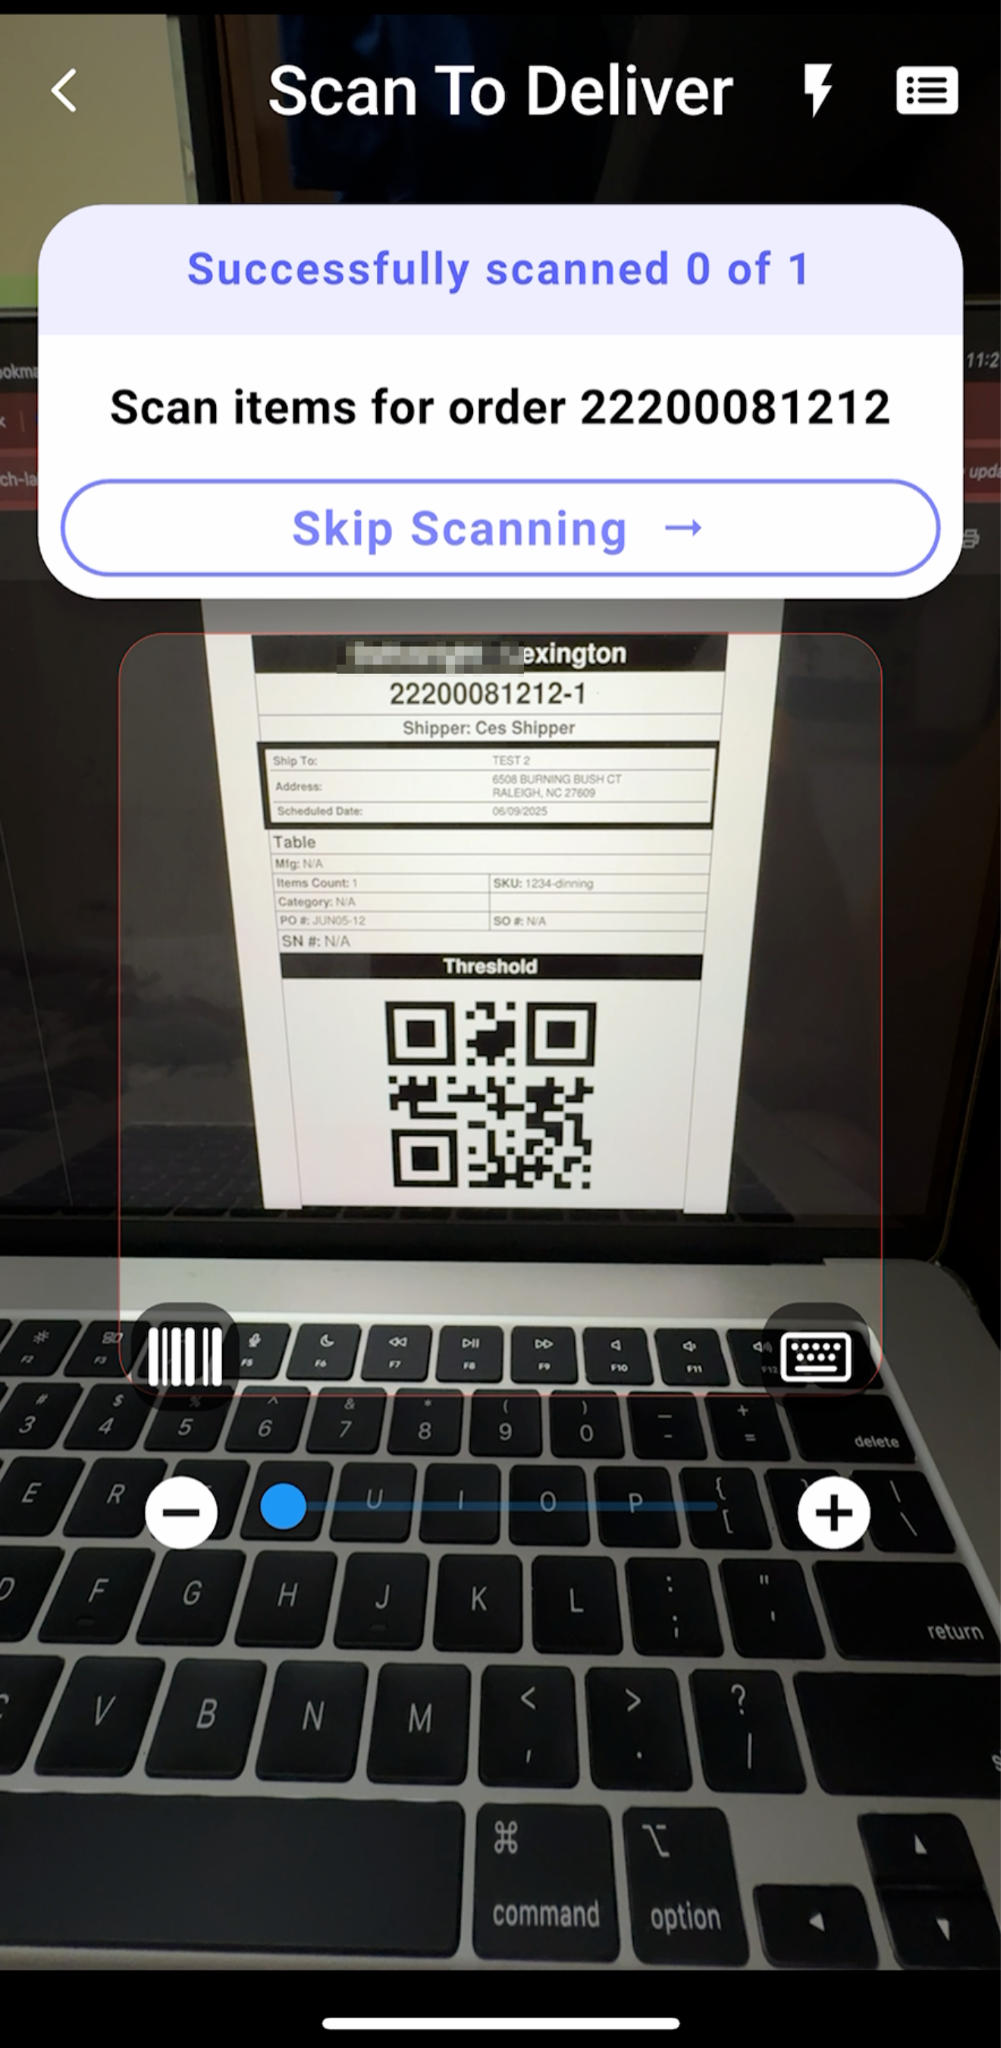
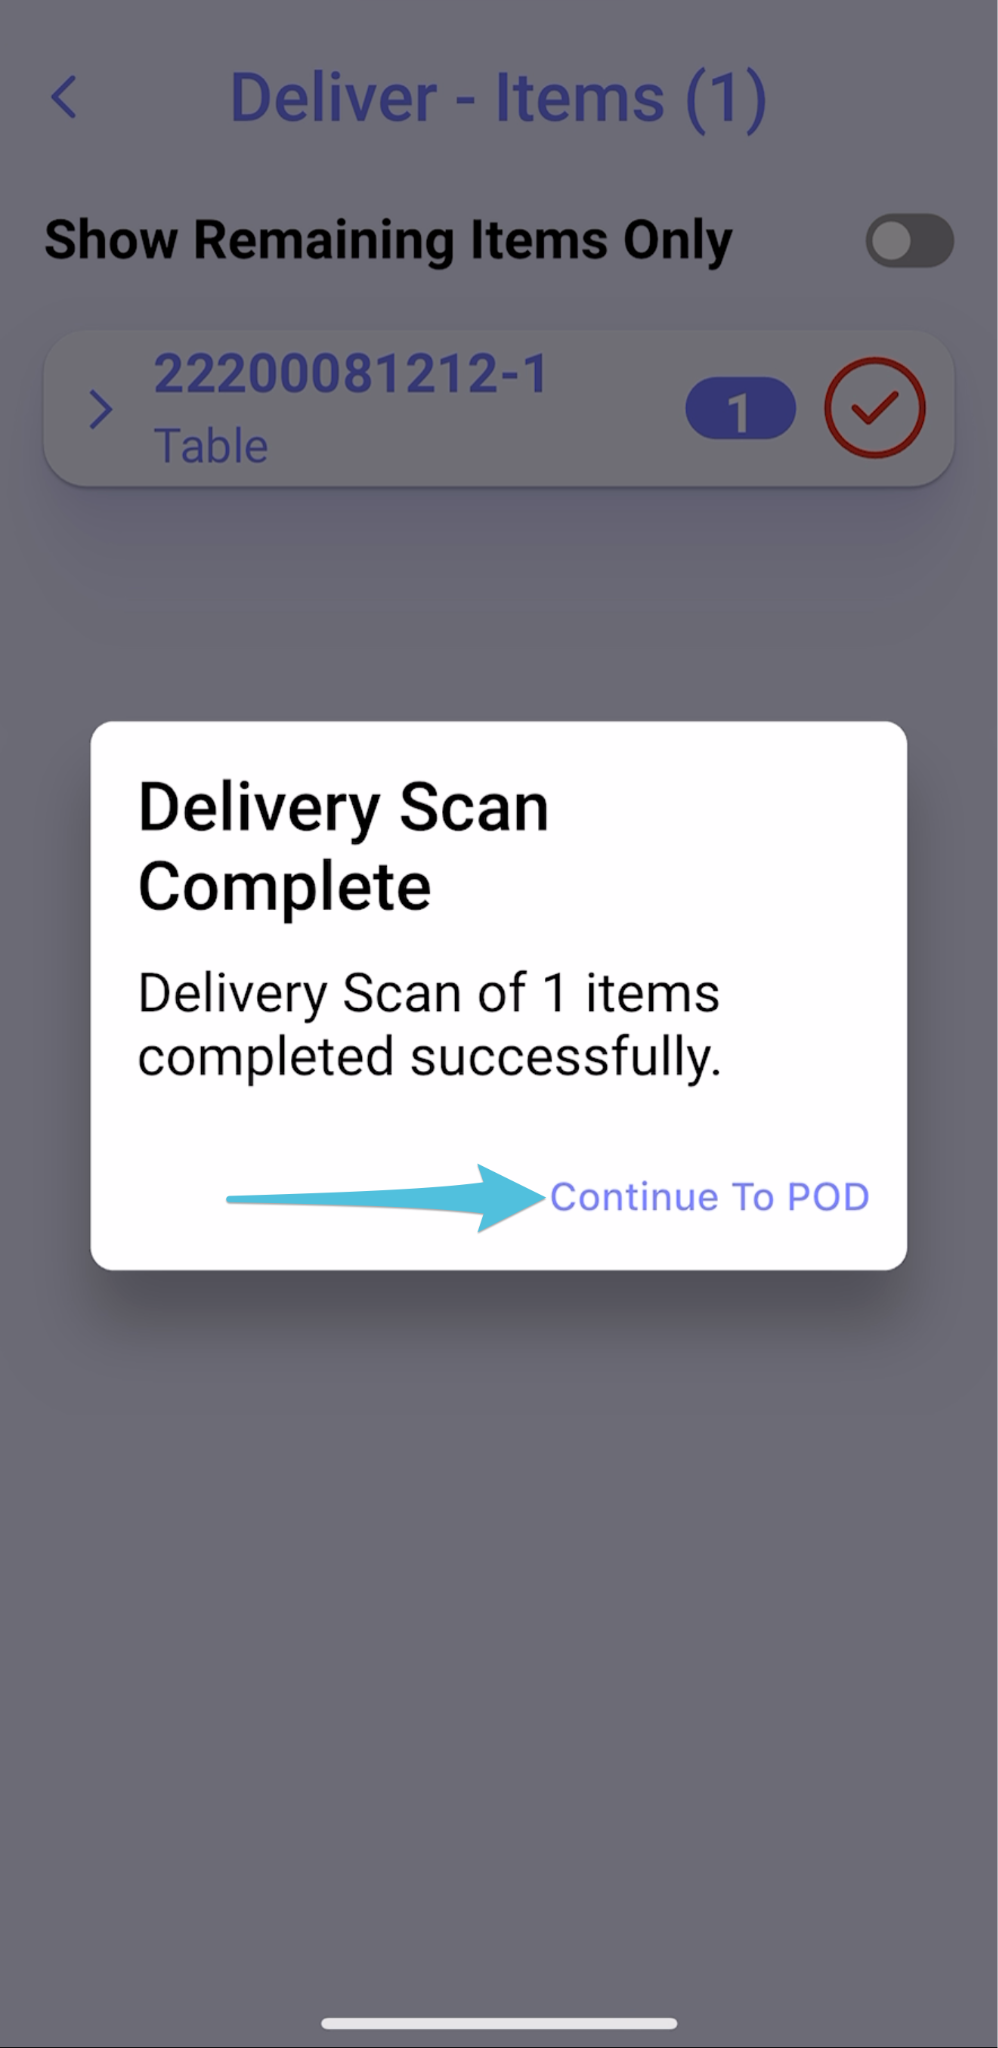
*The step for scanning item labels is omitted from the delivery process if the Delivery Scan option is disabled
Scan all items until the pop-up message shows Delivery Scan Complete then tap Continue to POD to proceed
Step 6
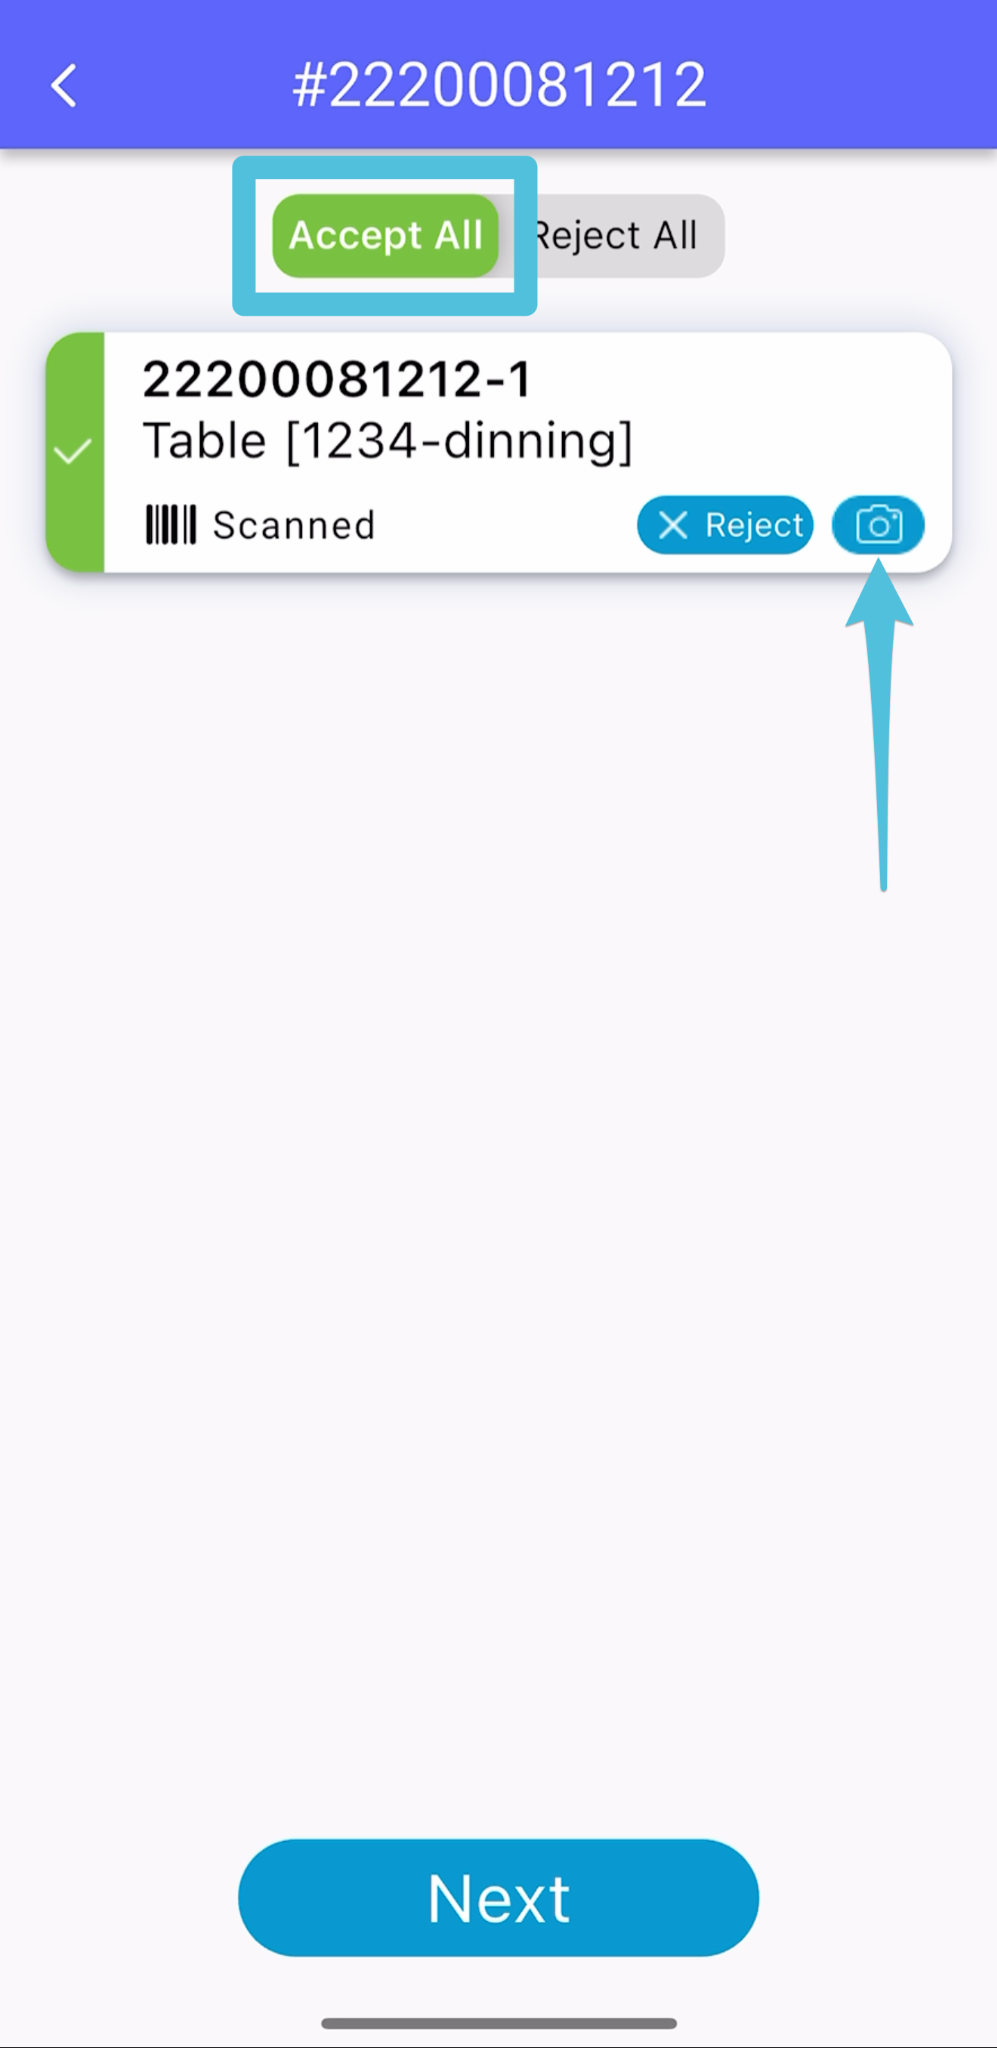
Toggle Accept All, then tap the camera icon to take photos as per the required minimum number.

Step 7
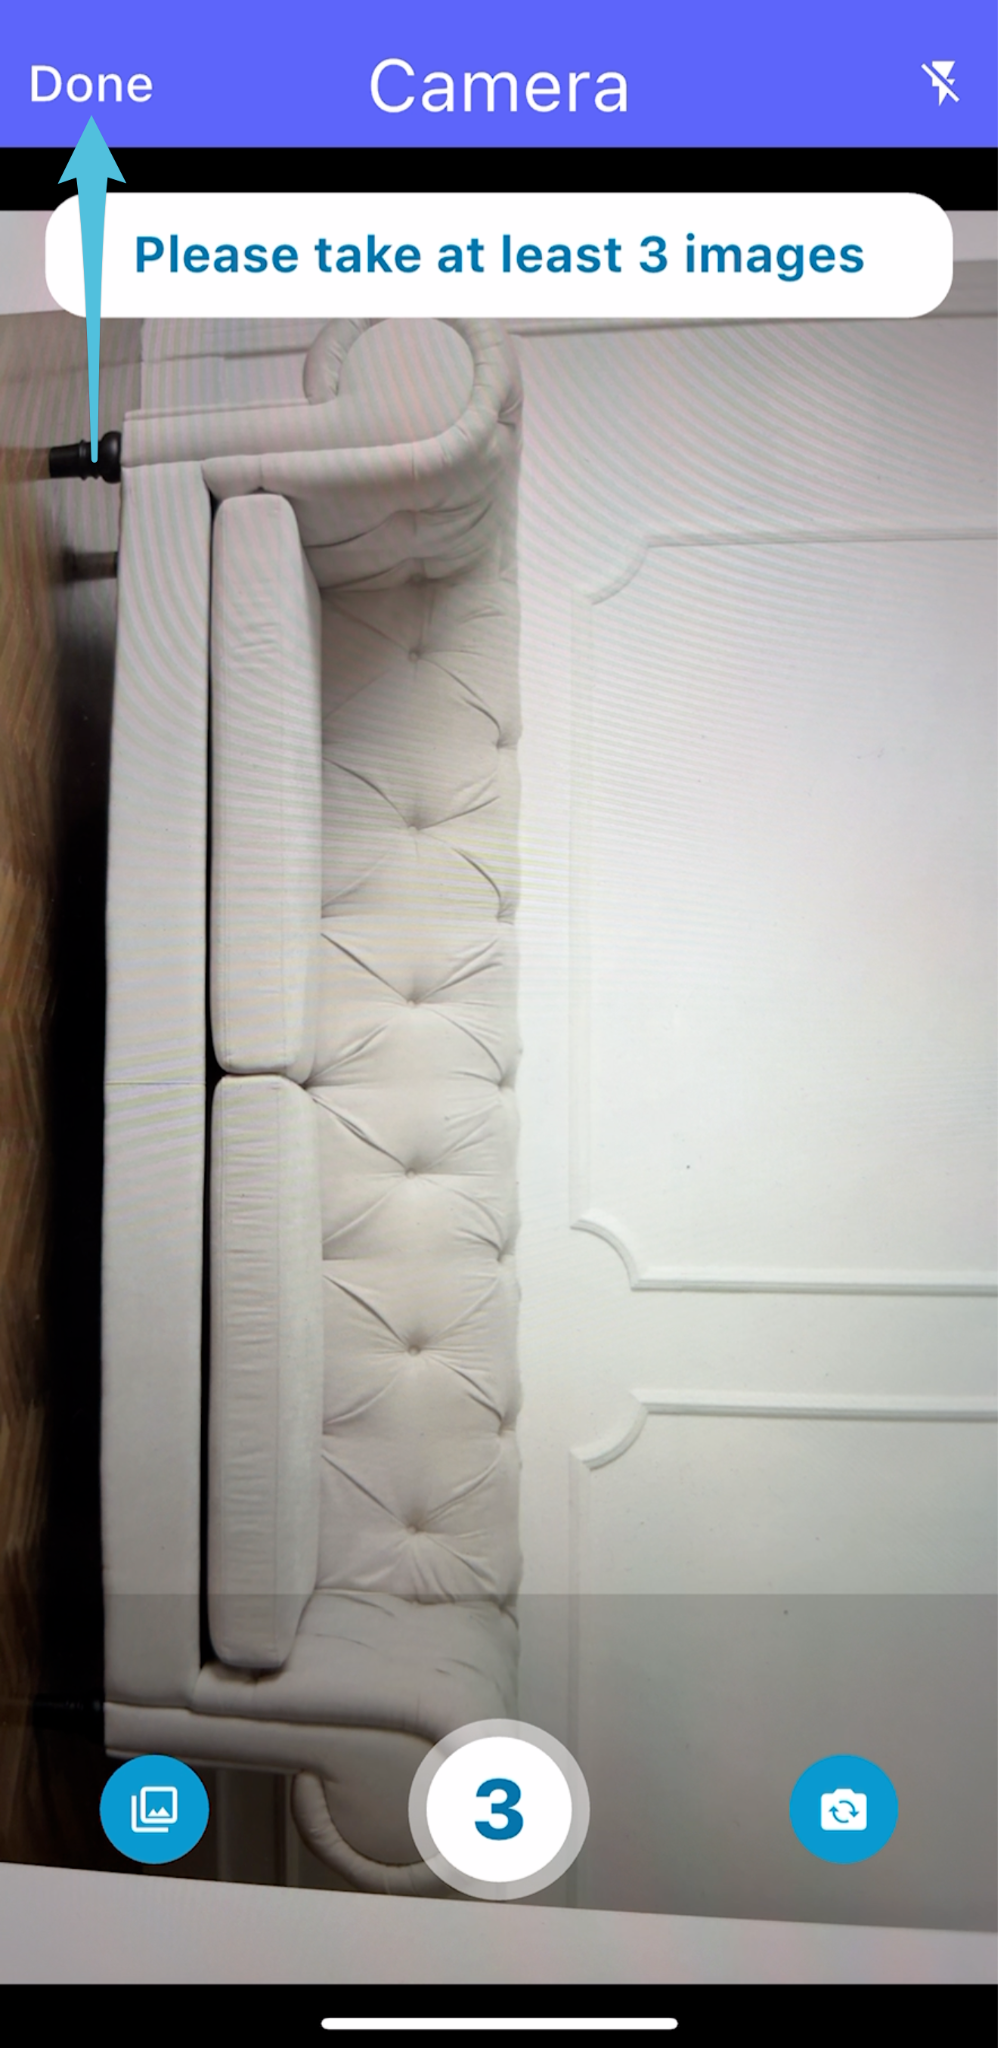
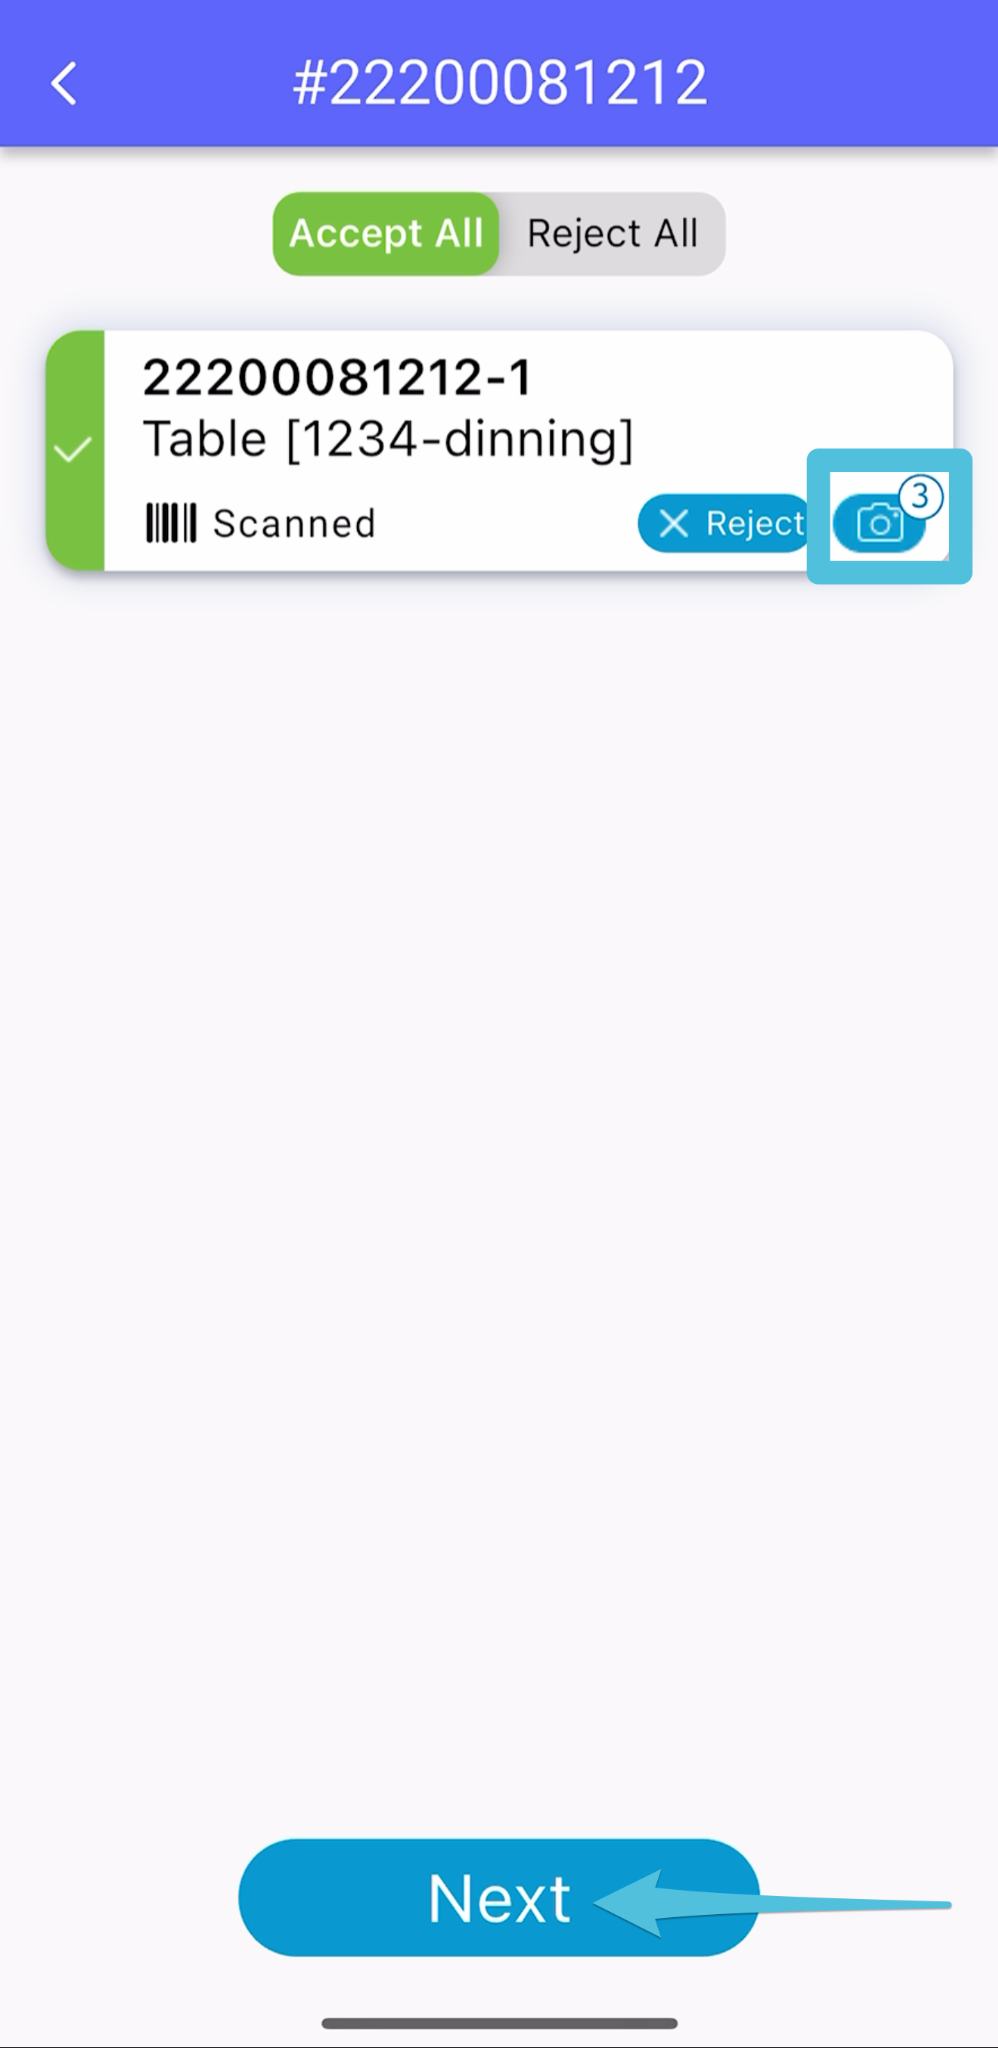
After taking the photos, tap Done then Next.
Step 8
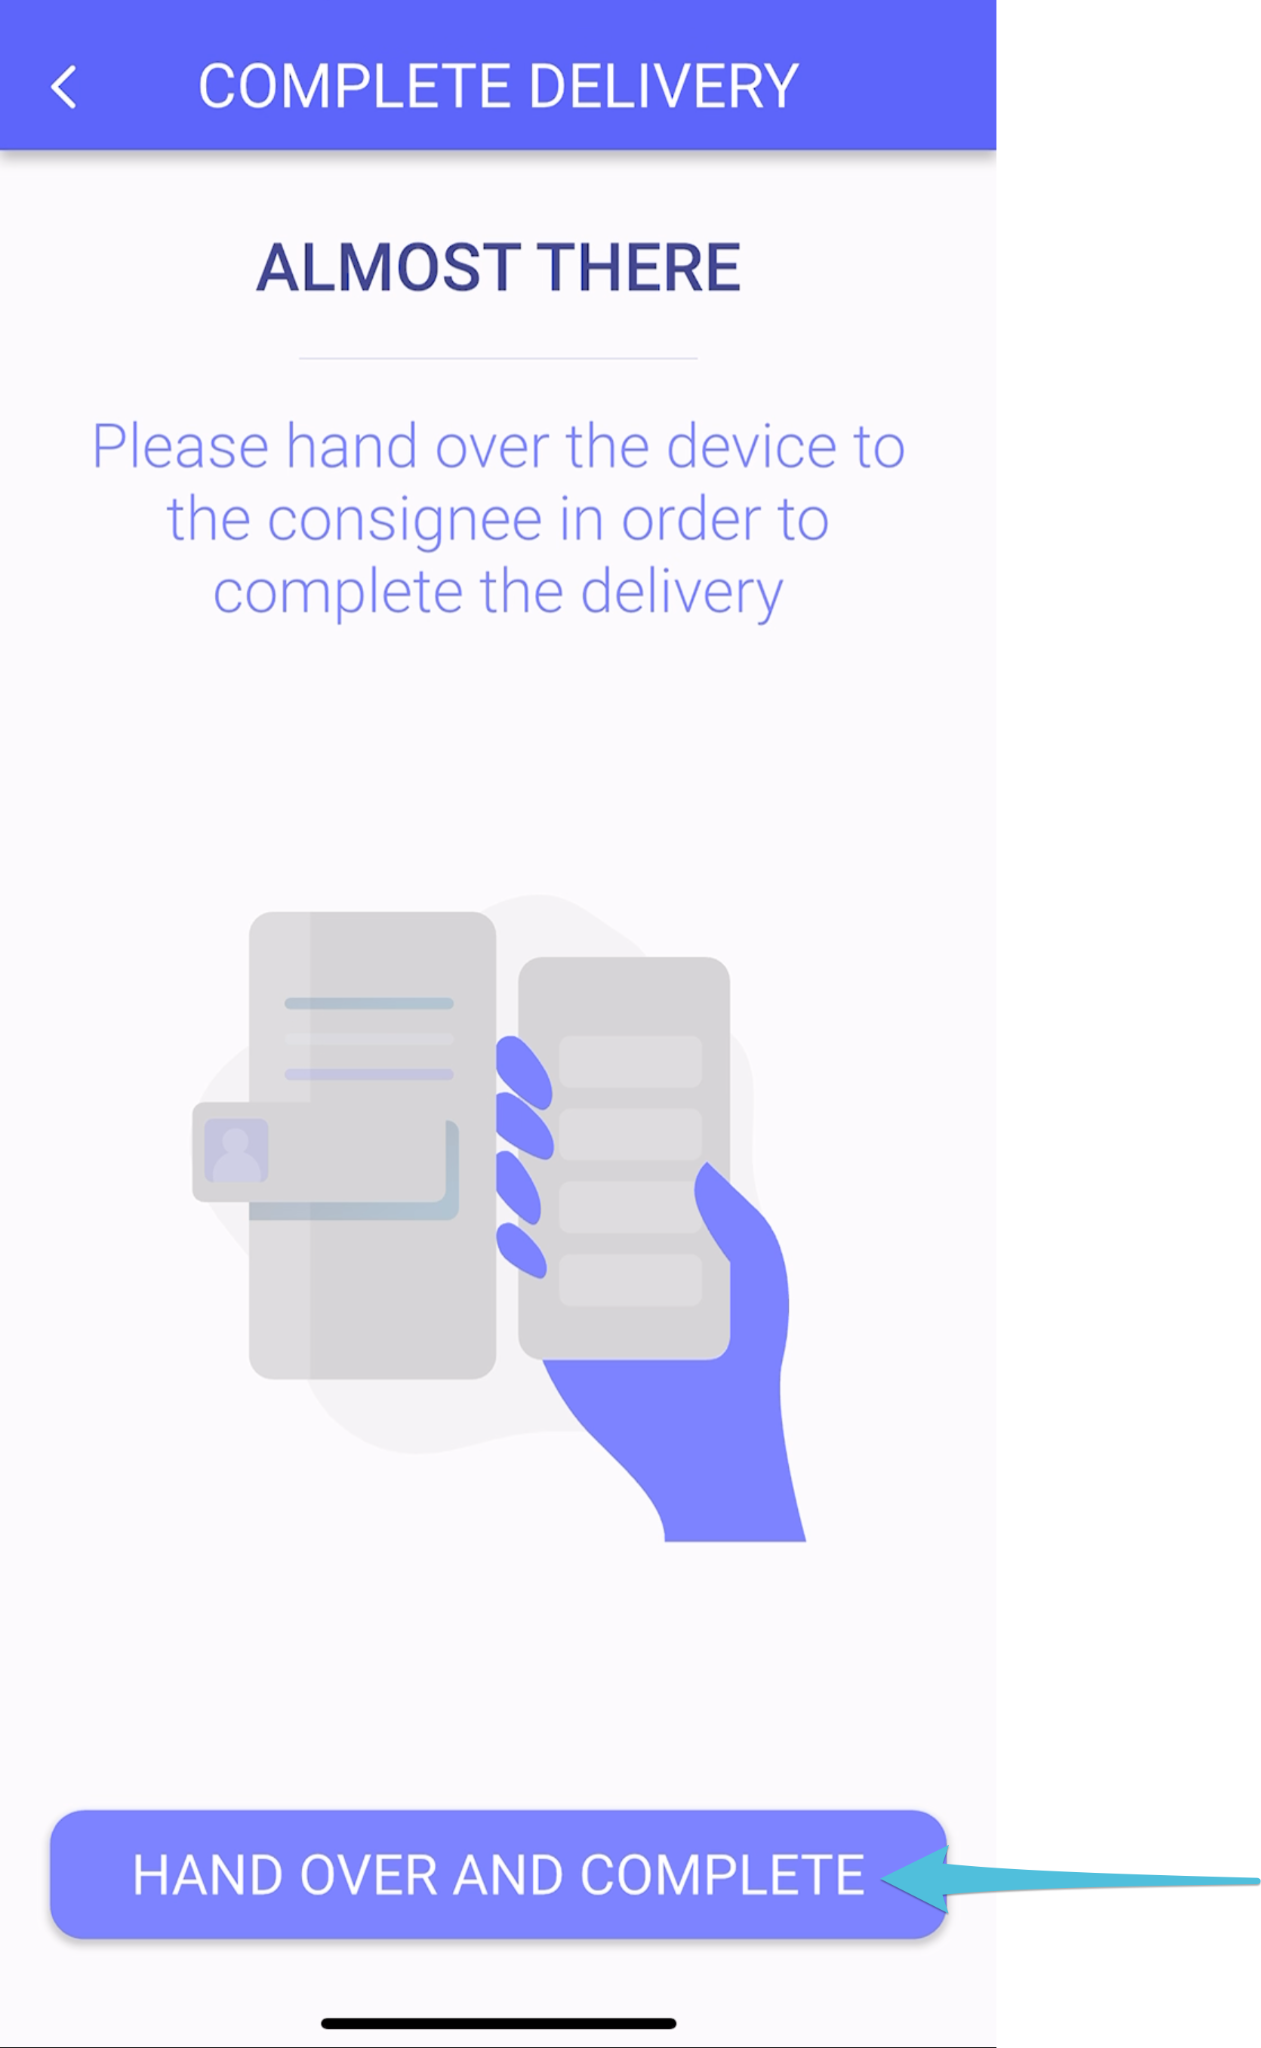
Tap Hand Over and Complete – handover the phone to the customer to fill out the information (and not the driver).
Step 9
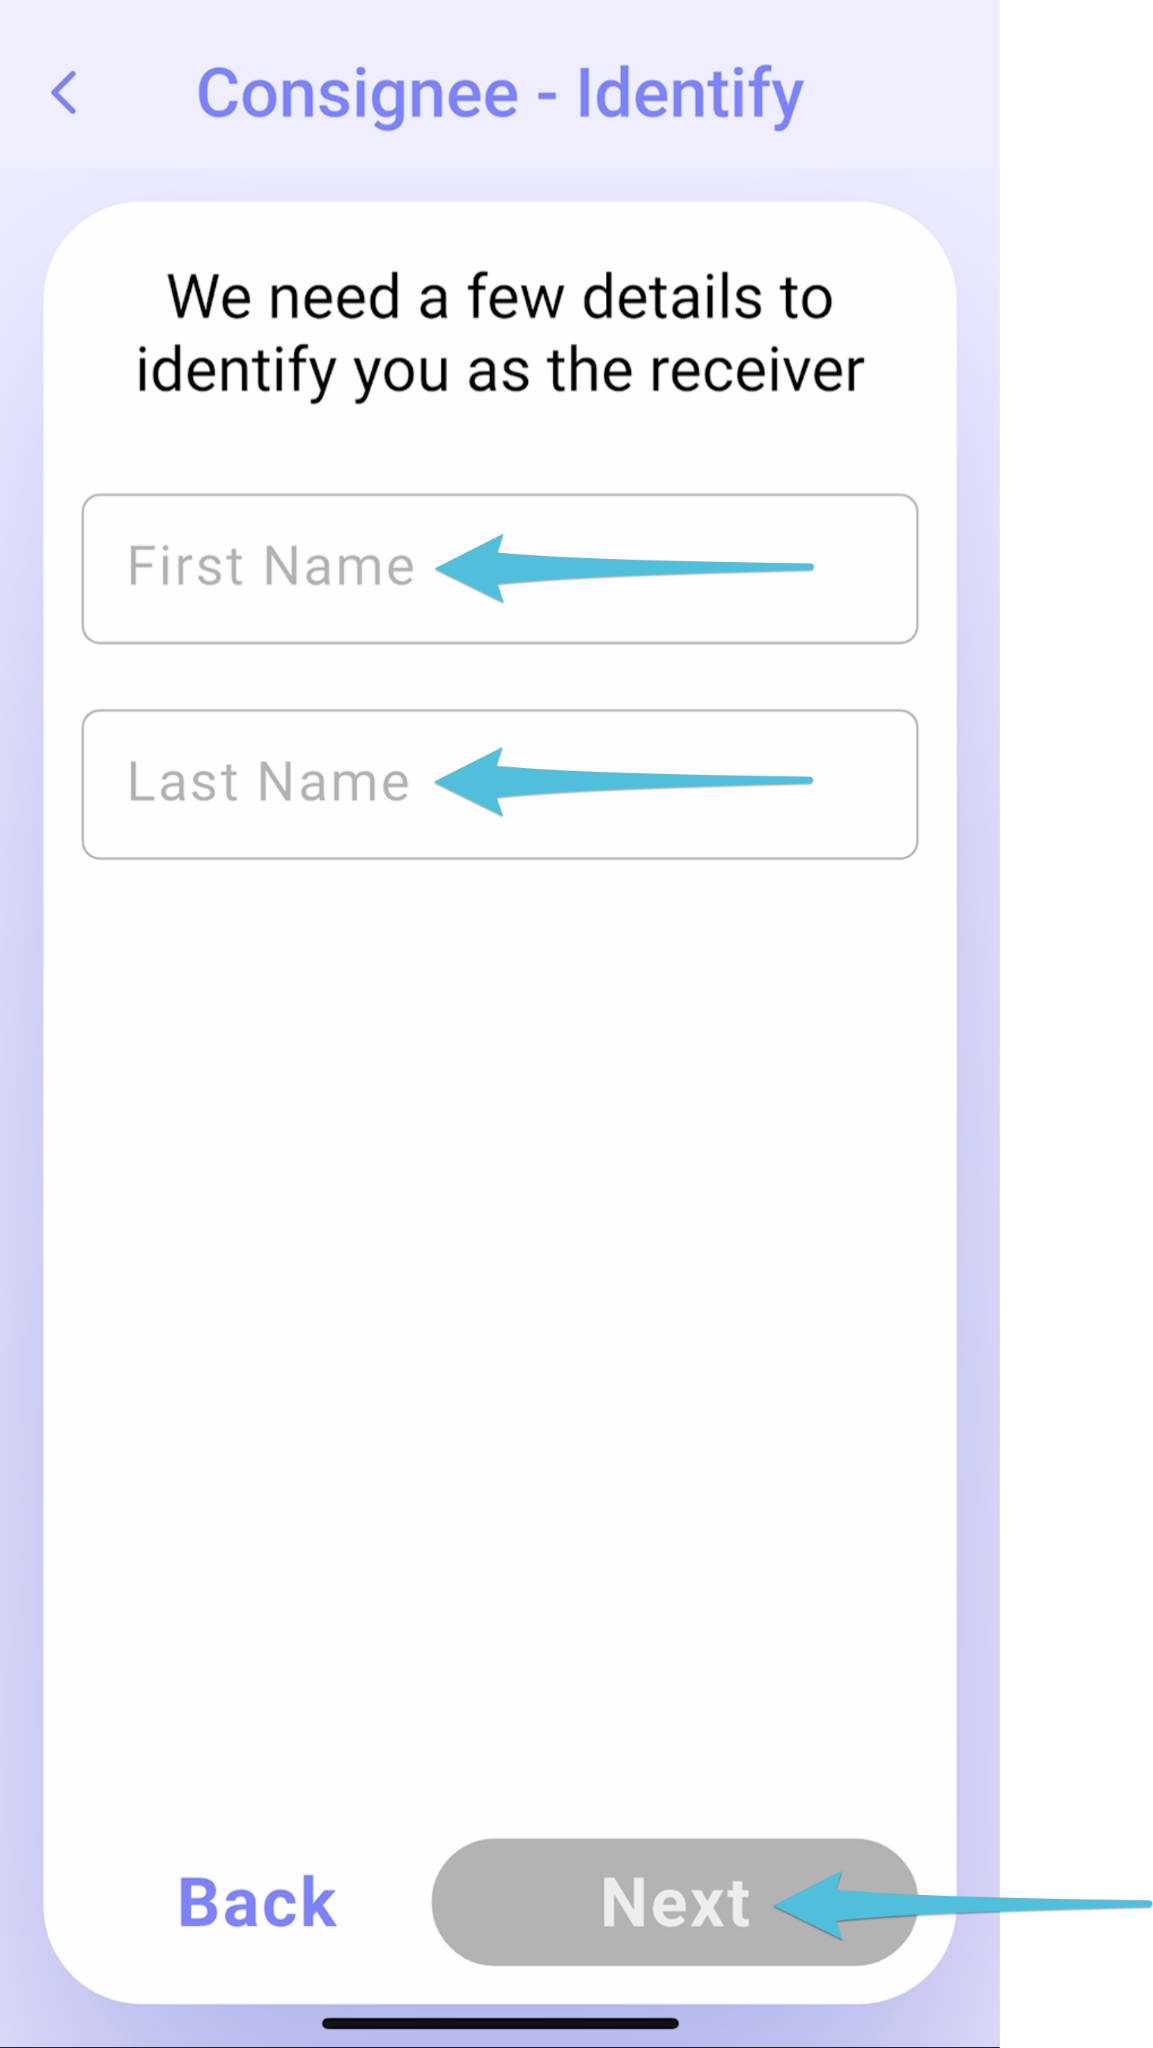
The consignee needs to enter their First Name and Last Name then tap Next
Step 10
*The step for entering the Authentication Code is excluded from the delivery process if the Complete POD on the driver’s device without the consignee’s verification option is selected in the POD Flow settings.
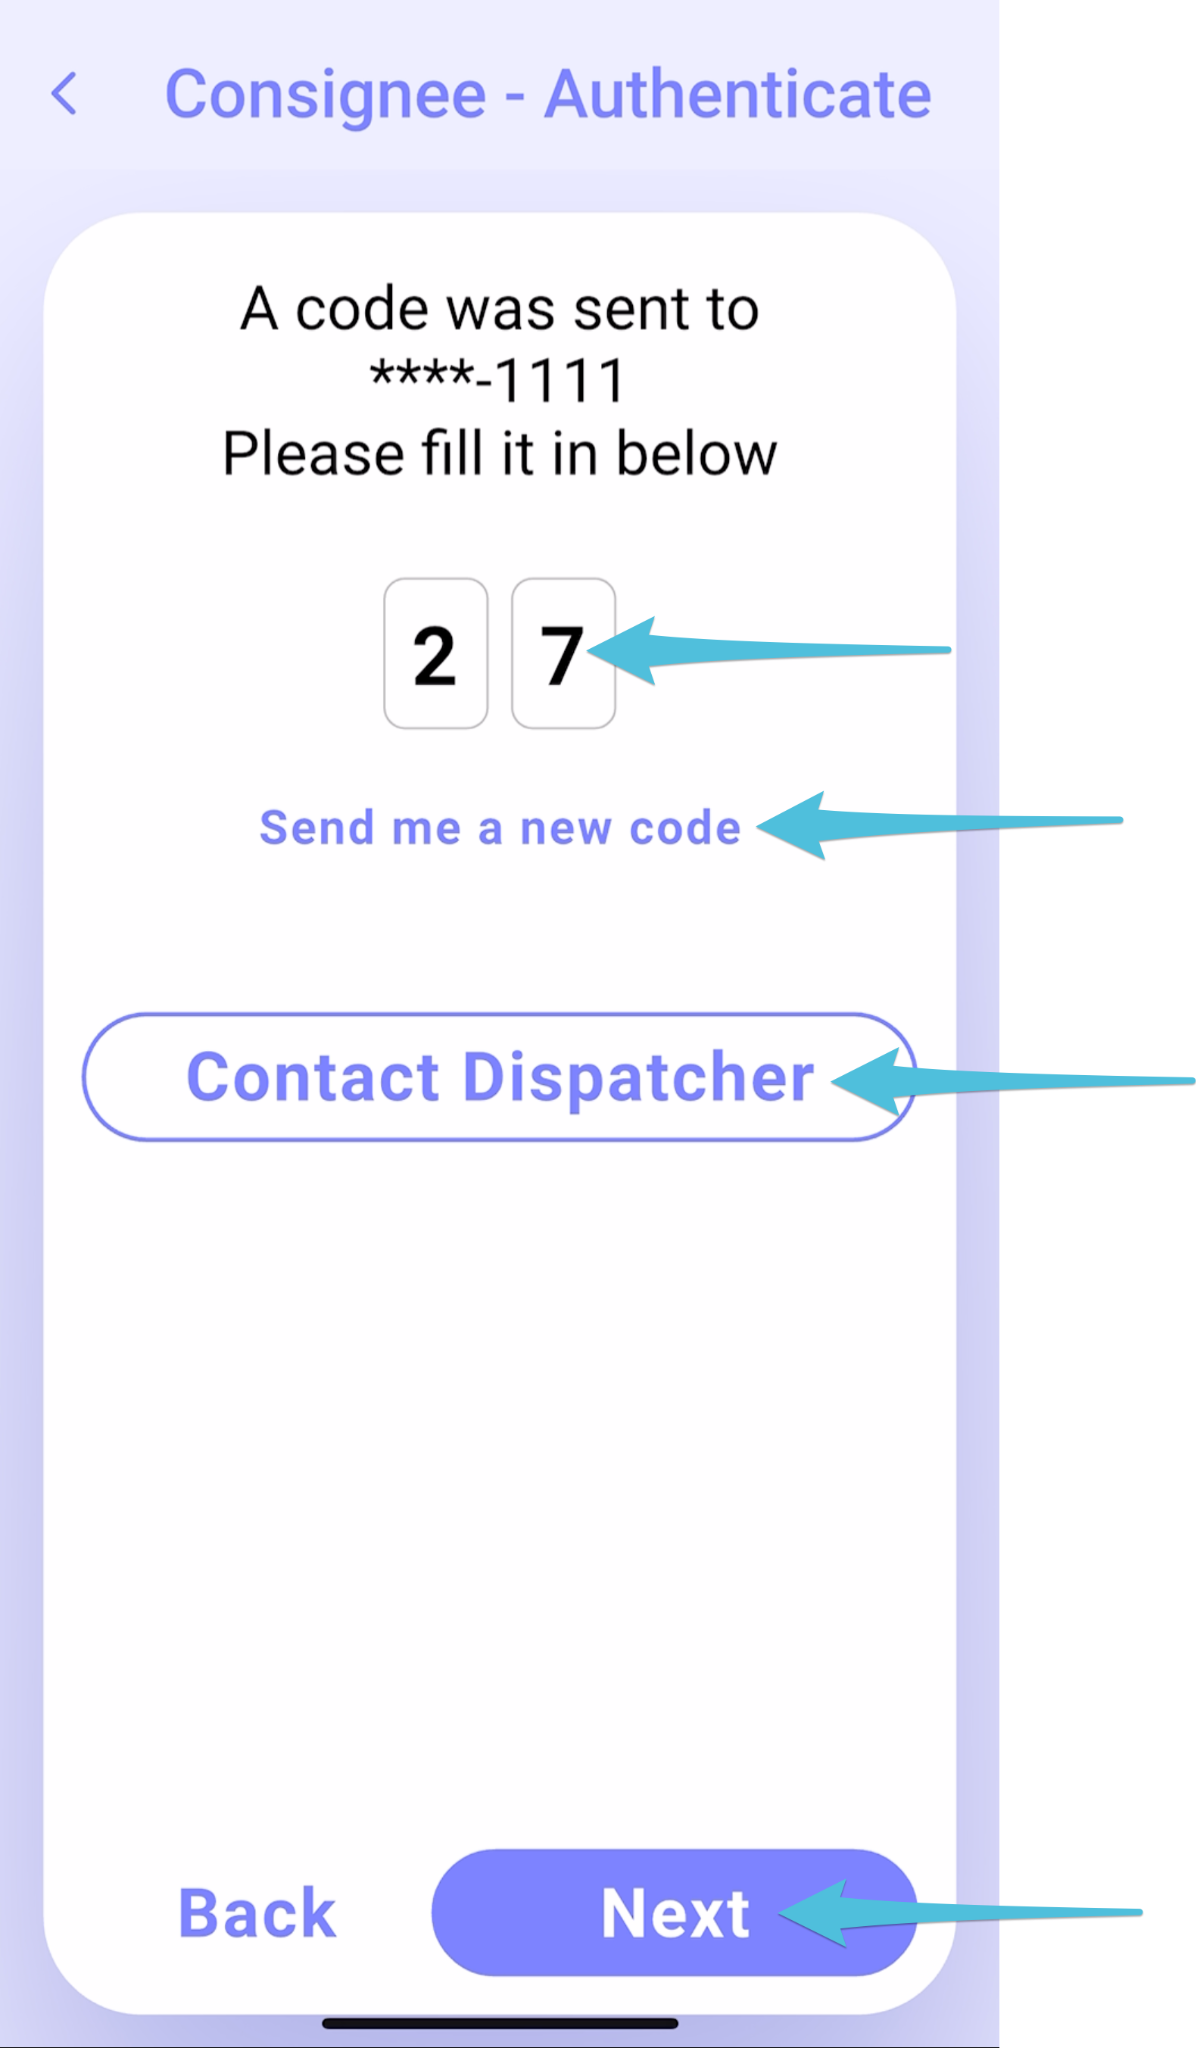
Enter the Authentication Code sent to the consignee’s registered mobile number associated with the order, then tap Next.
If the code was not received, select Send me a new code or the consignee can contact the Dispatcher by tapping Contact Dispatcher to proceed.
After entering the Authentication Code, tap Next.
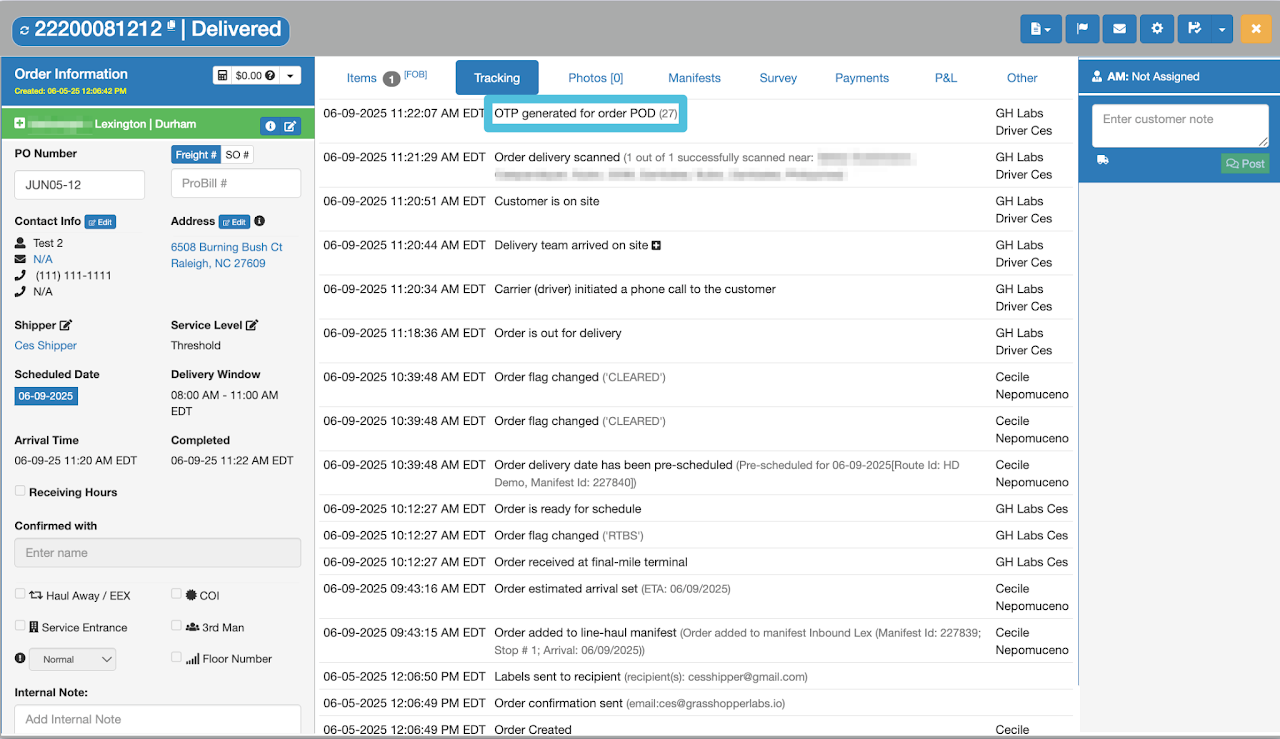
Authentication Code can be viewed from the Order’s Tracking Tab
Step 11
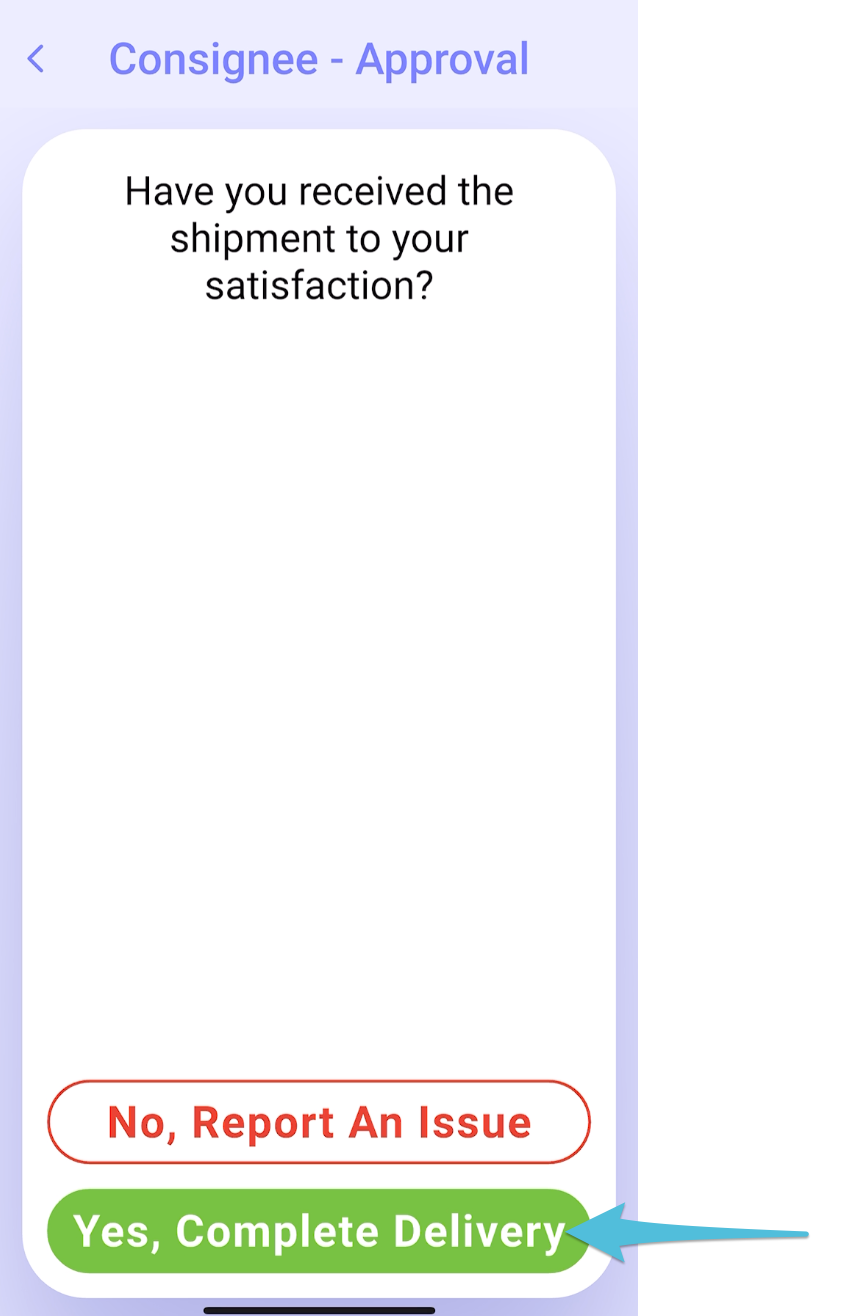
Select Yes, Complete Delivery. You can view the delivery summary by selecting View Summary
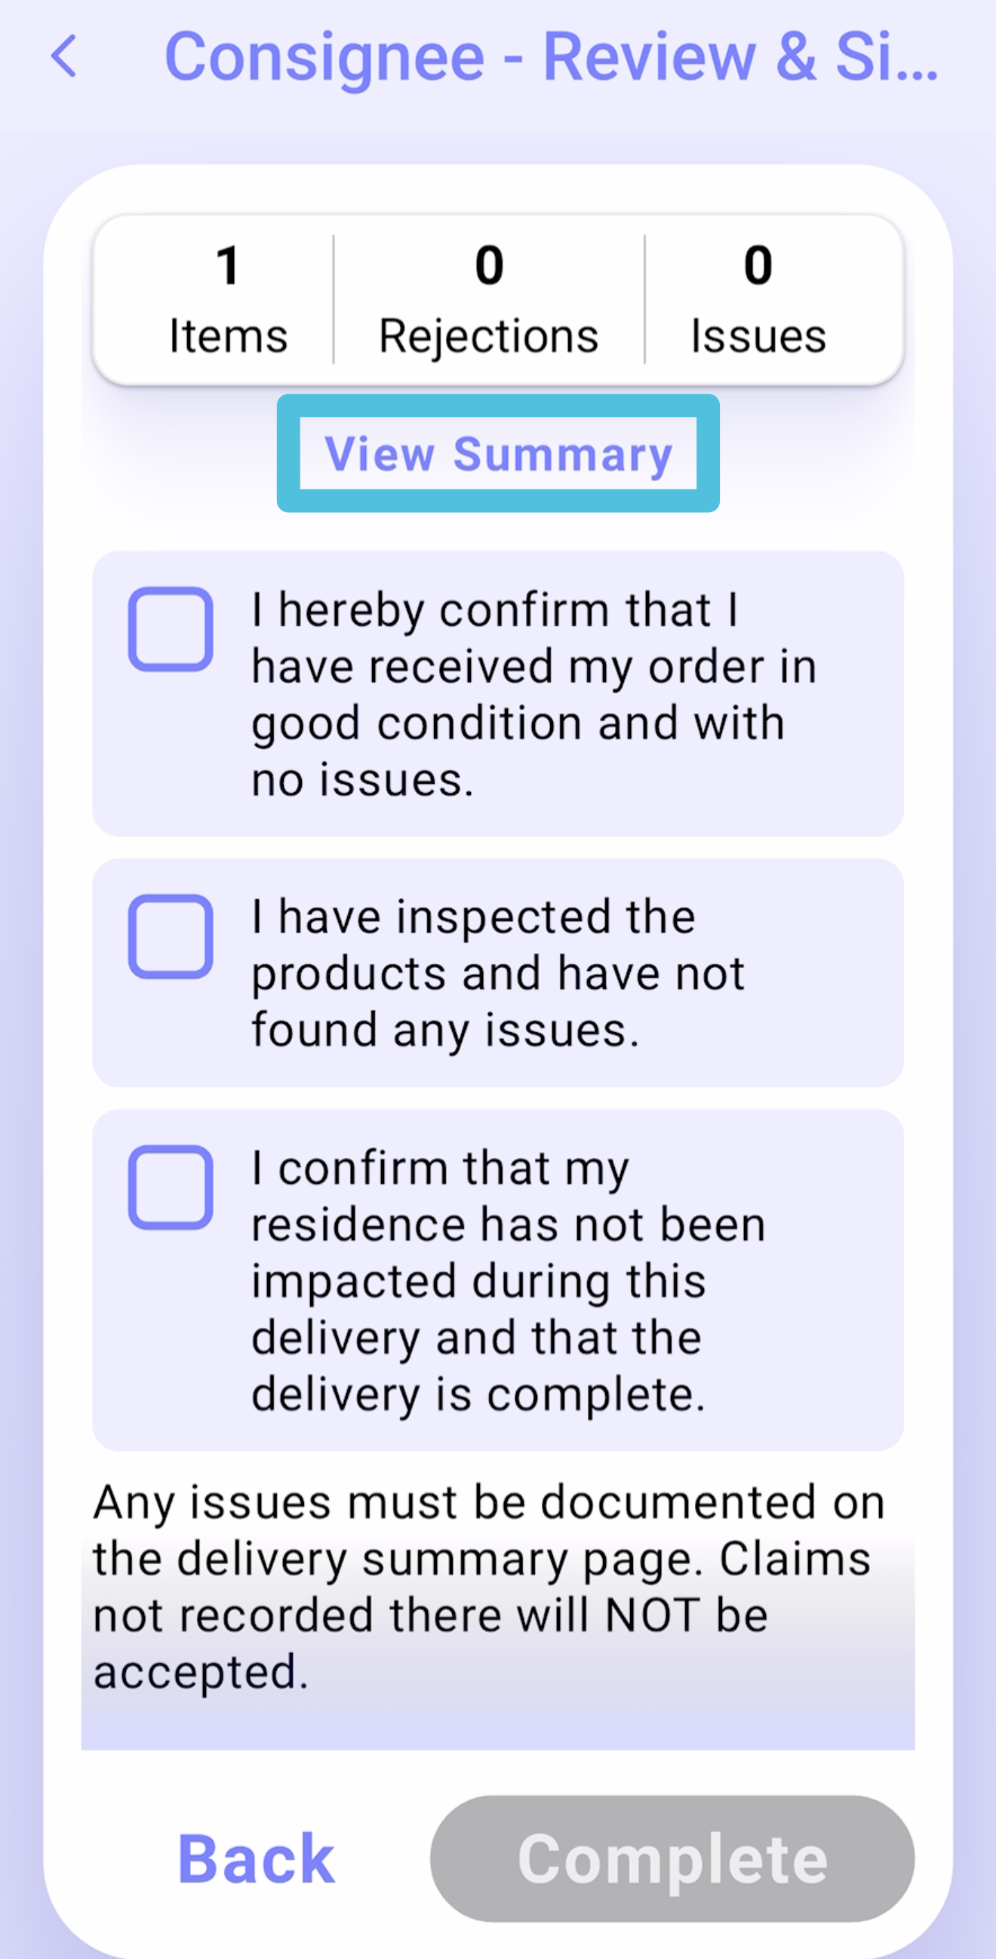
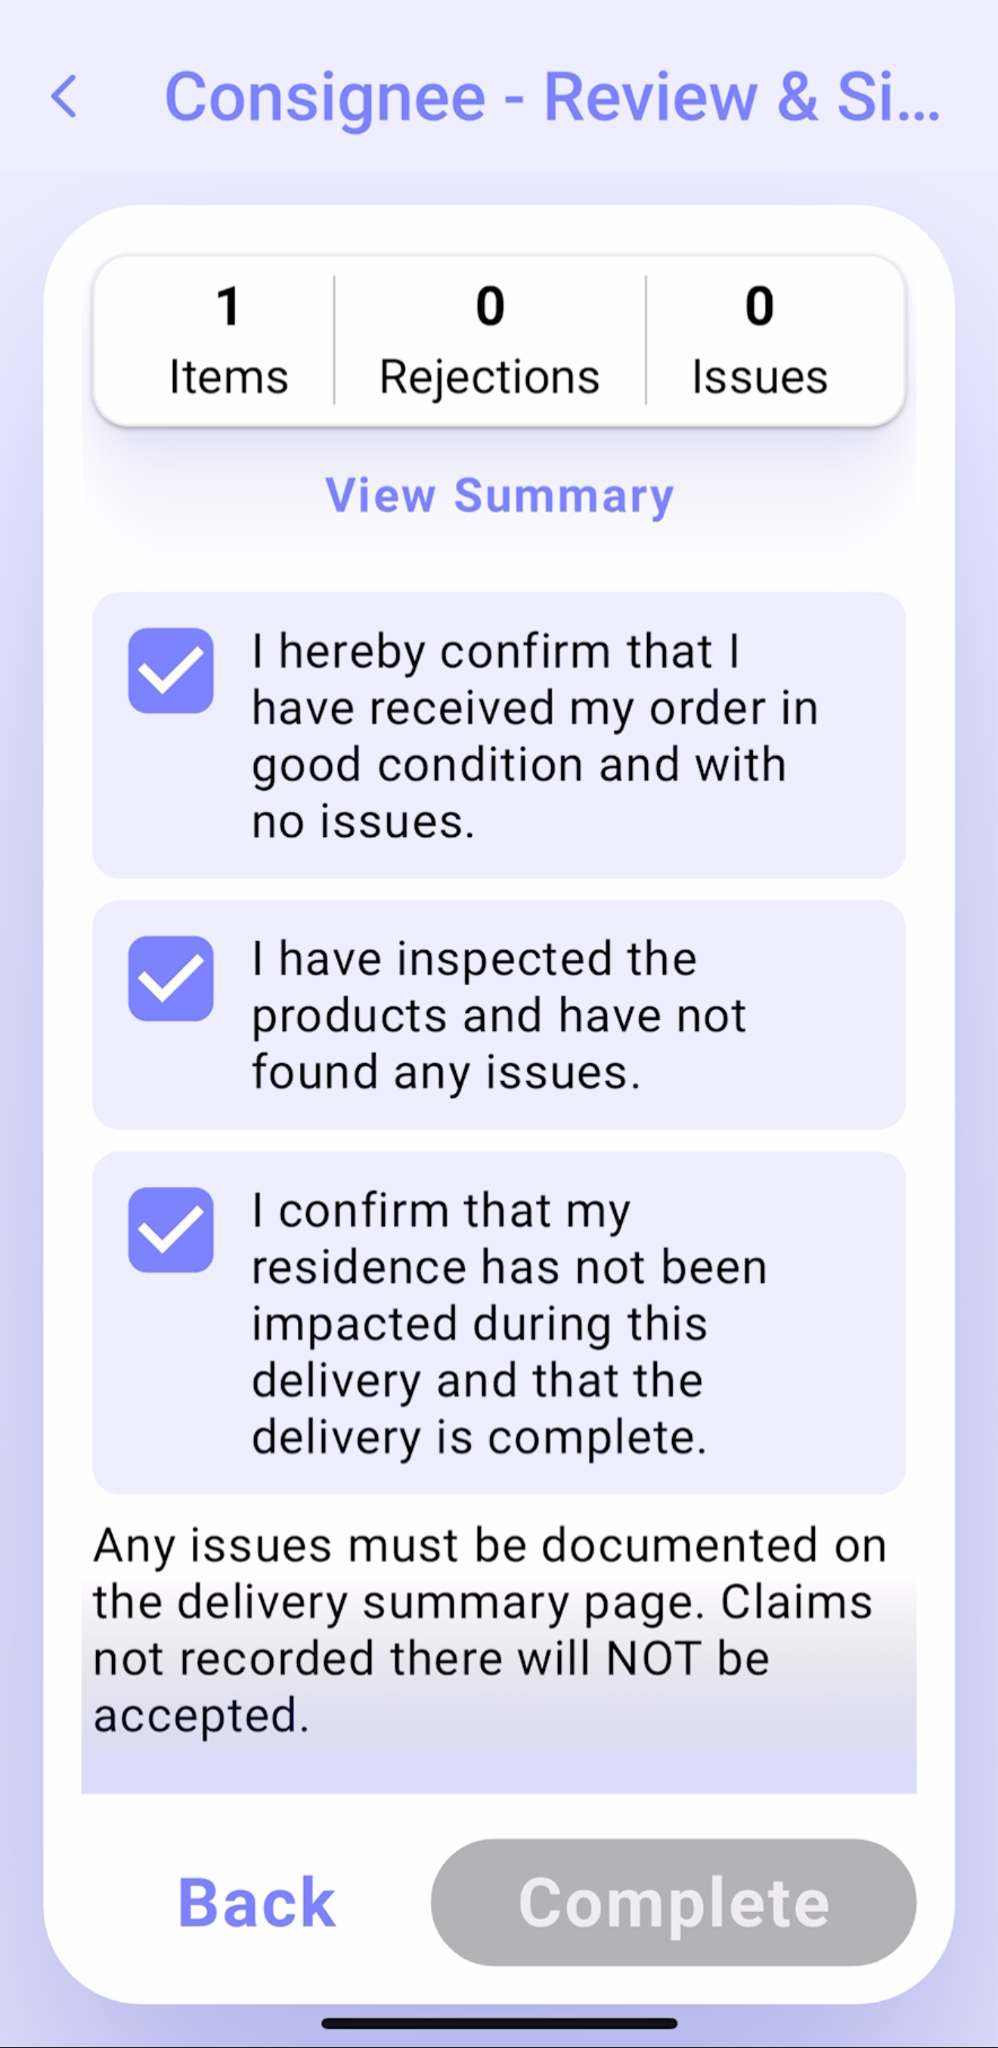
Step 11
Review the POD Acknowledgement Receipt, sign and tap Complete
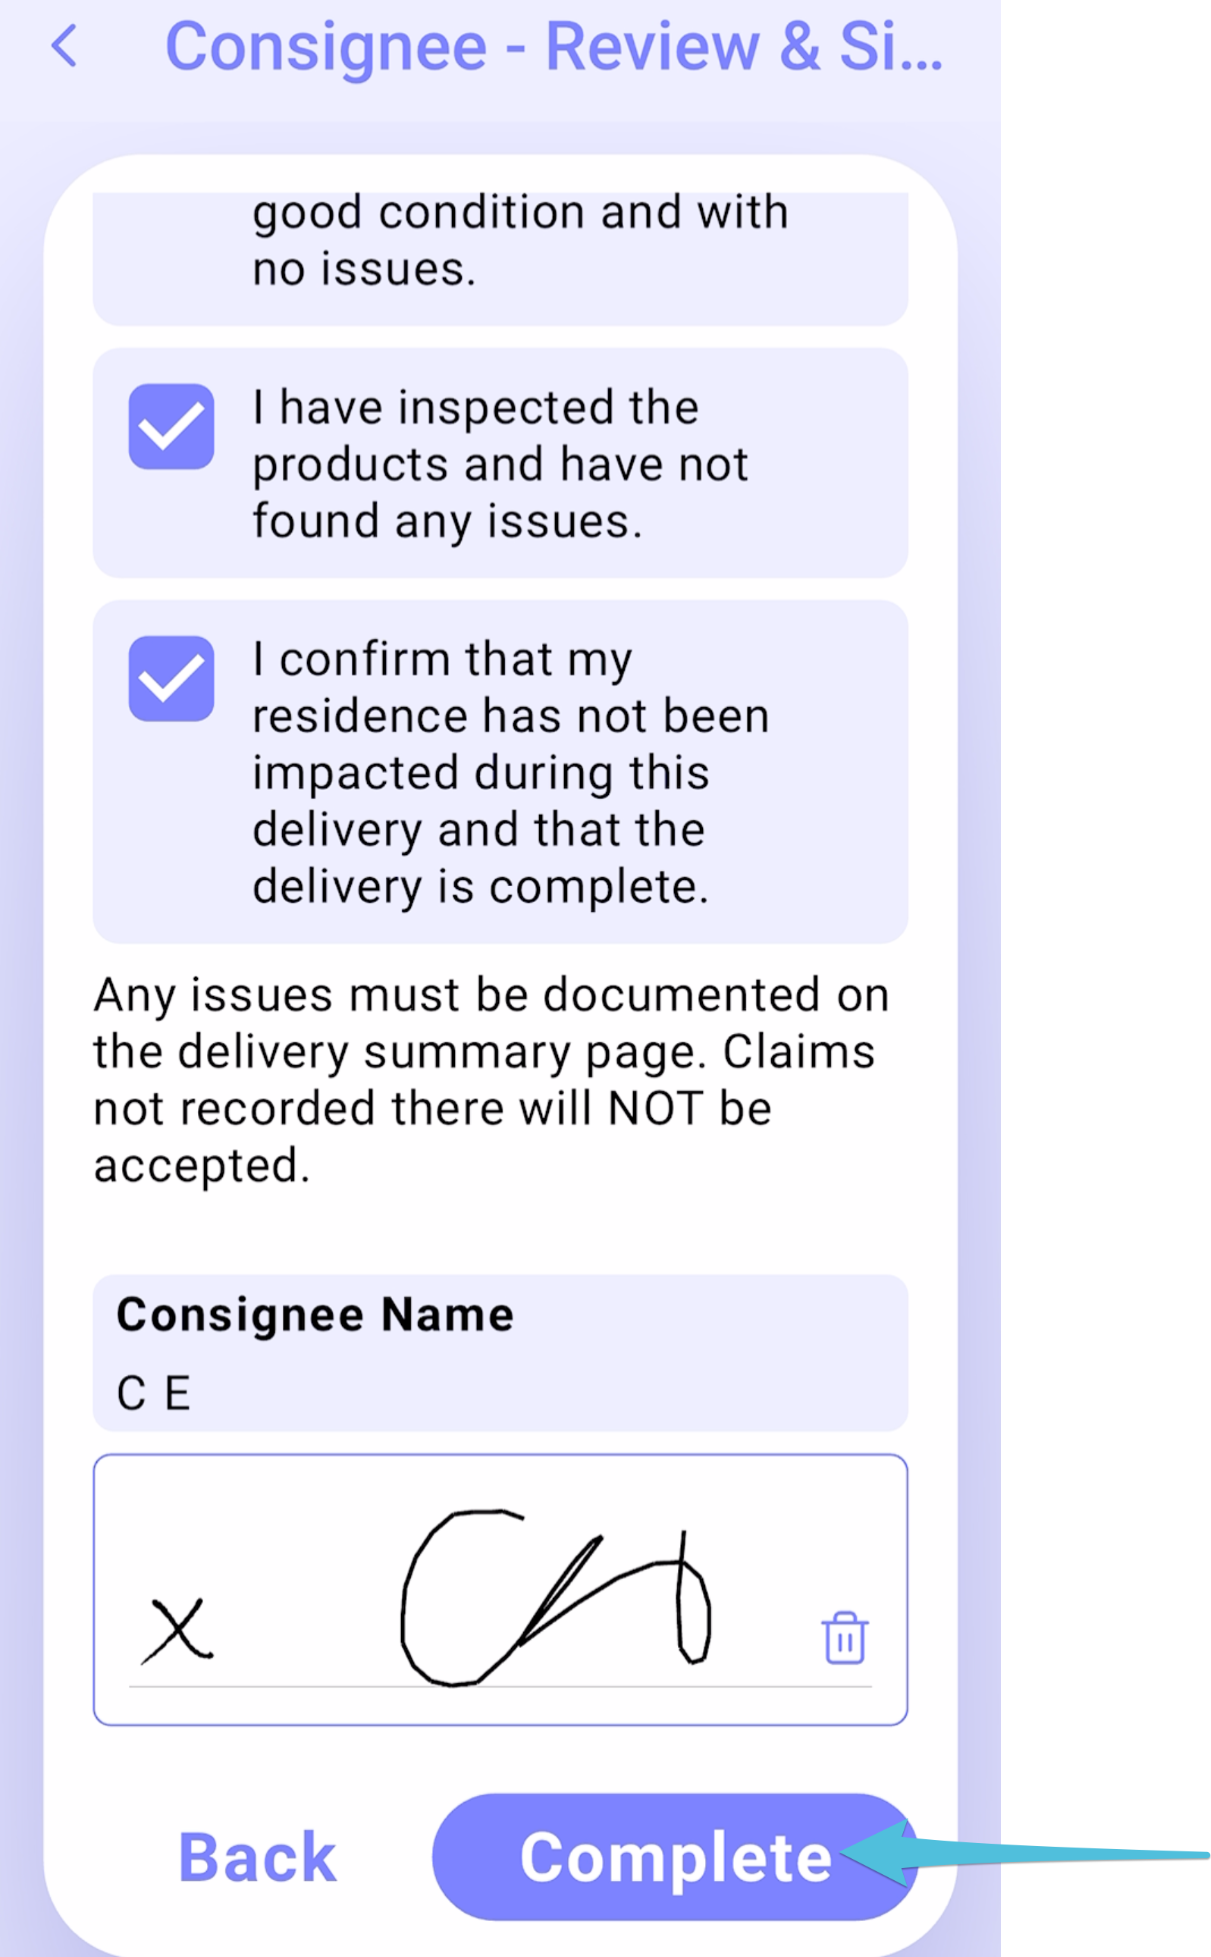
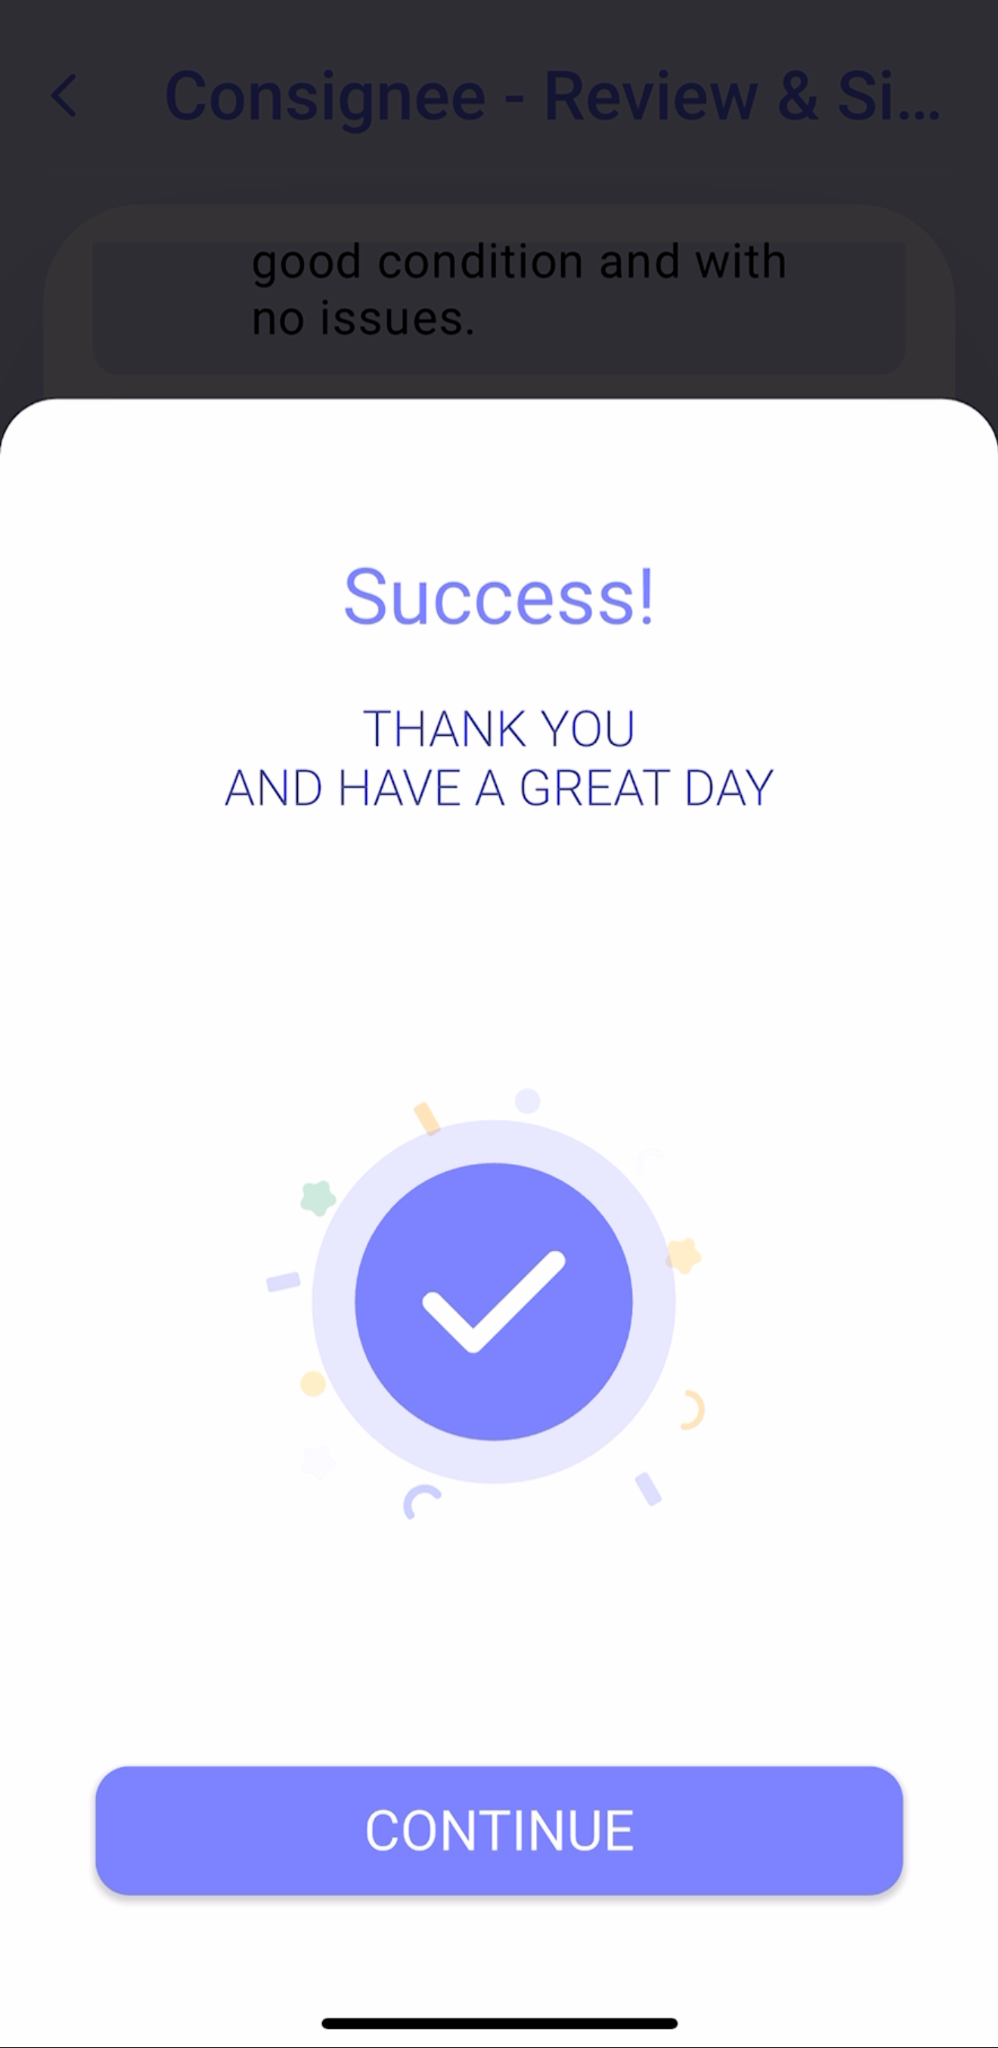
Confirmation that the delivery has been completed
Delivery Scan
When enabled, drivers must scan all items associated with the stop before completing the delivery.
See here to learn more.
Proof of Delivery (POD) Authentication
To establish the Proof of Delivery (POD) process and set the authentication level for the consignee, you may choose between:
- Complete POD on the driver’s device without the consignee’s verification
- Complete POD on the driver’s device with the consignee’s verification
See here to learn more.
