Option 1 – Individual Manifest
Step 1
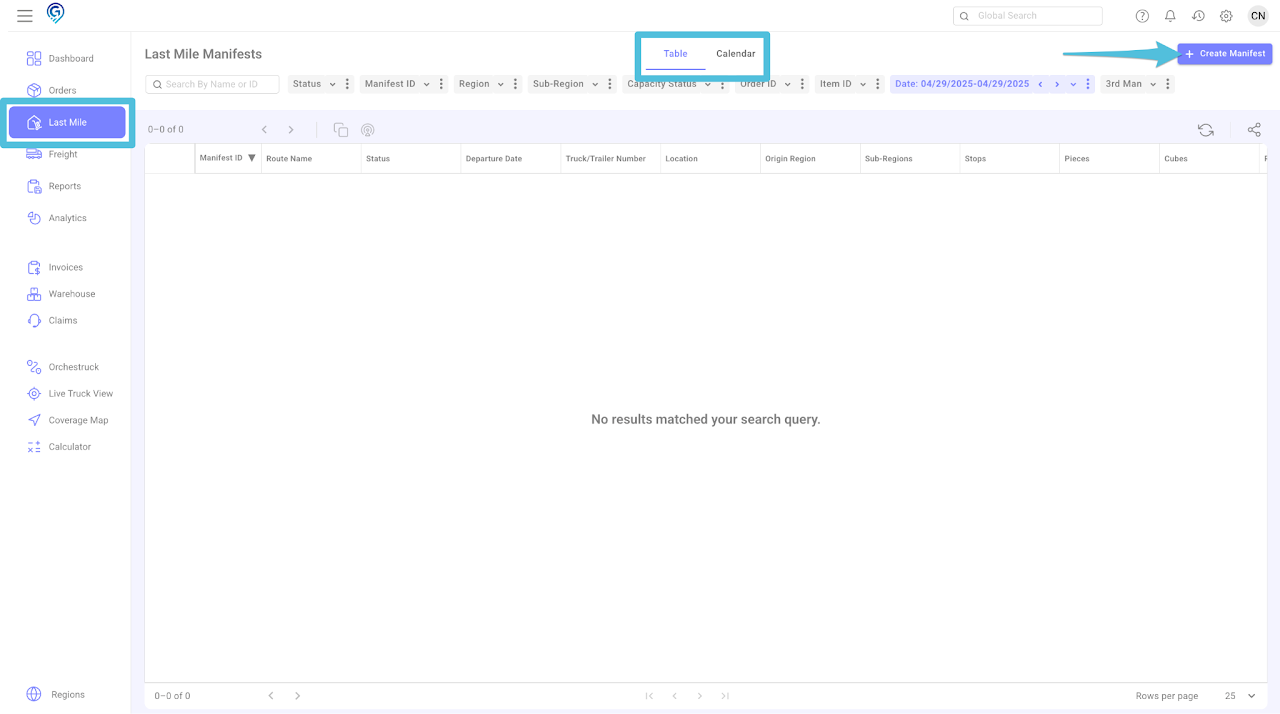
You can choose between a Table View or a Calendar View, then click + Create Manifest for an individual manifest
Step 2
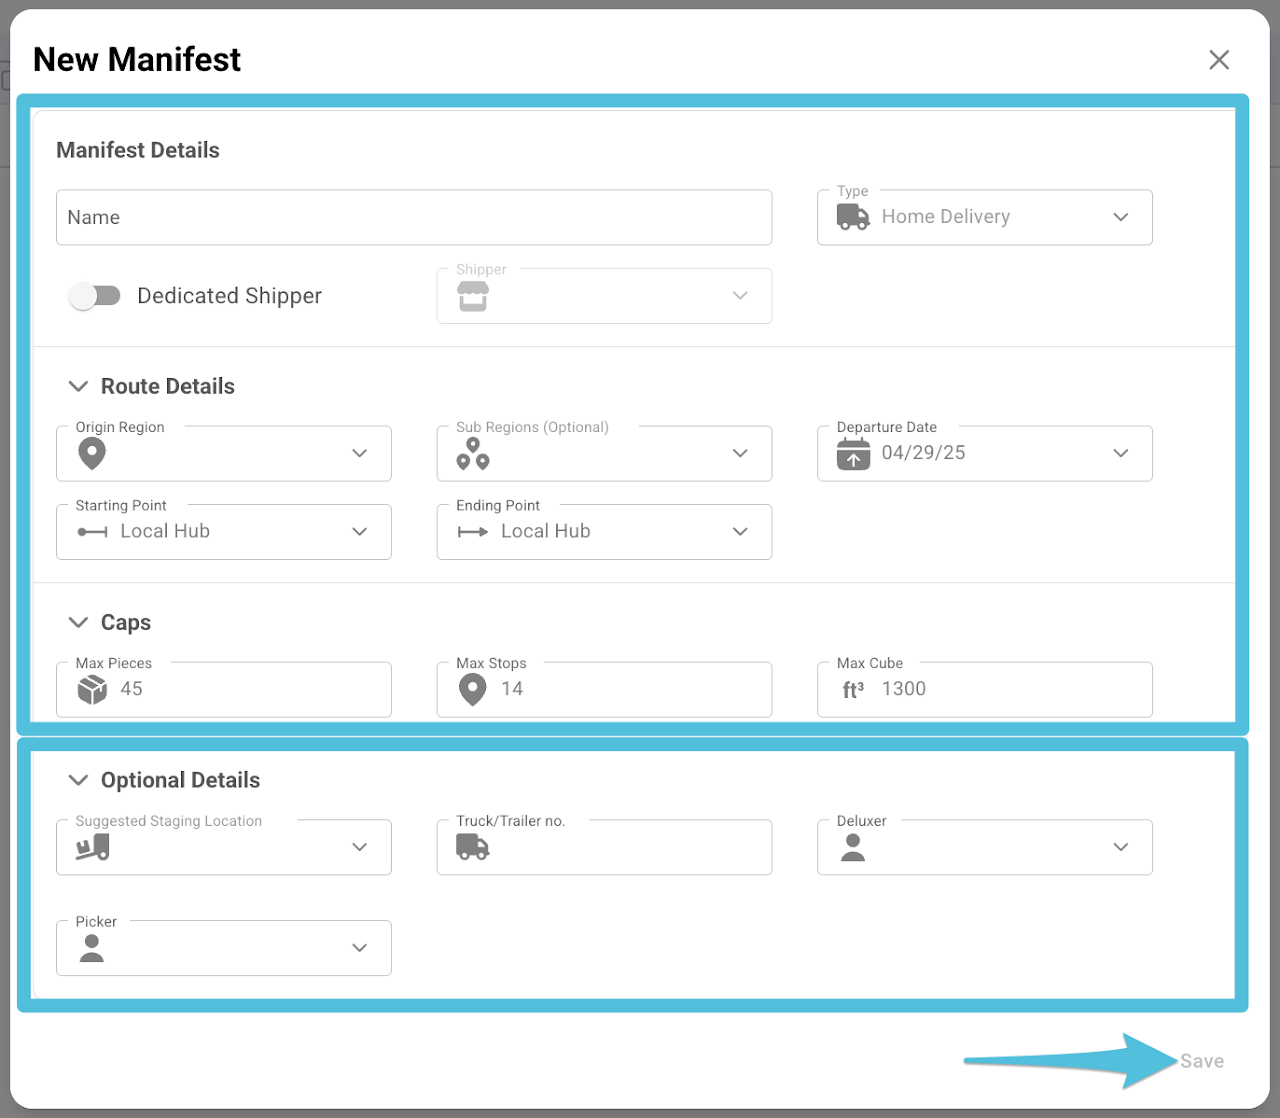
Update the following then click Save.
- Manifest Details – Name (Manifest Name), Dedicated Shipper (Toggle on if the manifest is solely for a certain Shipper). Click here to learn more about Dedicated Shipper.
- Route Details – Origin Region, Sub Regions (optional), Departure Date and Starting & Ending Point (if necessary)
- Caps – Max Pieces, Max Stops and Max Cube
You also have an option to enter the Suggested Staging Location and Truck/Trailer No., Deluxer and Picker.
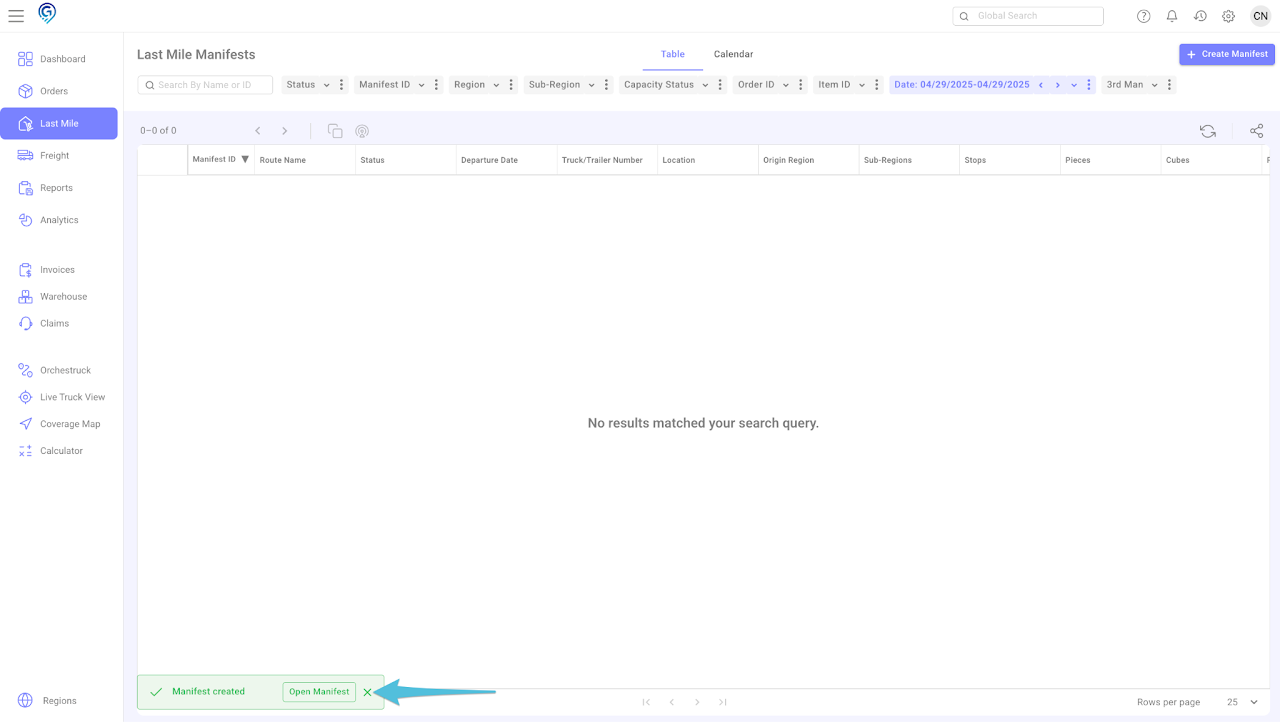
This is a confirmation that the Last Mile Manifest has been successfully created. You can click on “Open Manifest” to view or access the Last Mile Manifest you created.
Option 2 – Multiple Manifest Creation
Step 1
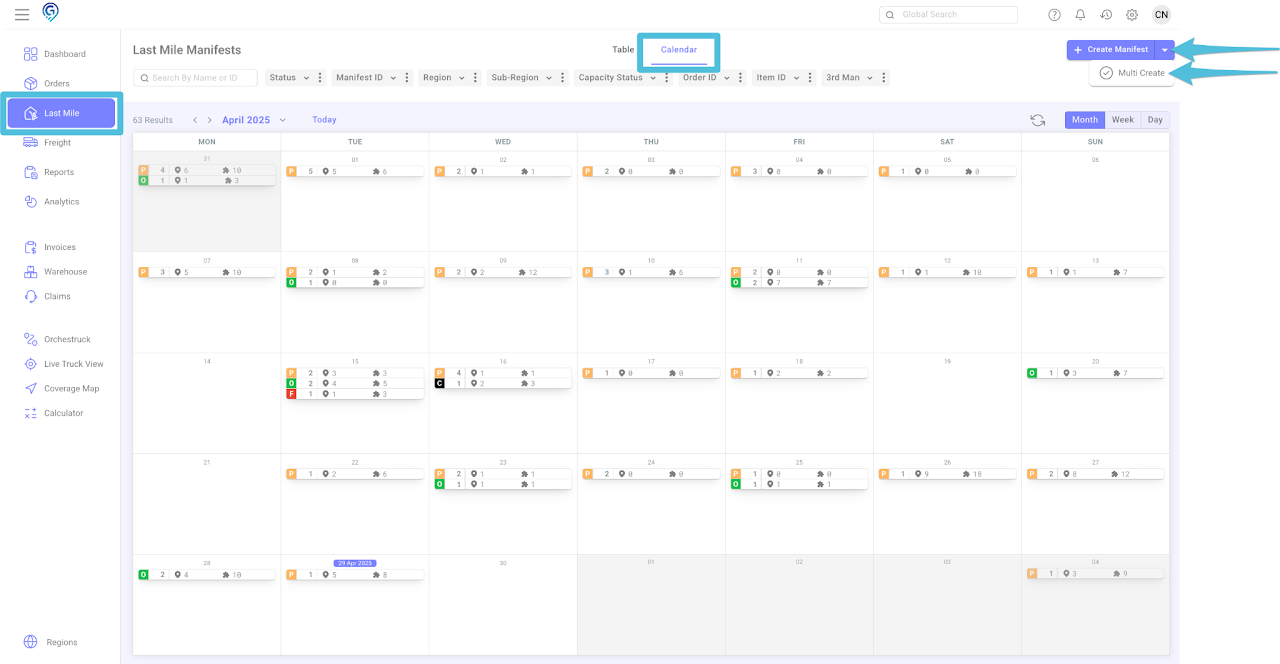
On a Calendar view, click the drop-down arrow and select Multi Create
Step 2
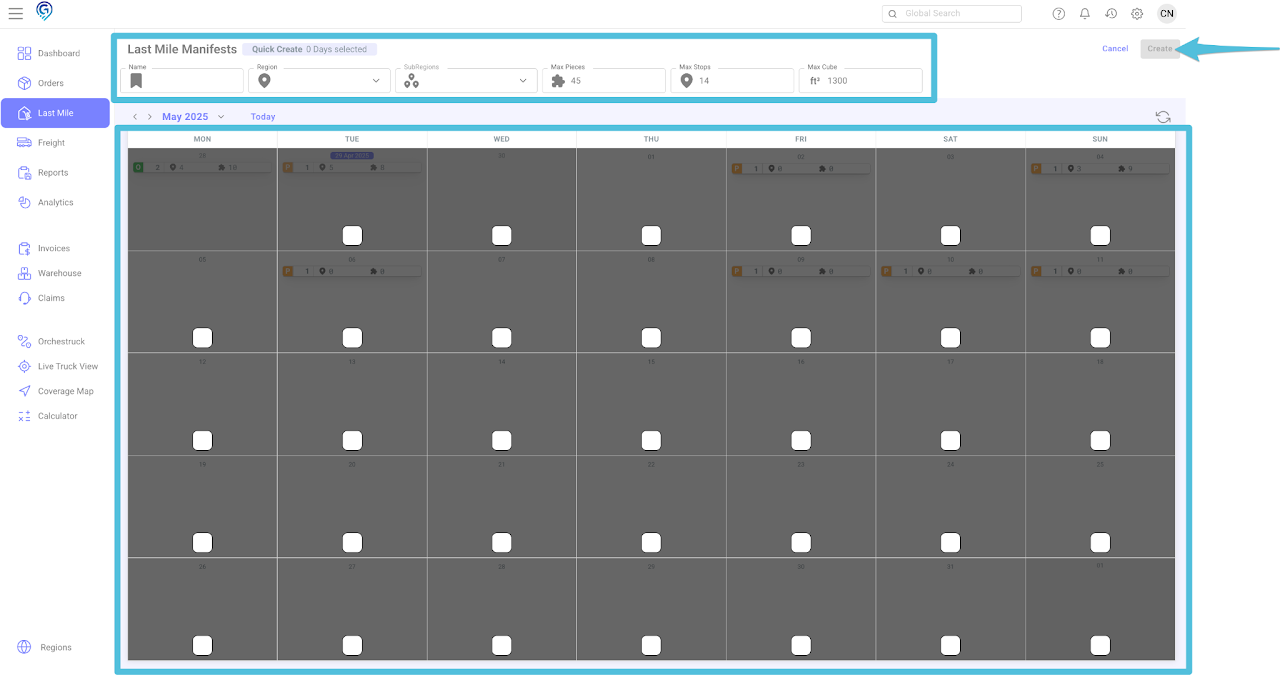
Update the following:
- Name (Manifest Name)
- Origin Region
- Sub Regions,
- Max Pieces
- Max Stops
- Max Cube
Note: If you intend to schedule multiple trucks in a day, you will need to adjust the Max Pieces, Max Stops, and Max Cube. For example, if 1 truck is assigned 10 stops, 45 pieces, and 1300 cube, and you wish to schedule 3 trucks, simply multiply the number of stops, pieces, and cubes by the number of trucks.
You can split the truck per day once it is full and you are ready to route.
If a box is available, it indicates that a route can be opened on the specified date. Please select the box that grants access to resources.
Step 3
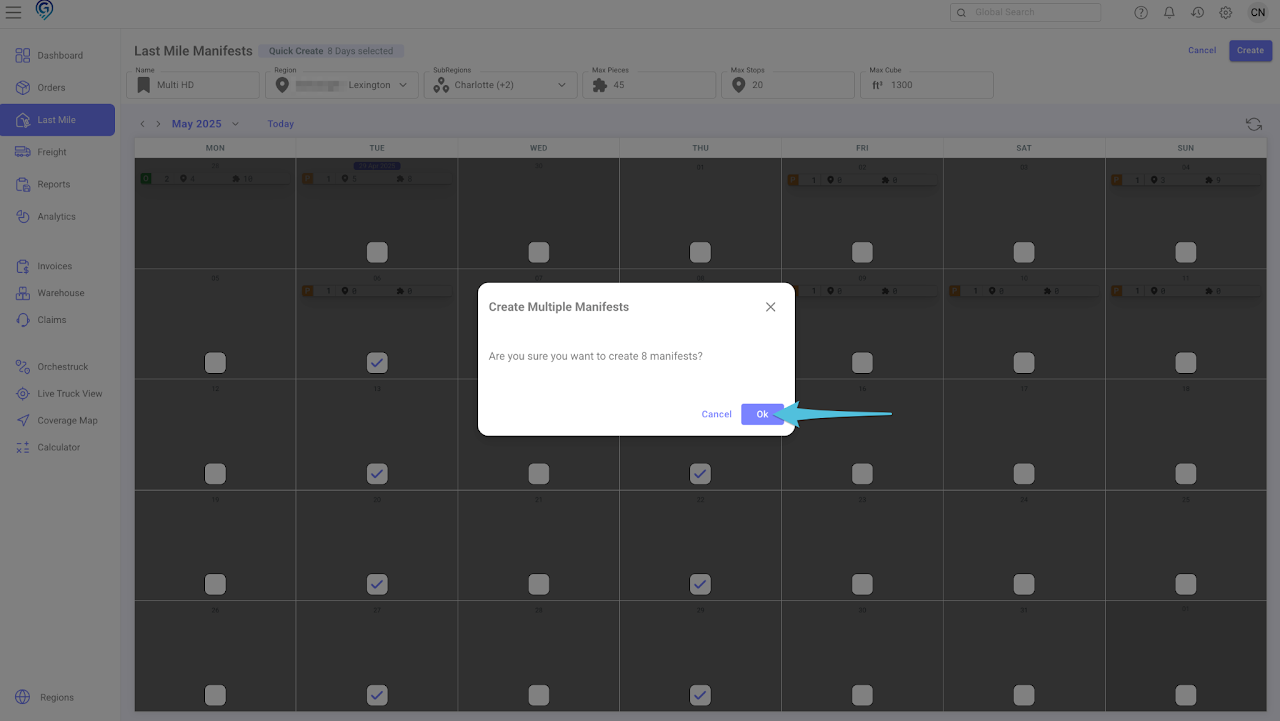
Click Ok to confirm that you want to create the manifests.
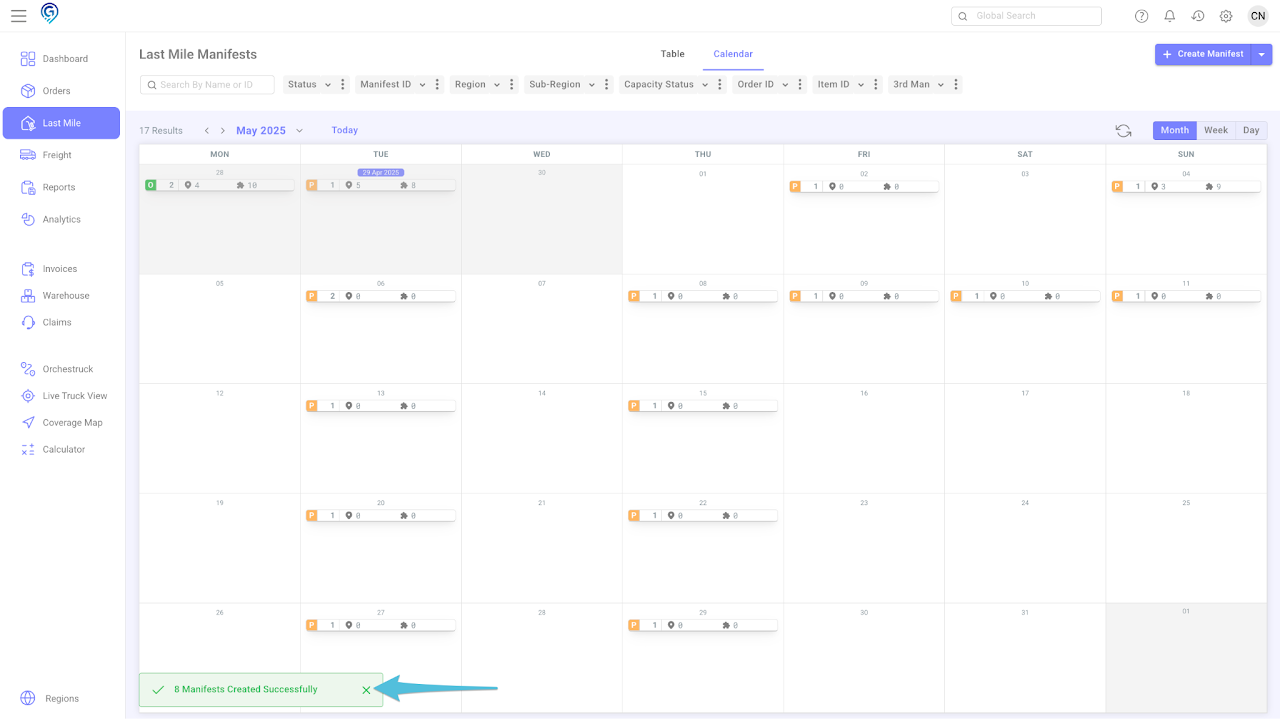
This is a confirmation that the multiple Last Mile Manifests have been successfully created. You can click Open Manifest to view or access the Last Mile Manifests you created.
Click here to learn more about the Last Mile Manifest’s status.


